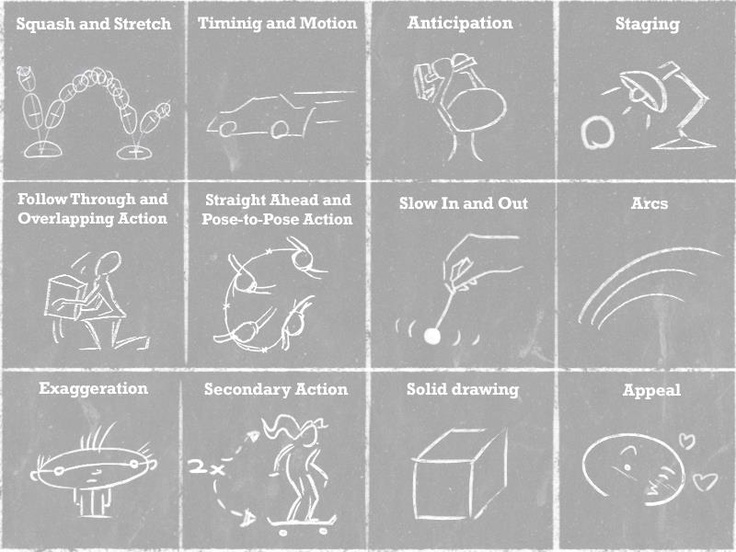
There are 12 main principles when it comes to animating characters, these principles can apply to both 2d character animation as well as 3d characters.
- Squash and Stretch – This principle defines the idea that objects will either get longer or wider / flatter dependent on their speed, mass and direction. The idea is to add emphasis to the motion to make it look like it is moving. It can also make object appear stiff or flexible depending on the how much more emphasised this technique is. If it isn’t used or used very little the object will appear rigid and hard, whereas if more squash and stretch is used the object will appear softer and flexible.
- Anticipation – This is where a character/s are preparing for an action to create build up for what is to happen next and make the action feel more realistic and flow. The energy required for that action has to come from somewhere, without it the action will look unrealistic and flawed. For example if a character is about to jump they will often duck down to gain energy to propel them upwards, this build anticipation as the player will know they are about to jump. You can add more levels of anticipation to make an action feel more powerful, this will often make the action more complex to animate and
- Staging – This is a principle that covers many areas within animation as it is the presentation of an artists idea so that it unmistakably the action that they want to show. It is a broad area as it can cover the setting of the animation, the timing, acting and camera. This allows the animator to control where the audience or player is looking at any give moment to draw their attention to or away from something within an animated scene. The actions within the scene need to be clear and concise and the action needs to be within the centre or the thirds of the screen so the audience can see what is happening.
- Straight Ahead and Post to Post – This is where when drawing an animation cycle, you start with the first drawing then the next and so on, the animation will move as you go. This is great for animating objects that are unpredictable, such as fire or water. This system works as the objects will have physics applied that work at a constant rate, this technique will allow the animation to flow more naturally and unpredictably. Post to Post is where you start with the beginning, middle and end of the animation you are creating and fill in the remaining space after the begging middle and end is completed. this is good for most animations as it means you have a good idea as to what the finished animation is going to look like very early on, this gives you more control to change and make sure the animation lands where you want it and doesn’t change shape at any point.
- Follow Through and Overlapping action – This is the idea that objects sometimes attached to the body or something can be dragged behind a character and stay moving for a while when the character stops. The can add depth and realism to a character as their attached appendage is delayed and is the last to catch up to the main body of movement. For example if a character stops running, they don’t just stop instantly, parts of the body will follow through and then come back to the main body once that has stopped moving. This helps break down an animation to make it seem more realistic.
- Arcs – There aren’t many objects that are natural that have the capabilities to have precision movement, most living things will move in a circular or arced path and this should be replicated in animation. Slow In and Slow Out should be considered when building an arcing animation,
- Secondary Action – This is often associated with overlapping action, but can be can often be interpreted as something completely different it refers to an action that supports the original main action and adds dimension and detail to a characters movement. For example if a character is moving joyfully, the main action is the legs, jumping and the secondary action is the movement of the rest of the body to highlight and exaggerate that motion and feeling of the character.
- Slow in, Slow out – All movement will start slow and end slow, it is important to consider this to create lifelike motion, without this an objects motion can feel forced and mechanical. Body parts and movement doesn’t start at a constant speed there is a slow start and build up of speed (anticipation) to reach a top speed and when slowing down it should gradually slow till we stop. If an action is very fast you could add in a smear in-between the arcs,. this works by taking to points in a pose and drawing a arc between them and fill it in and make it slightly more transparent as if to blur the motion because of the speed it is moving.
- Timing – Refers to the space between frames of an animation, this will dictate how quickly or slowly a character or object moves and for how long it will stay still. The object or character in question must still relate to physics as that will help the animation remain realistic. The more frames in animation cycle the slower the object will move, the fewer there are the quicker the animation will reach its end point. The standard for most animations is 24fps (frames per second), An artist or animator can chose to have a drawing every one frame (drawing in ones), every 2 frames (drawing in 2s) or every 3 frames (drawing in 3s)
- Exaggeration – This is the idea that every action, pose and expression can be exaggerated to give more of an impact and make a scene more dynamic. It helps give make the action more appealing and apparent for the audience so it seems more realistic and exciting to look at. This does not mean to distort the shape and size of the character but rather make their actions more convincing and make the view anticipate the final action that little bit longer.
- Solid Drawing – This where an animator or artist will have to check that the form and construction of the drawing is realistic and grounded. One thing that can make solid drawing easier is to draw a character or object from more then one angle so you can visualise that character in a three-dimensional space. For example if you are drawing a line on a sphere, that line must follow and relate to the contours of the Sphere’s surface, a simple straight line would make that object feel flat and 2D.
- Appeal – Your characters and object that you animate should be nice for an audience to look at, therefore this relates more to the overall design of the character rather then the animation itself. Characters should have key details and aspects that are unique and appealing to the human eye. The use of Shape and Colour Theory, anatomy and Proportion can help an artist create details that are unique to character architypes. Remember it is easier to animate more simplistic designs so don’t over exaggerate detail.
My Work:
Week 9:
For the first week we looked at creating a sprite sheet, this is used by animators and designers to contain all of the sprites necessary for a game onto a single sheet. we were given a choice between 2 set briefs to create a ‘ Single Sprite Sheet that Contains assets for a 2D Pixel Art Platform
Game, the game is set in a Fantasy Environment and the target audience is
younger gamers.’
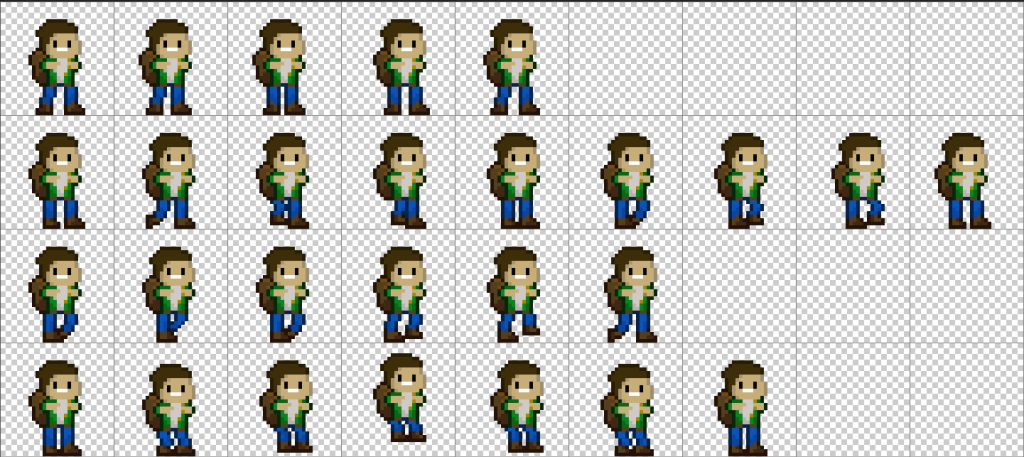
I decided to go down the route of creating characters for this fantasy game I started by creating a character in the first frame. The brief states that the player character required a run, walk, jump and idle animation so I went for a post to post take to design as I knew what position I wanted my character to end up in. so I started with creating the start, middle and end of each of set of animations and filled in the middle parts.
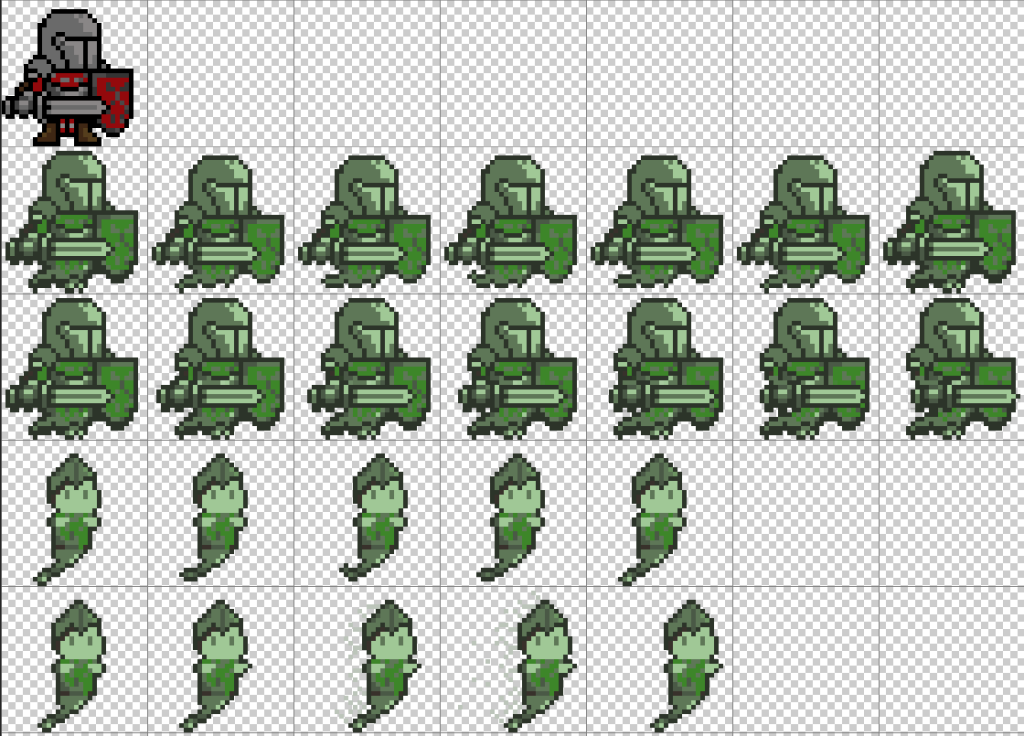
I then created my enemy character animations. I needed 2 types of enemy each with a walk and attack animation. I found a template and created a pixel art knight, and then made him a ghost as the brief indicated the character had to be non-bipedal. The first enemy is the knight template without legs and turned green with a longer walk cycle than the other enemy as I wanted them to be a slower moving character. For my second enemy I based the design of the main character and added a medieval style helmet and changed the clothes to look like armour, for the attack animation I wanted the character to dash towards the player so I added a fading trail off the enemy in the last 3 frames to make it appear as if he teleports to towards the character.

Finally I created a collectible gem that will move up and down, I had some extra time and thought this might be something that would fit the theme and style and add something for the player to collect.
Week 10:
Next we looked at rigging a characters animations by giving a sprite bone structure and linking them together.
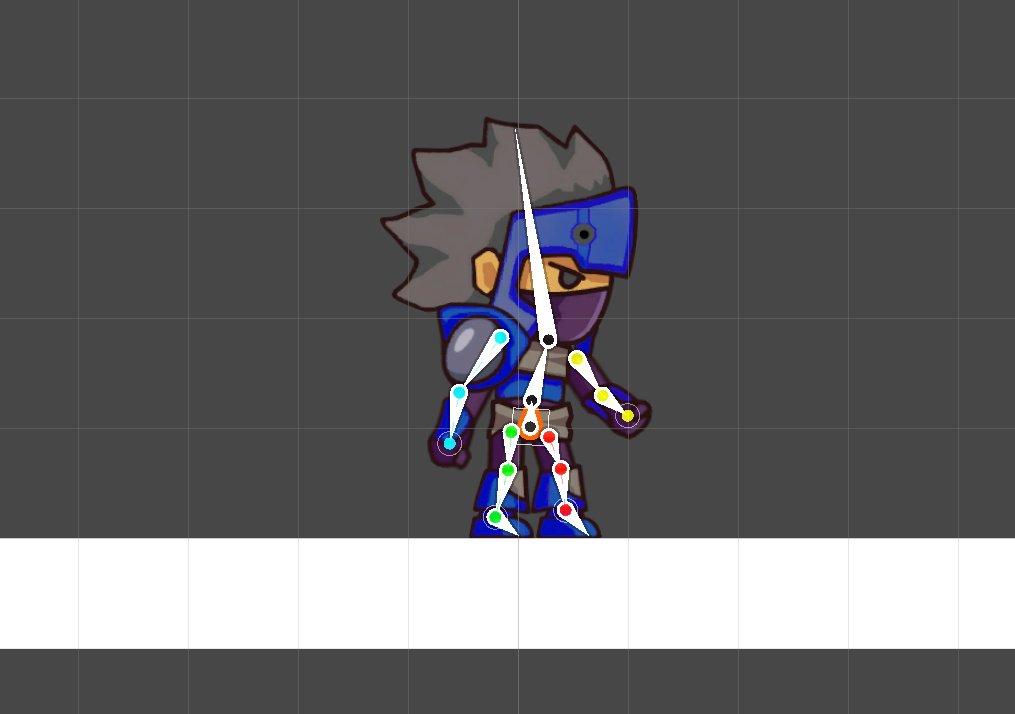
Using the given photoshop sprite and generating geometry for the asset, this determines what parts deform and stretch depending with the placement of the bones. The bones started with as root bone at the pelvis of the character, this will move the characters overall position, all of the bones will link to the root and body bones that are created. We created 4 main categories under the main root, the left and right arms (close and far) and the left and right legs (close and far).
I then changed the weights and influences of parts of the bones so they will be able to move those parts of the character and not influence any parts of the body they shouldn’t.
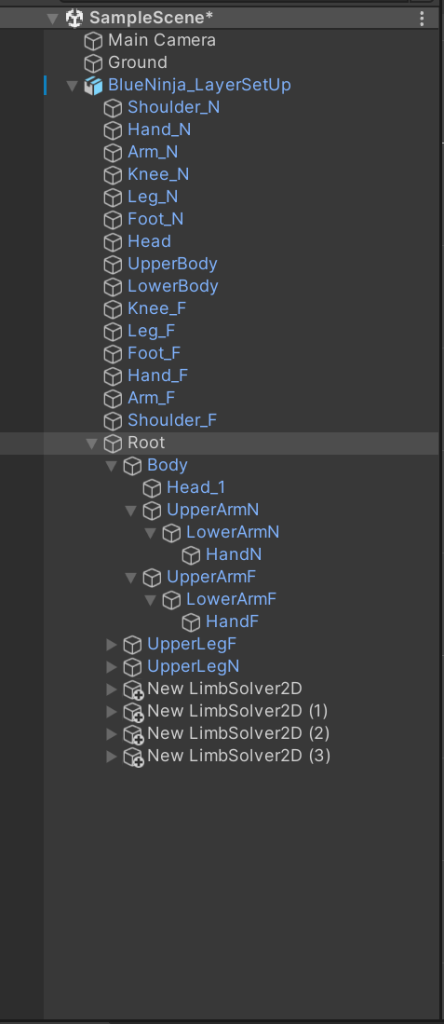
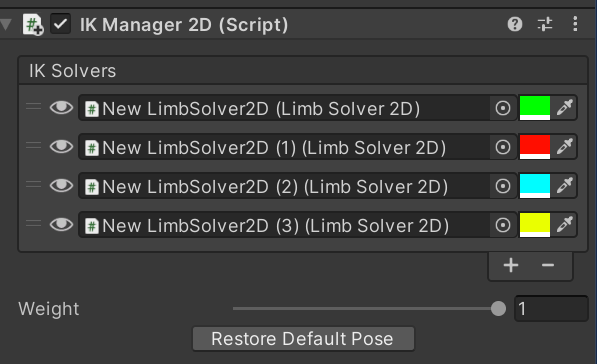
Once it was in the scene it needed a platform to run and stand on and there were a few things left to do before I could animate the character using the animator. I added an IK system script and attached the bottom of each of the 4 groups (arms and legs). Once attached it meant I could add an animator to the character group and create 4 animations. An idle, walk, run and jump animation.
Within the animator window I could press play and then move the characters bones to different poses and arrange them over the time I want the animation to play to create the desired affect I wanted.
link to video for finished animations – Art and Animation
Reflection:
I am happy with the sprite sheet and it is something I will create again when building my next game for my next assignment , it means I can create all of my assets on one document and export them to then arrange and edit them to be the single steps I need in Unity. As for my bone rigged animation, I had a play around with different runs and positions of the bones to create different styles and affects that I then tweaked and manipulated to give the final design.
References:
Becker, A. (2017) 12 principles of animation (official full series) [Video] Available Online 12 Principles of Animation (Official Full Series) – YouTube [Accessed 10/12/2022]
Haran (2017) Animation Principles Available Online ANIMATION WORLD: Week 4: Animation Principles (harithmation.blogspot.com) [Accessed Online [10/12/2022]
Wonderboy48 (2019) Pixel art green knight Available Online Knight Pixel Art Cartoon, PNG, 1088x1190px, Knight, Armour, Art, Cartoon, Character Download Free (favpng.com) [Accessed 22/11/2022]