With my model complete I could export it into Maya to retopologies the mesh. There where a few things I needed to do in Zbrush to set up my character model so that it would run well in Maya without any issues.
Exporting:
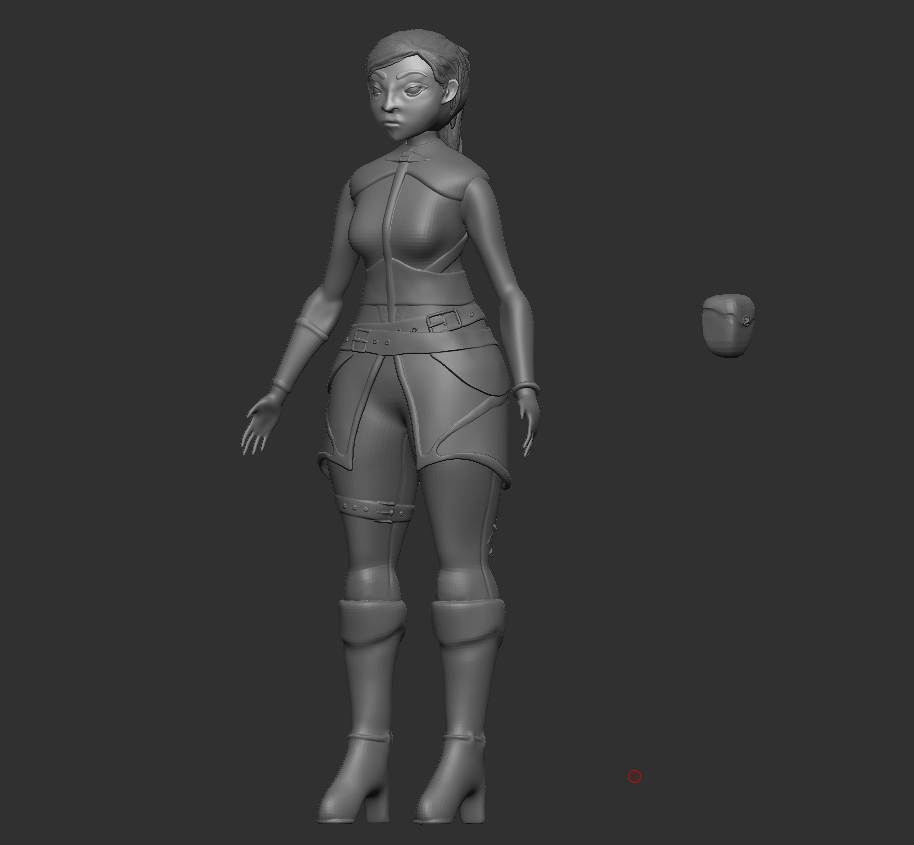
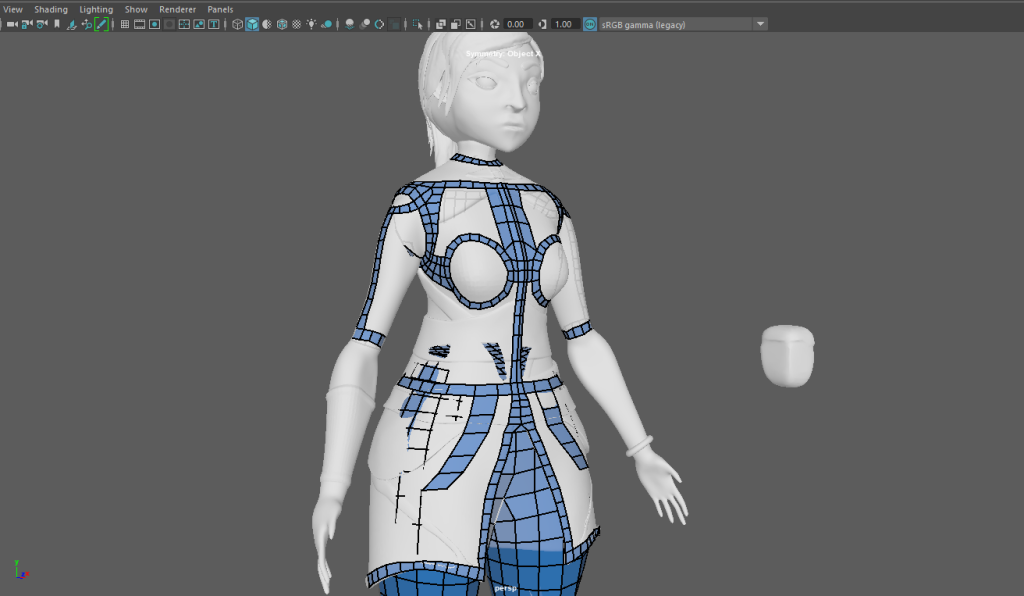
With the main model complete I had to separate and combine it into subtools before I could decimate the mesh. This required me to select parts that I had previously combined to add clothing too and split them up. As well as combining all of the clothing together.
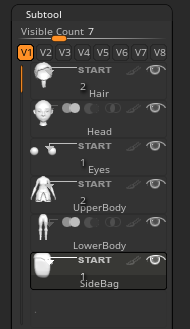
The eyes of the character are something that can be moveable in animation so they where one of the main parts of the face that I had to split up. By using control and shift I was able to click and hide parts of a combined subtool Until the part/s I wanted where left. Then I was able to use the mask tool to highlight those objects and use the split tool to separate the masked and unmasked points.
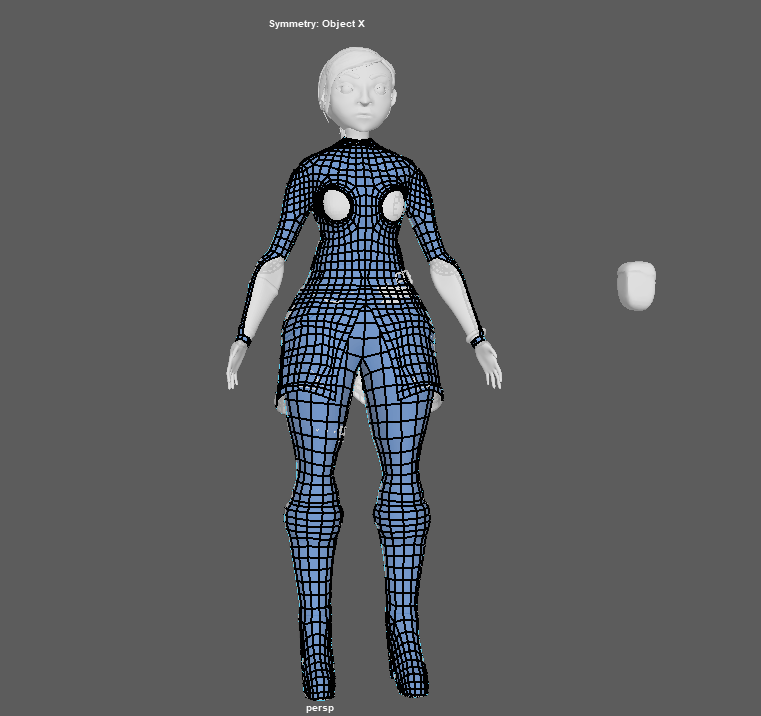
Above is an early variation of this process. the finished model before export was split into these catagories;
- Hair
- Head
- Eyes
- Upper Body
- Buckles
- Lower Body
- Leg Detail
- Side Bag
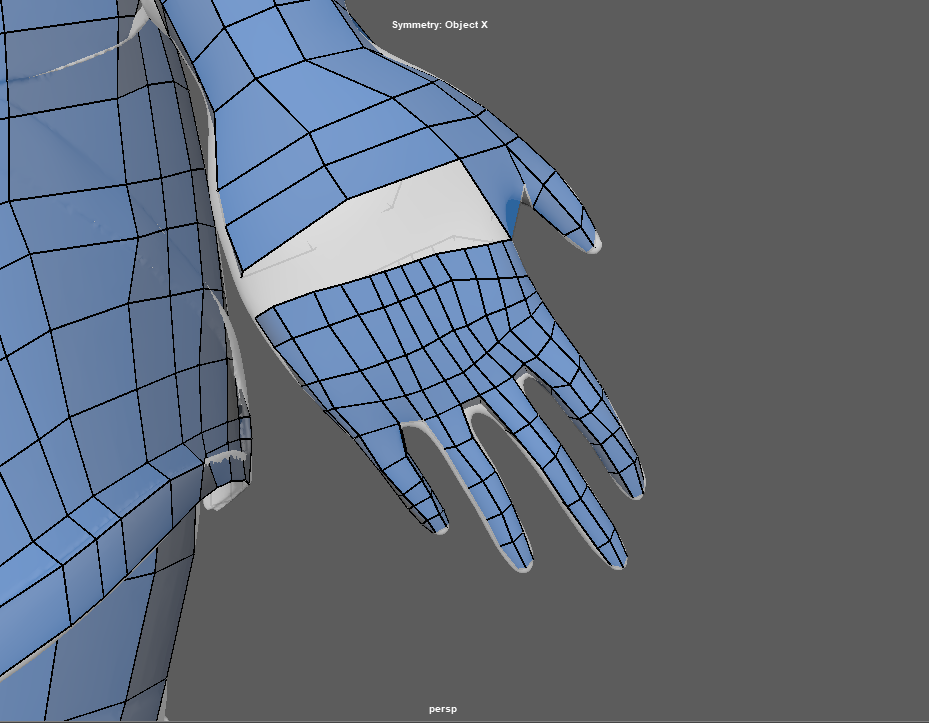
This was done to help protect details within the model and help with the retopology.
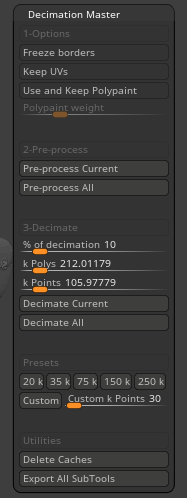
Using the Decimation Master tab I was able to use Zbrush’s inbuilt features to decimate the model. This helps keep the poly count of the model low but the detail to a relatively high standard.
Re-Topology:
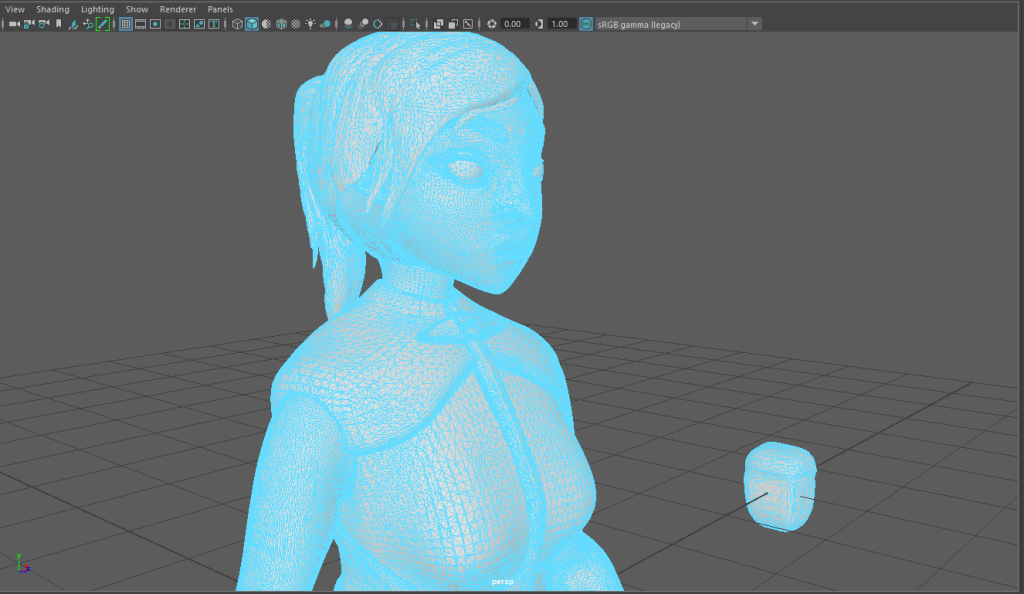
Even with using the deformation master to decrease the amount of polys in the mesh its is still highly detailed and has some awkward geometry in Maya.
To make it lower poly and easier to texture in Substance painter I have to retopologies the mesh. By selecting the magnet icon on the part of the mesh I am working I can turn it into a live surface. With this live surface I can draw vertices that I can turn into quads to make the base of the model.
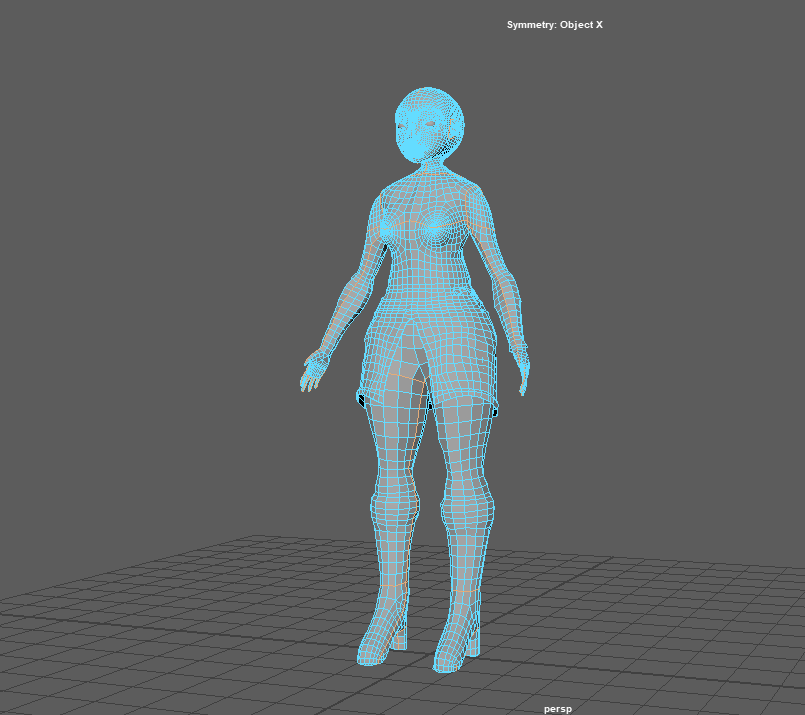
I can use object X symmetry so that any vertices I draw are mirrored on the mesh I am working on. I can also use the smooth tool and soft select to smooth the edges of the topology I have created and conform it to the mesh.
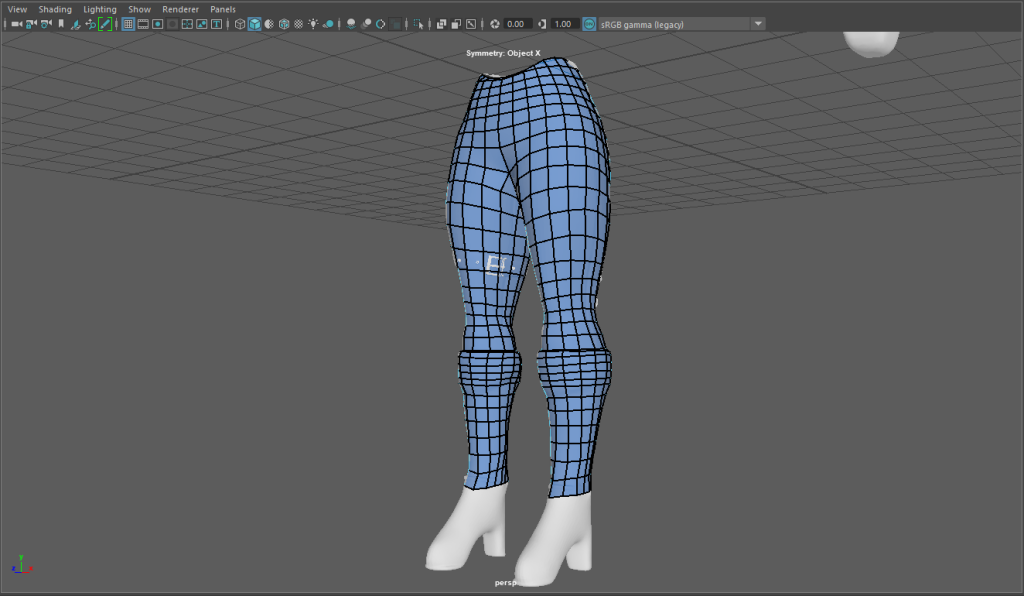
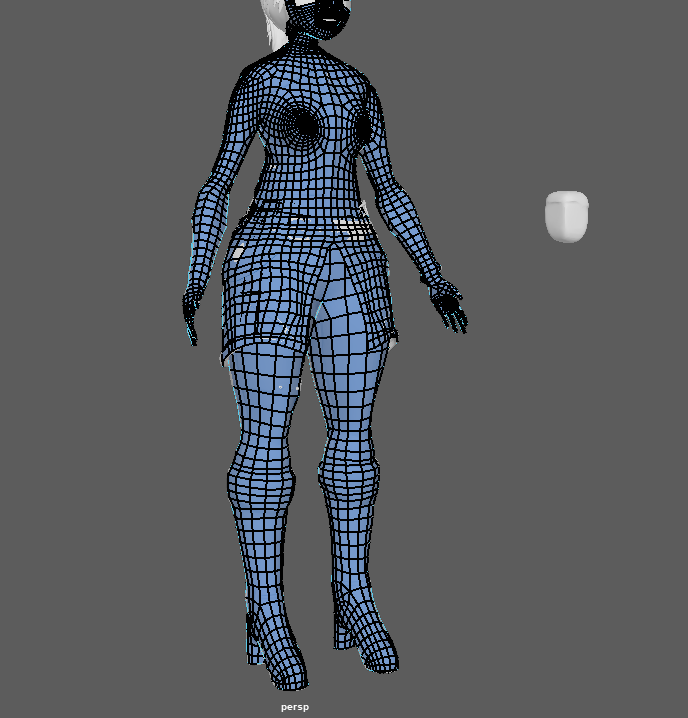
Eventually with some tweaking of the vertices and faces to make sure that there were no triangles with in the topology. I started to develop something like this. I started with the legs to get to grips with both Maya and retopology rather than going and working on the face which will require many more edge loops and detail.
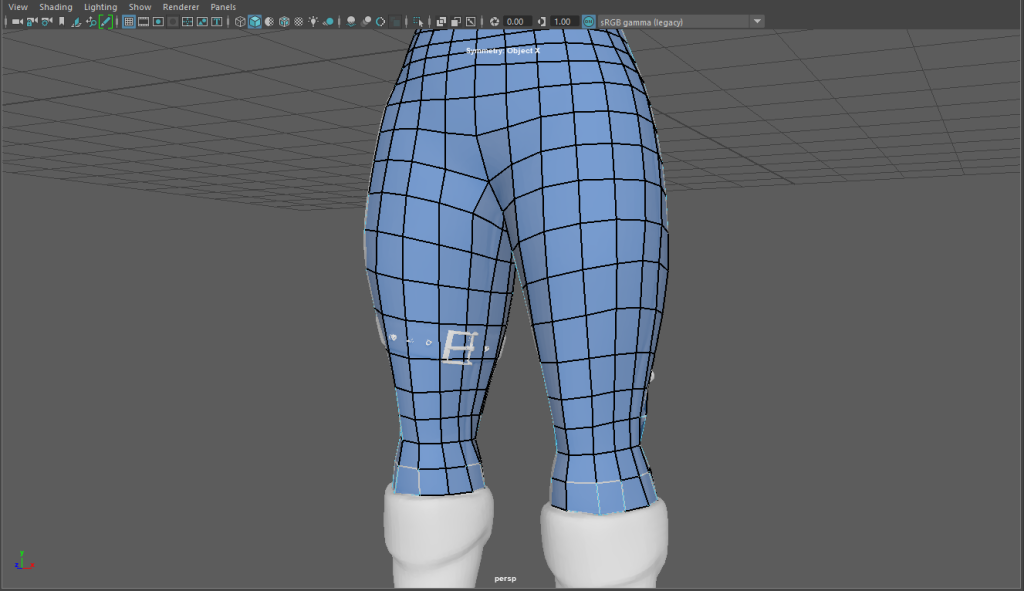
I then made use of shift to relax the vertices in the mesh before moving down onto the boots.
I had to go back and edit some of the edge loops before moving onto the sole and heel part of the boots. I started with creating a line at the front of the boot that I connected up with the top and gradually added more faces in from there

I then started extruding faces from the back and beginning to think about lining them up with the faces on the rest of the shoe.
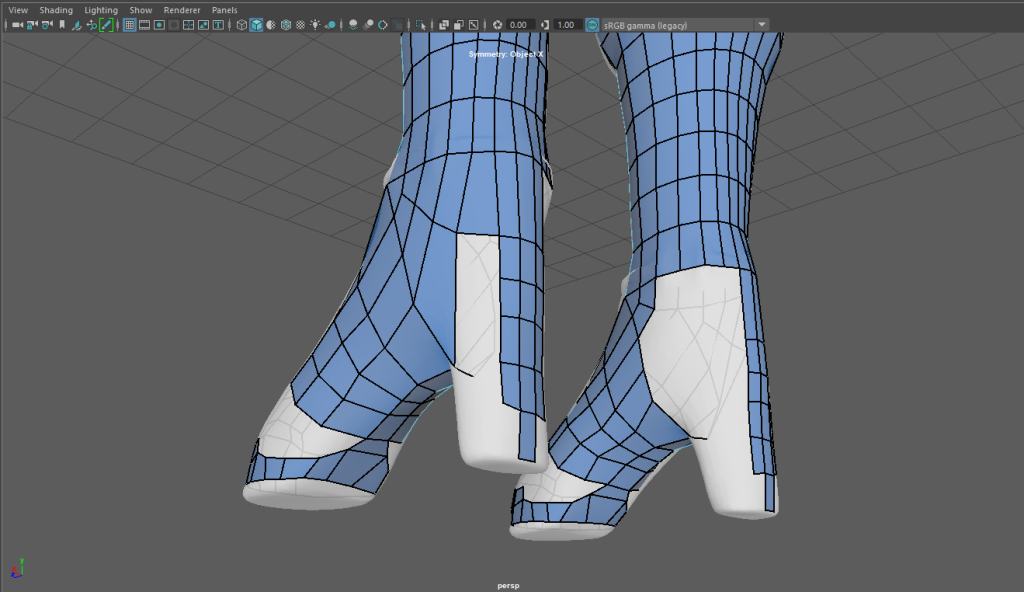
I made sure to pull them down to the heel and connect what I had before editing and moving some of the faces around. I also added in some edge loops to make the geometry fit better.
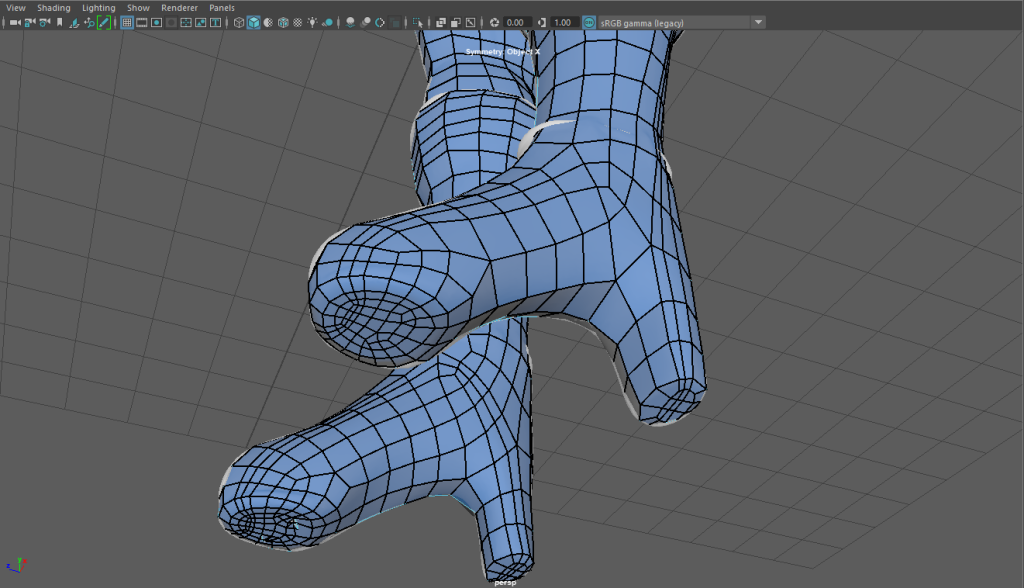
finally I connected them all at the sole of the shoe to have the lower part of my characters body complete.
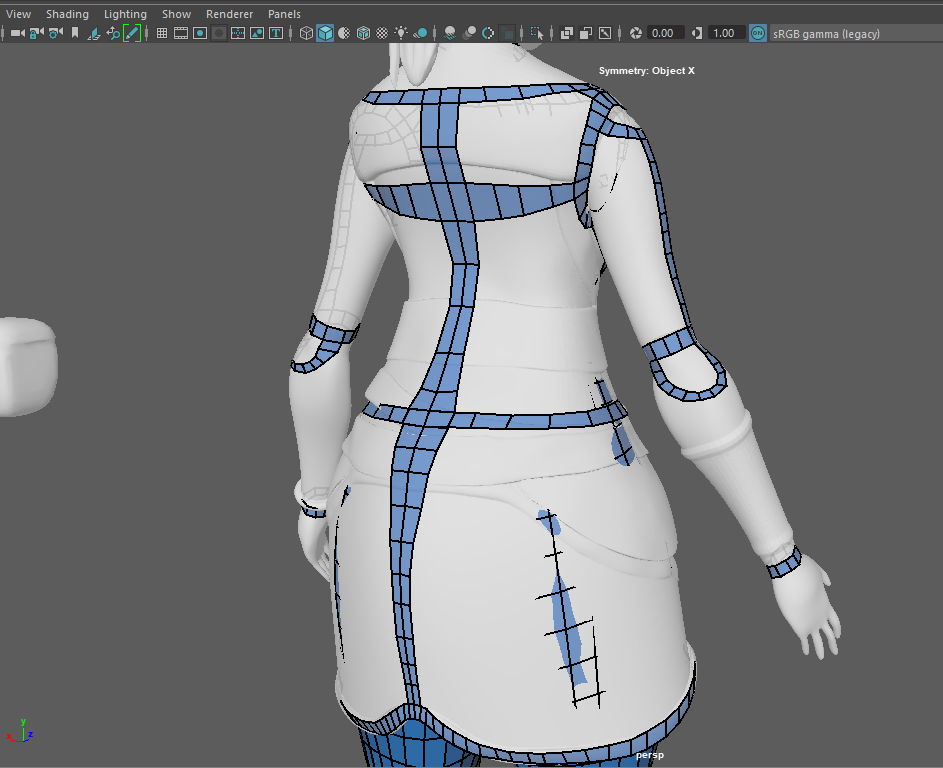
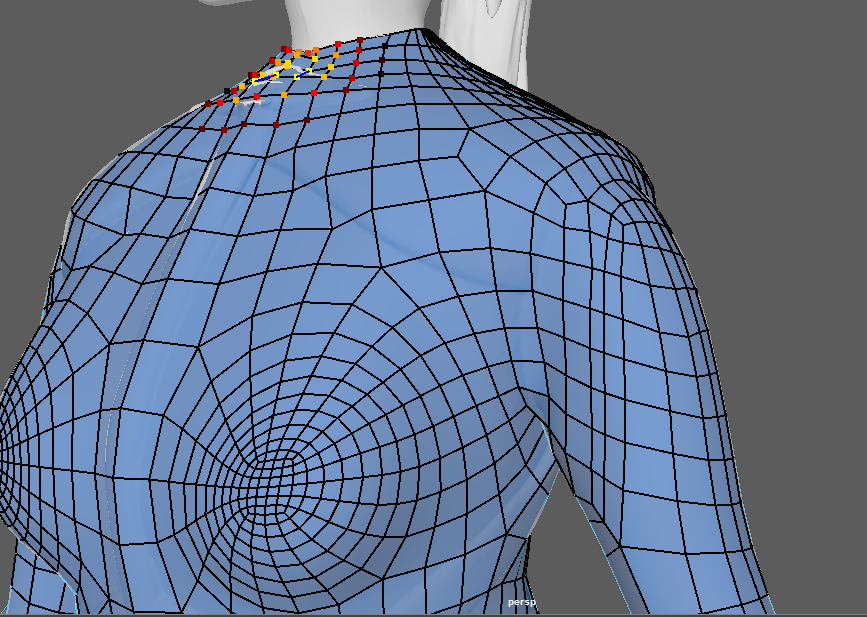
Torso and Arms:

I then moved onto the torso and main body of my character. I used the image above as a reference point for some of the edge loops as to where the body would deform naturally I also added some edges around the loose areas of clothing.
with some of the main edge loops marked out I smoothed them out using soft select and then moved onto connecting them together.
I began to connect each of the faces to create a complete mesh, I would then re-use soft select and smooth to make the topology neater and deform to the body.
I made sure to work on getting some loops connected in the arms and the main torso area connected before working my way down to connect faces to the end of the jacket.
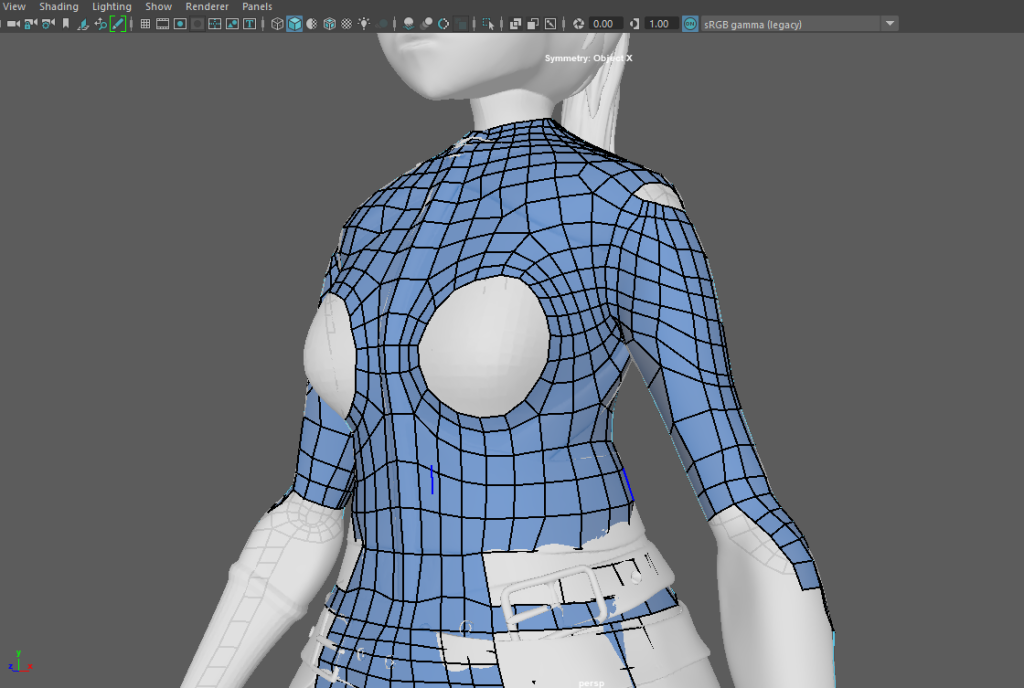
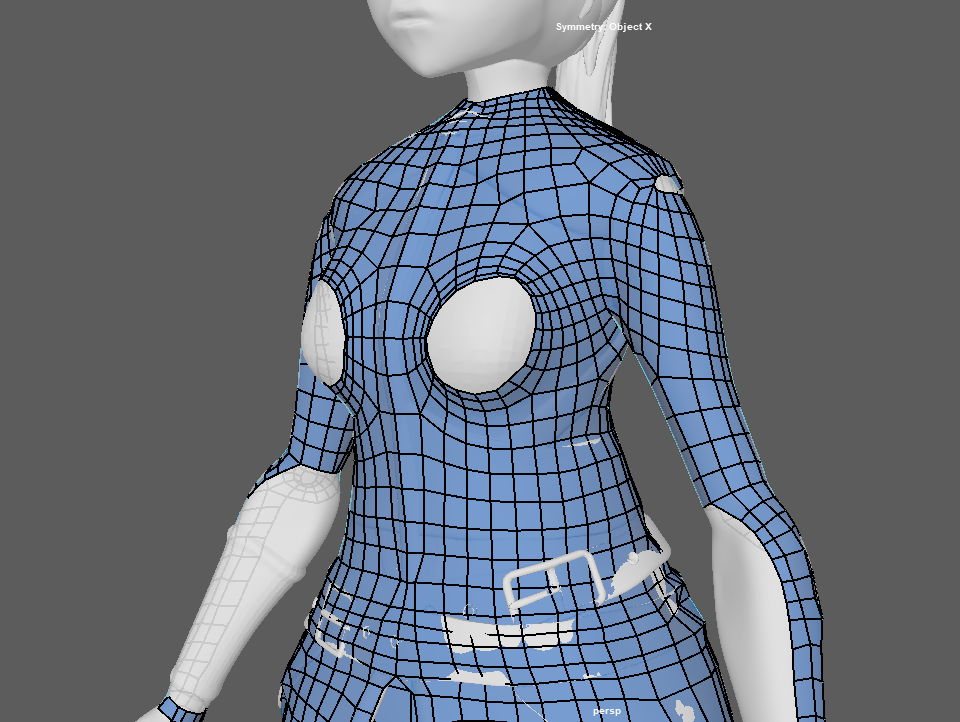
Using the reference Image I found for the female body I filled in the exposed area around the breasts and shoulders, then used the soft select tool to smooth the edges of the geometry. I then did the same with the elbow before completing the arm
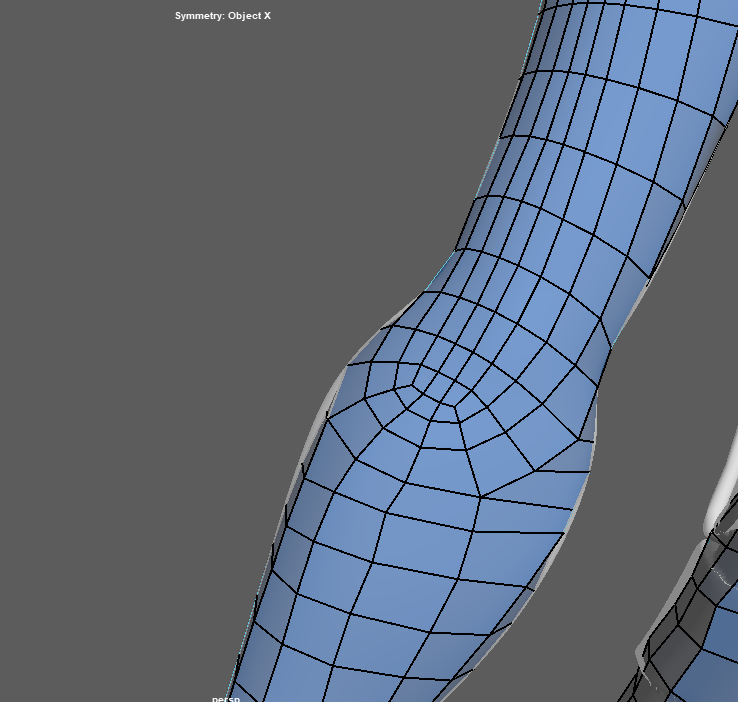
For the arms I started with some large faces and topology that I could then smooth and add detail too.
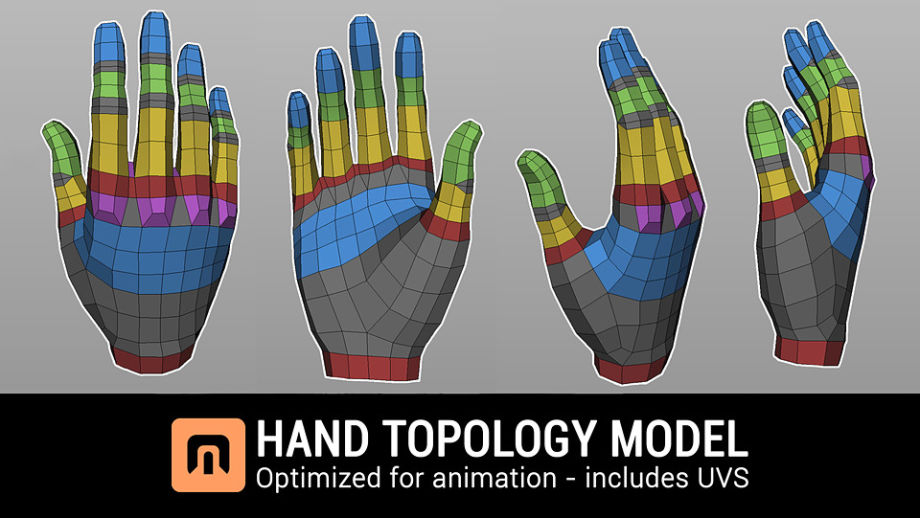
Hands and Fingers
Again I looked at reference images before attempting to retopologies the hands of my character. I found this image online that I can use as a basis when adding faces and vertices.
I started with some basic edge loops around points of contraction and around the centre of the palm
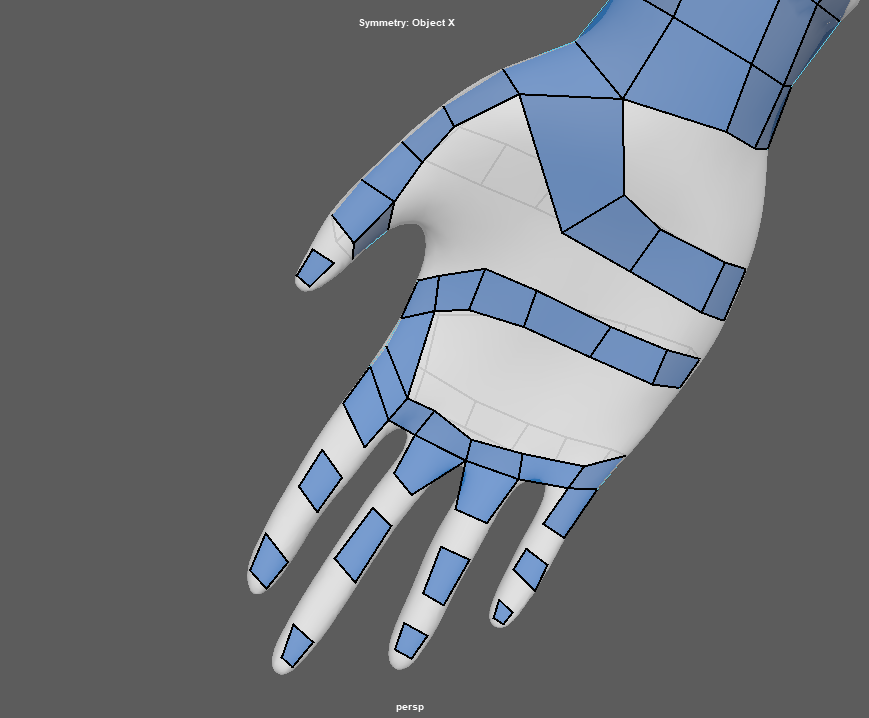
From there I can connect everything together on the hand before connecting it to the arm.
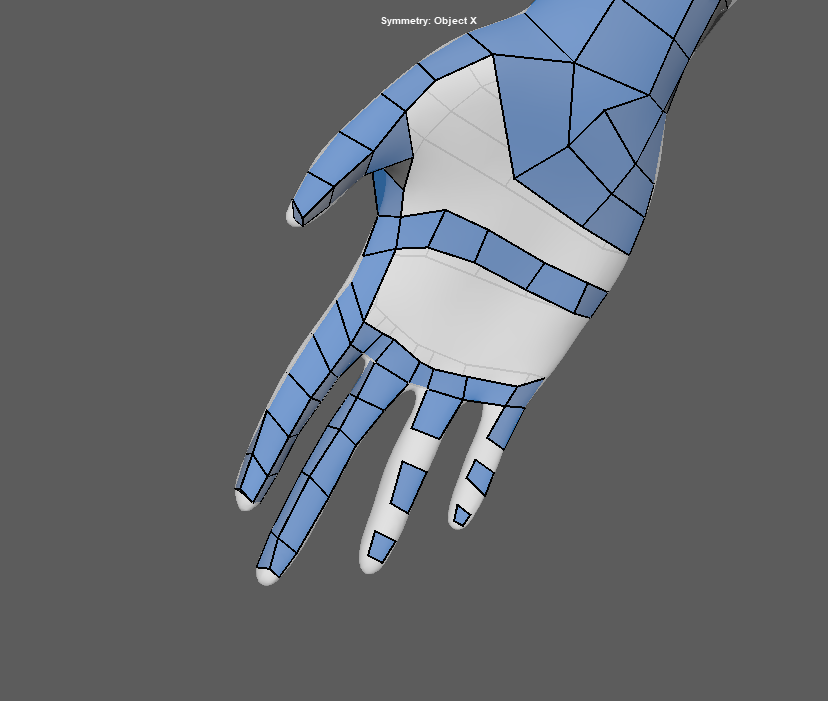
with the hands attached and smoothed all that is left is to start on the head. I already made some progress with some basic edge loops around the eyes, mouth and nose as well as connecting the head to the body.
The fingers where an area I had some issues with, due to the fact that I had already connected the body to the neck and head I new adding an extra edge loop that went up to the neck would mess with the already created and connected geometry. So I had to reload an older version and remodel the loops and faces I created form the fingers and hands to avoid this.
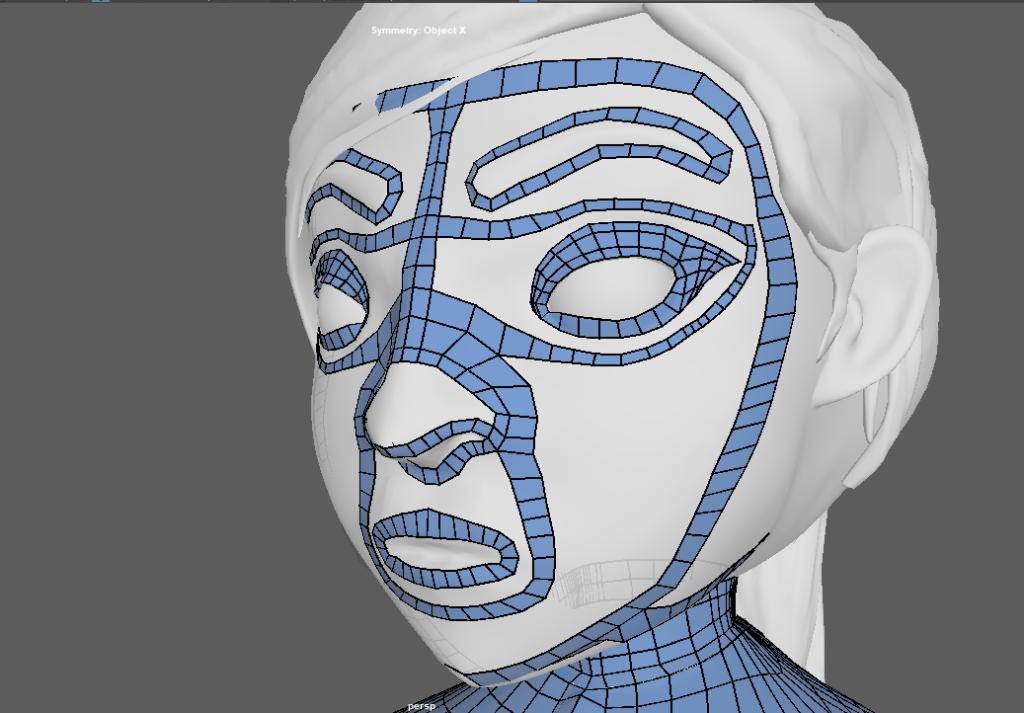
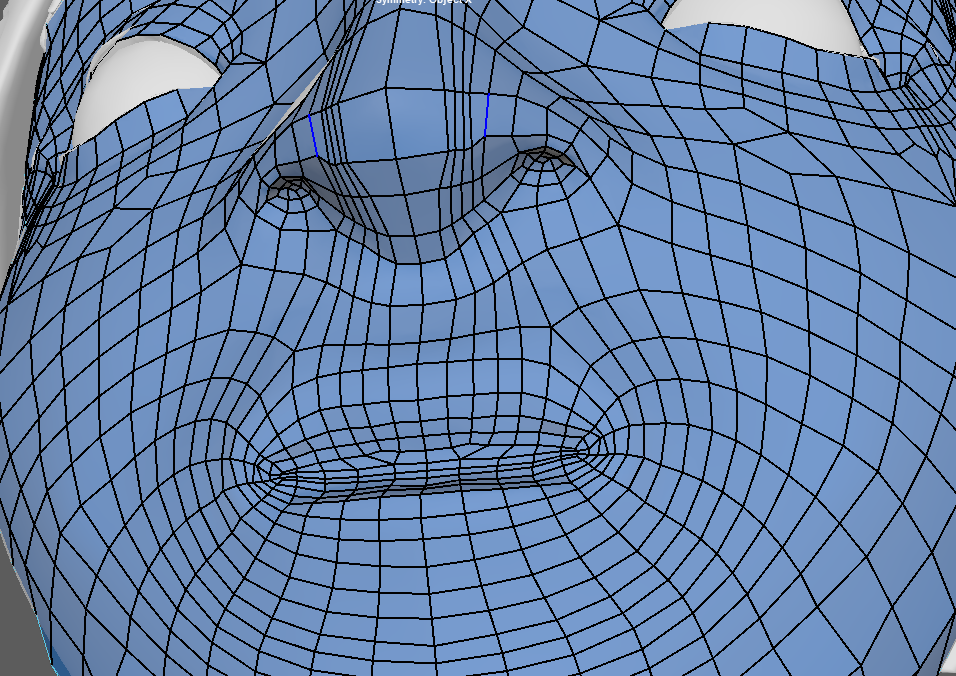
Head:
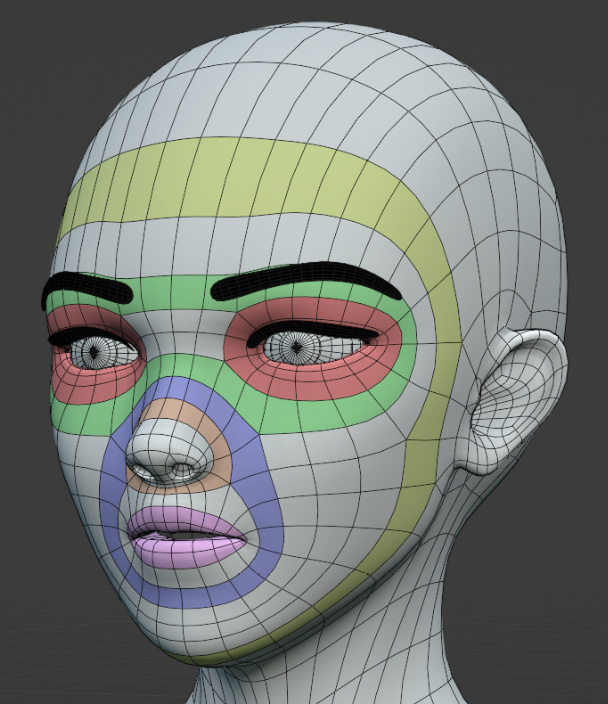
Using the image above for reference I started with some of the main edge loops in areas around the eyes, mouth, nose and eyebrows. These are main points of deformation in animation so they are areas that need to have shape and detail when it comes to texturing and creating the UV,s. from there I gradually padded out the faces shape and connecting it to the neck
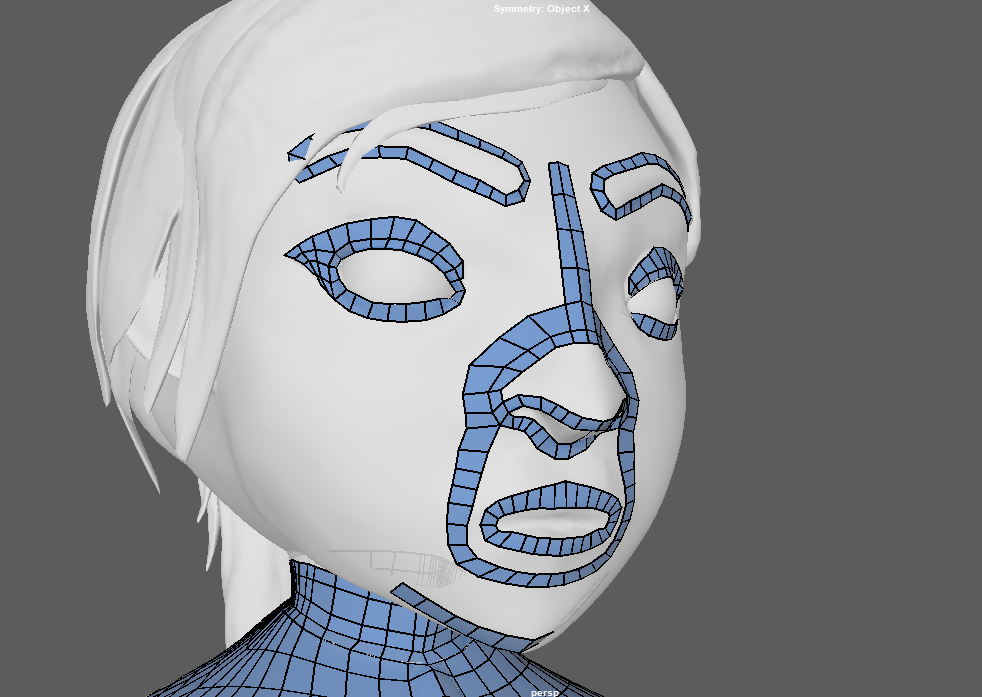
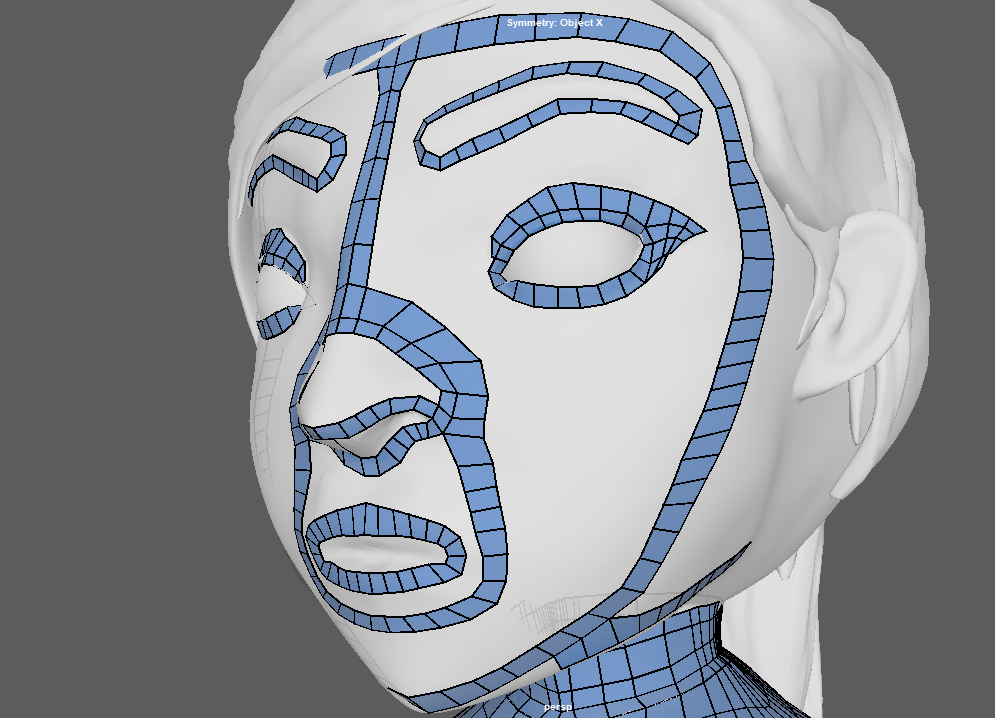
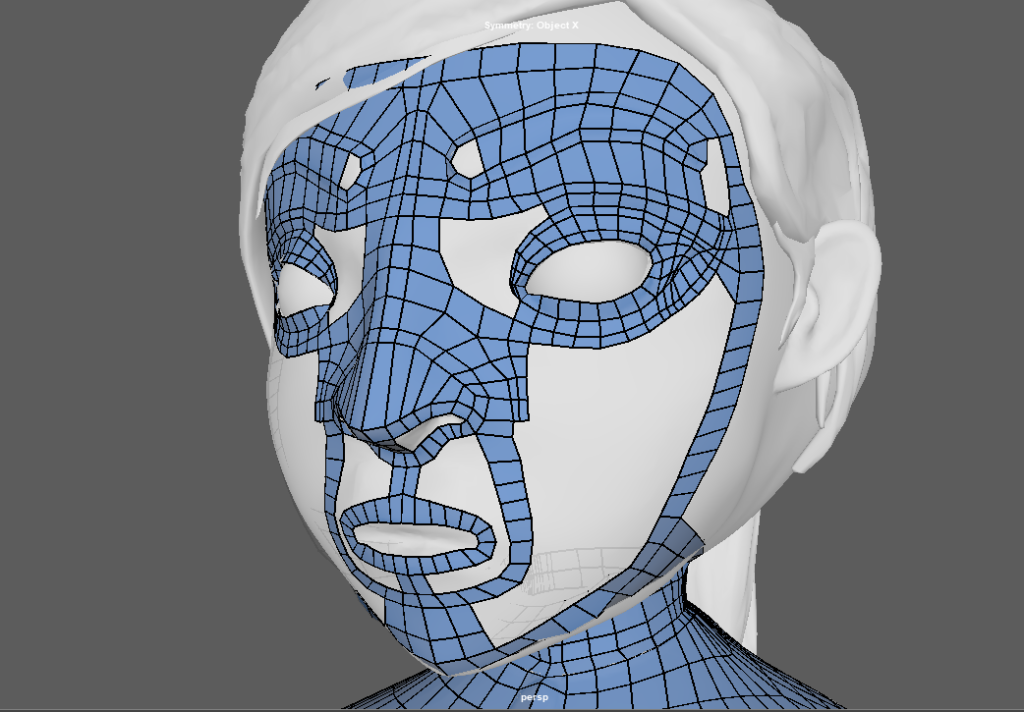
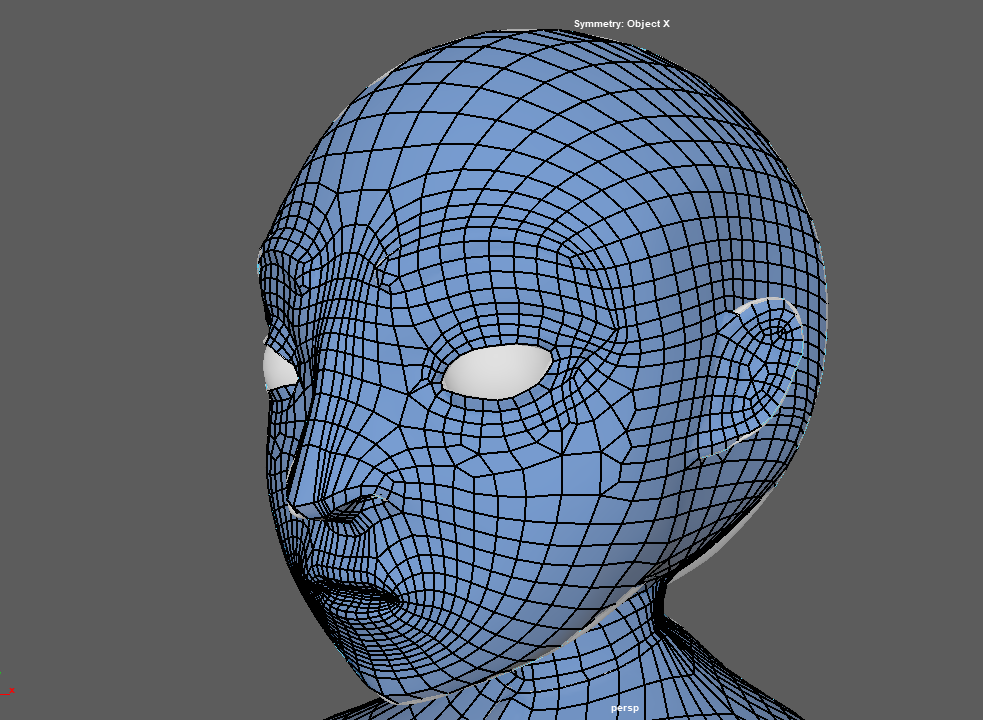
Finally I began to connect all of the major points together to have a full topologized face, the eyes are something I can add in later as they are not grouped with the face mesh.
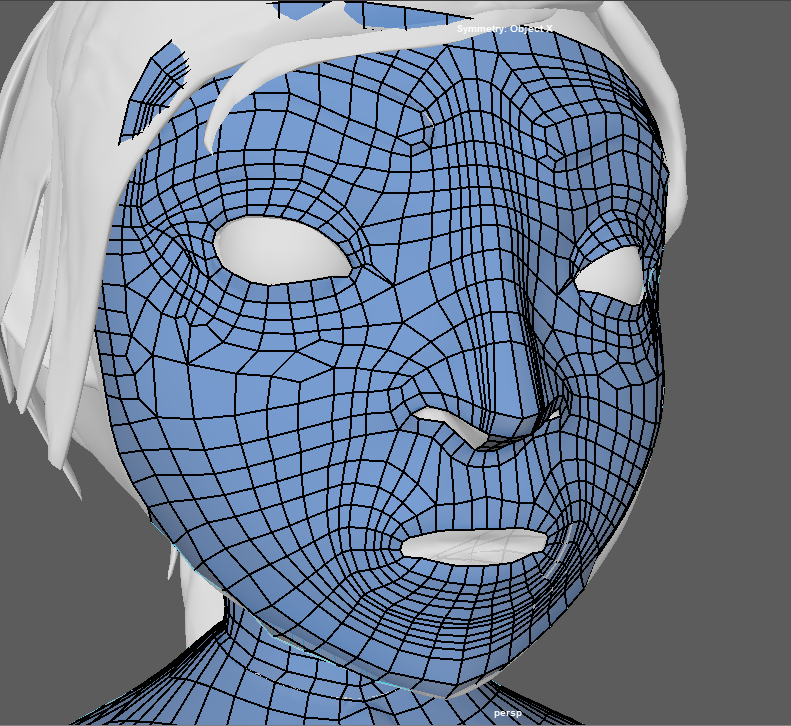
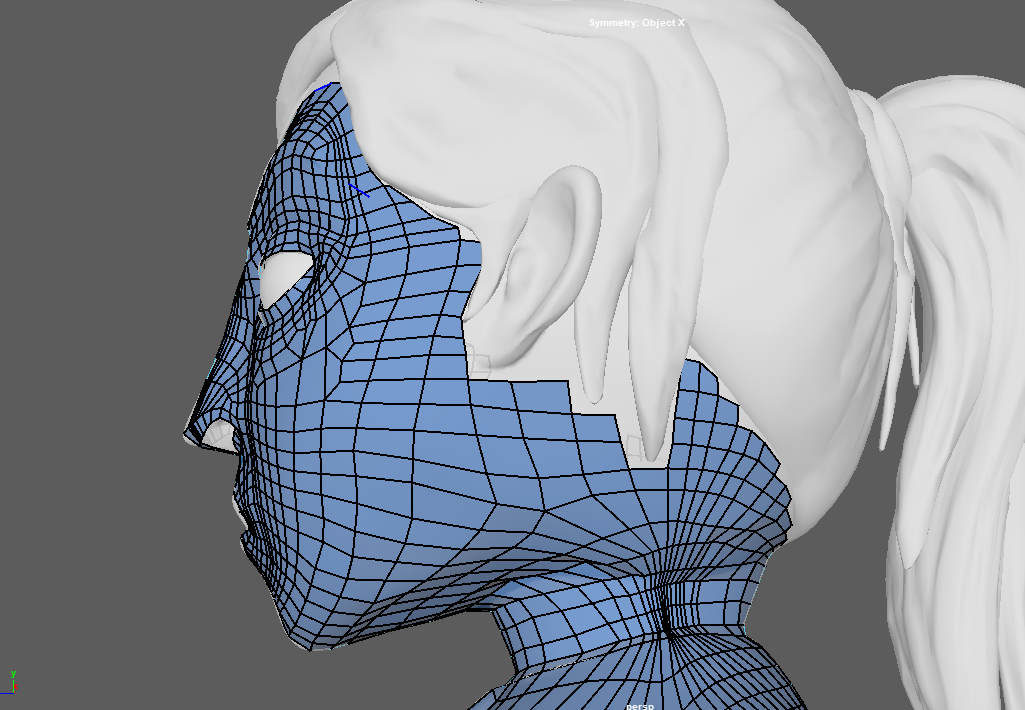
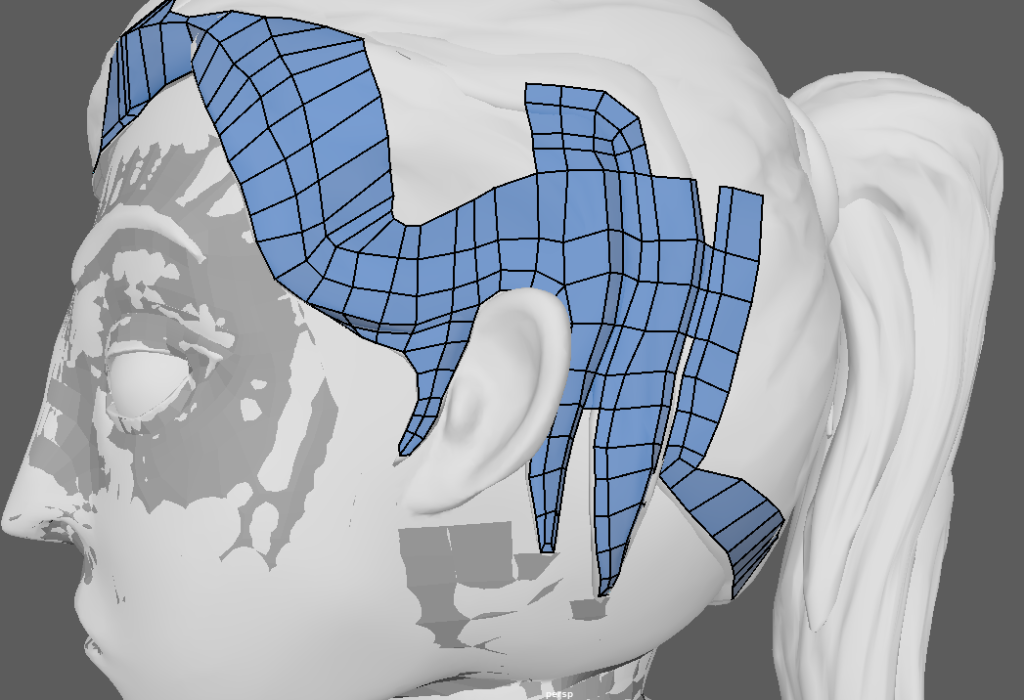
I hid the hair and build it on its own polysurface, that way the head model isn’t distorted or modified when connecting the hair to the base of the head. With that problem sorted I moved onto extending the back faces and connecting them up the top of the front of the face and working on the ears.
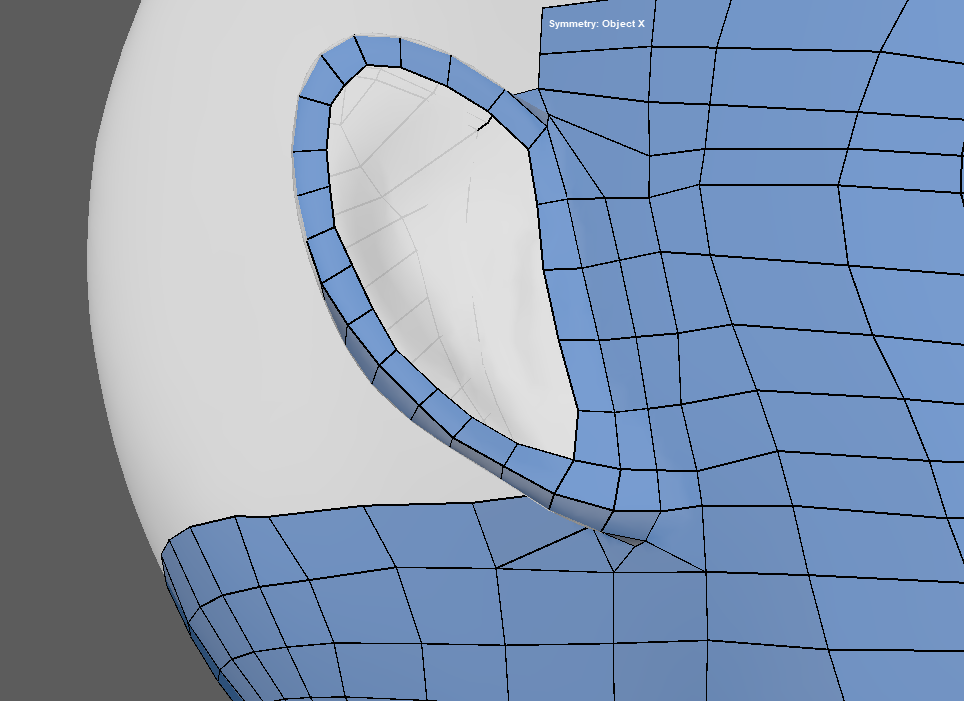
I pulled the back of the head up to the base of the ear before creating a slight loop around the earlobe shape, the ears aren’t to detailed and the lo on the left of the face is obstructed by hair. From that loop I was able to apply some face onto the ear shape and extend the faces from the back of the head up to the top of the ear before combining them altogether.
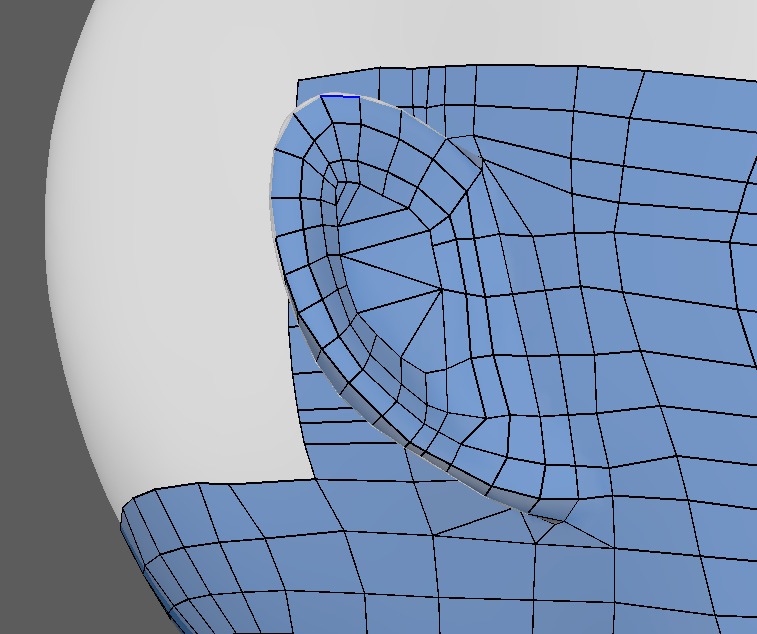

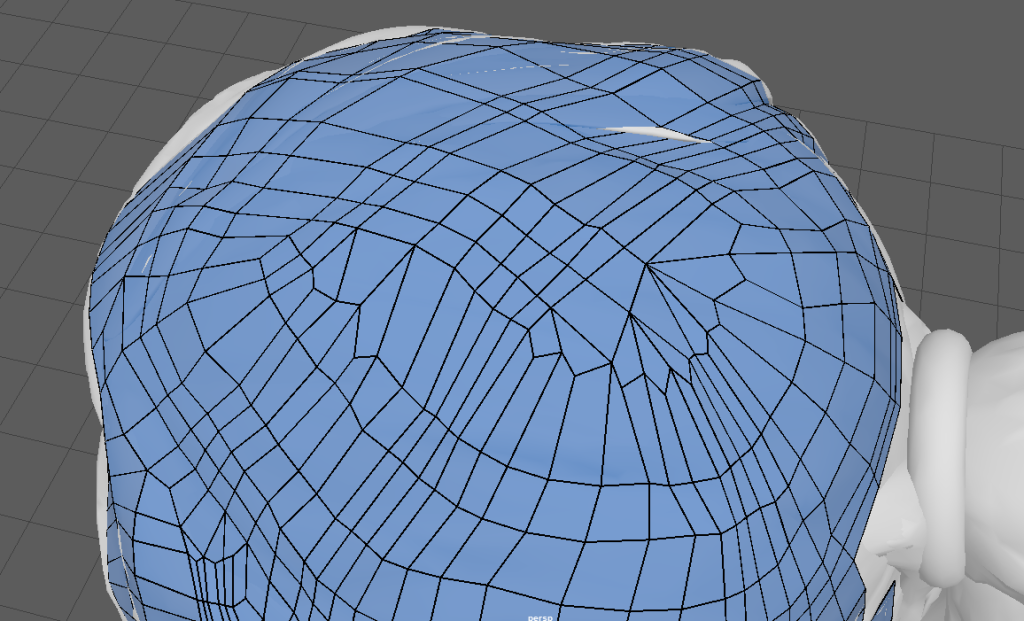
I then gradually worked my way up to the top of the head combining all of the faces together at the top before using soft select to smooth and relax the topology.
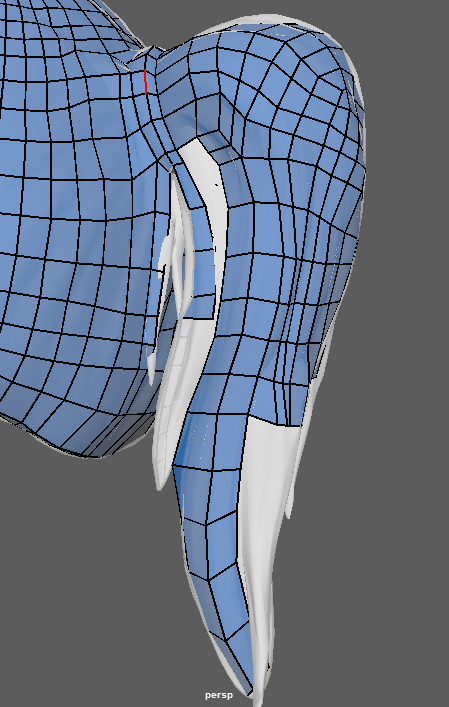
Hair:
For the hair I started with the basic shape and mapping out the most prominent bangs and curves that I created within my model.
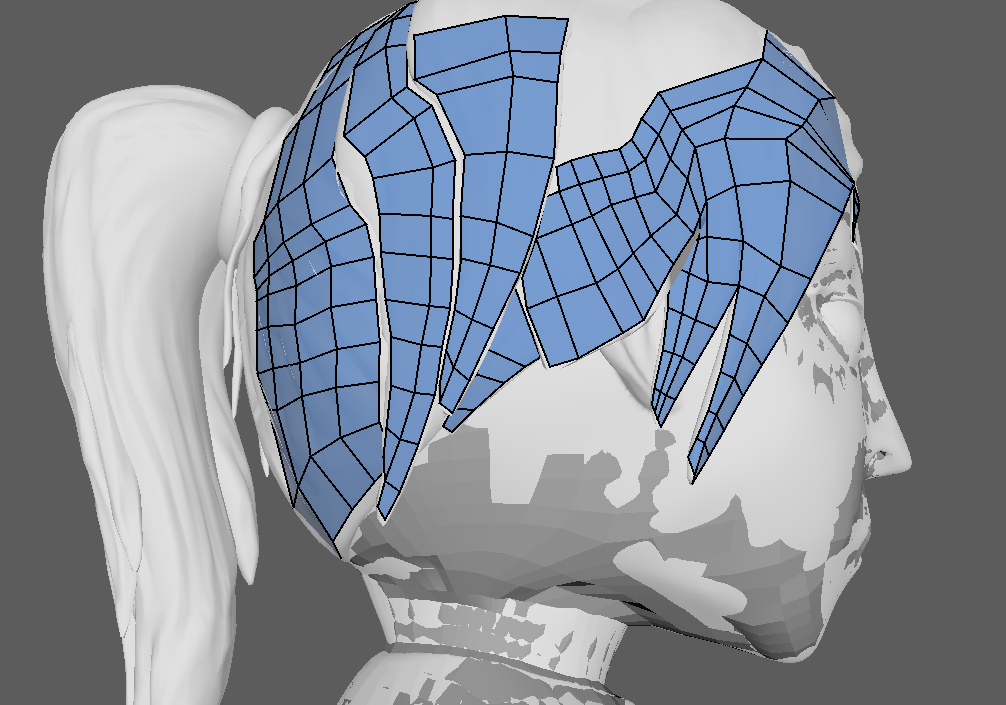
I then began to combine them together at the top and round the back of the head.
Finally I moved onto pulling faces and creating some new verts to shape the main ponytail. I started with the main loop that is at the base of hair and pony tail and connected it to the rest of the hair I had already re-topologized.
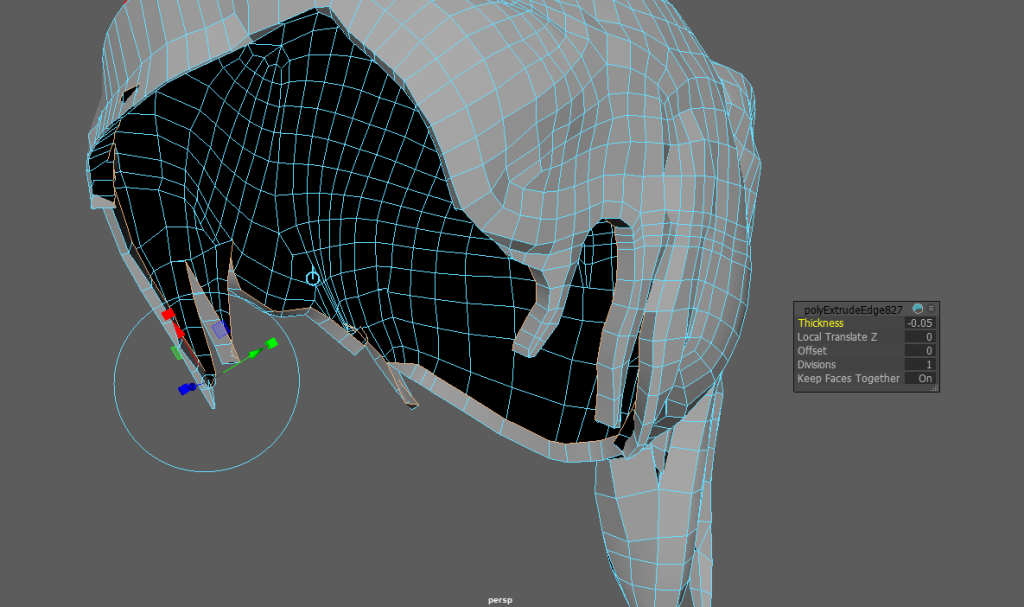
I had to use the bridge and multi cut toll to reach some areas that the quad draw tool wouldn’t connect with in the ponytail.
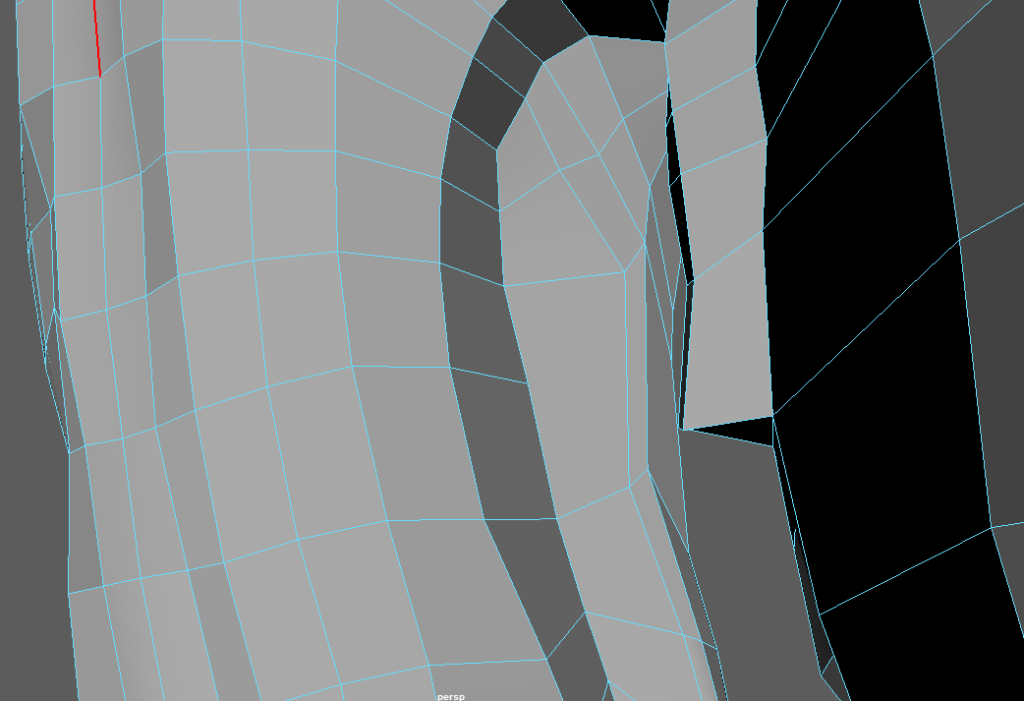
I found this tutorial, It shows that rather than topologizing the inside of the hair polysurface. I can extrude the edges of the mesh and the bevel those edges to make sure they intercept with the head sculpt. The inside doesn’t need texturing and it will make it easier to unwrap as well.
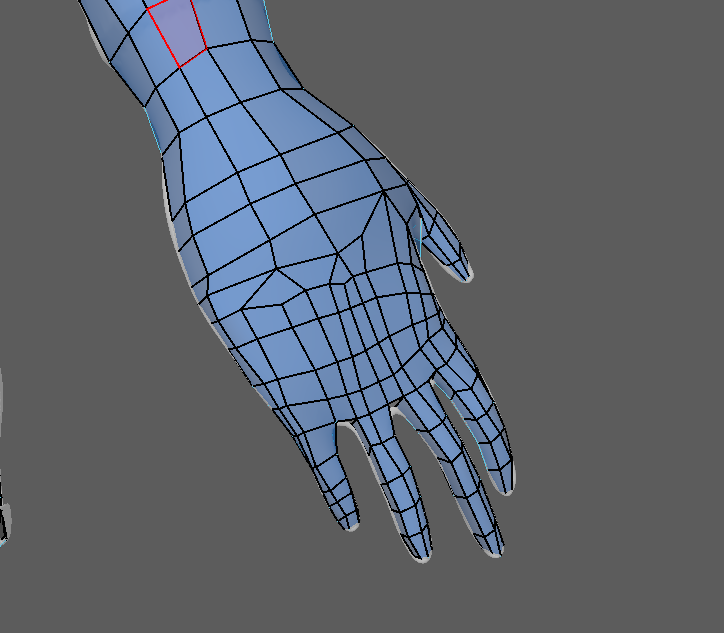
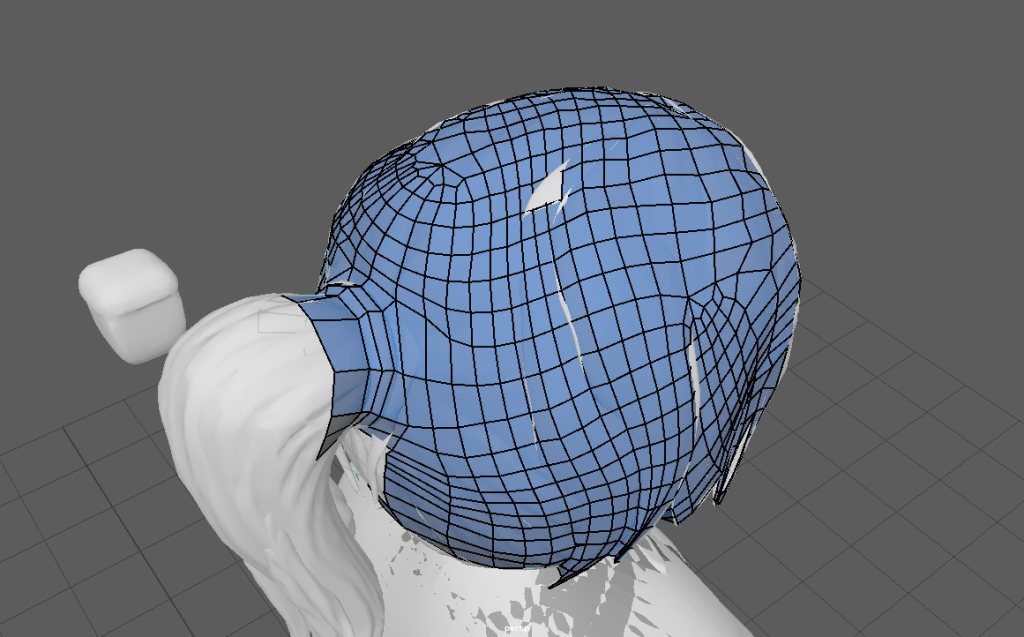
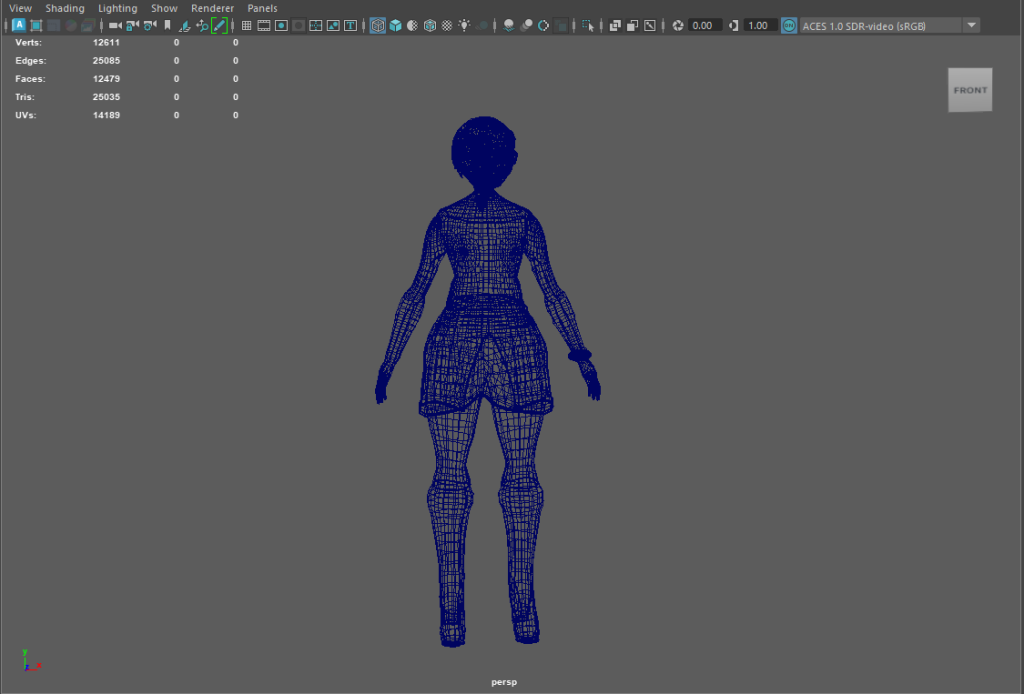
With the hair complete the main body parts for the character where complete and I could move onto creating the UV’s.
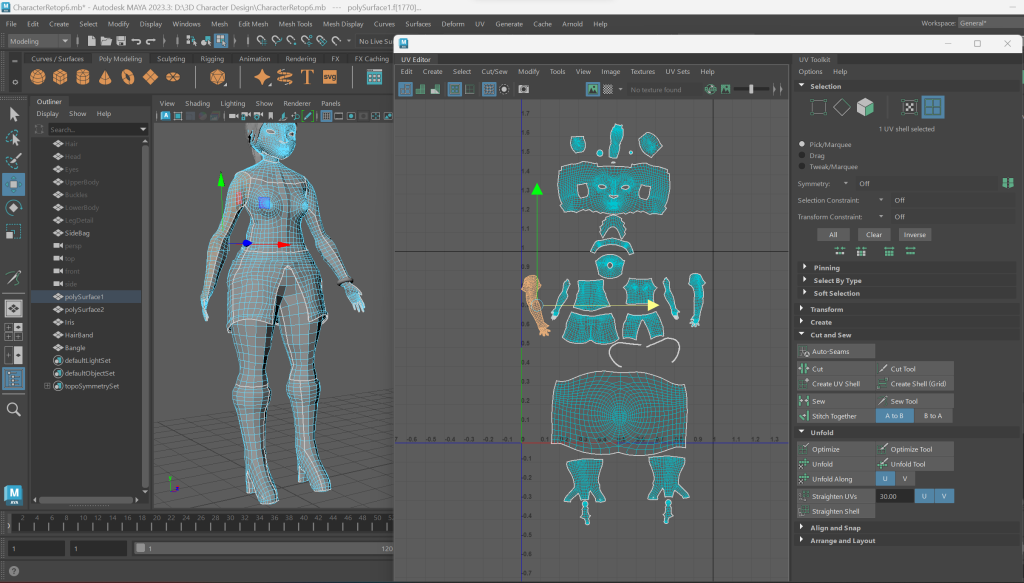
UV Unwrapping:
UV unwrapping Is where I had some issues. I marked out a quick basis on the model as to where I would place some loops and seams before using the 3D cut and sew tool on the model.
However when I went into using the cut and sew tool I had problems where I couldn’t see the seams I had cut or created. I then found that When I tried to unwrap the model it unwrapped into lots of tiny squares and planes rather than as a group of planes that should have been created with the seams I cut.
I Went back and loaded an older version just to have the same results happen in the UV editor.

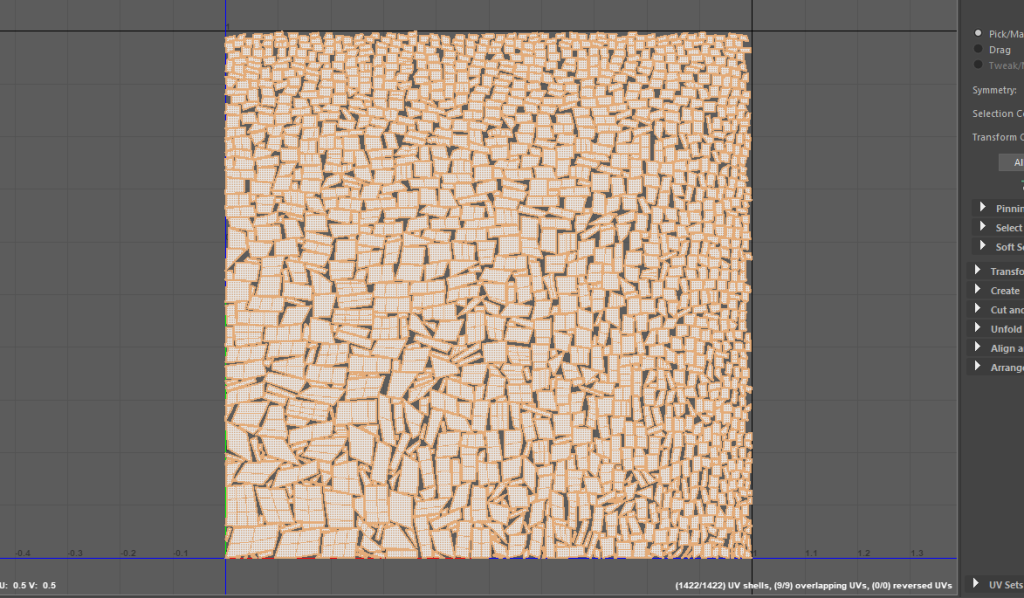
I tried to use auto seams to get a some rough seams onto the mesh but I was met with the same result of some jumbled up barley connected squares on a plane in the UV editor
After a while I did manage to get some cuts into the hair mesh, so that it is usable to texture. I still couldn’t figure out the issue with the body, So I used the Automatic unwrap tool that Maya has to create a unwrap of the body. From there I can use the cut an sew tool in the UV editor to combine and edit the cuts on the mesh.


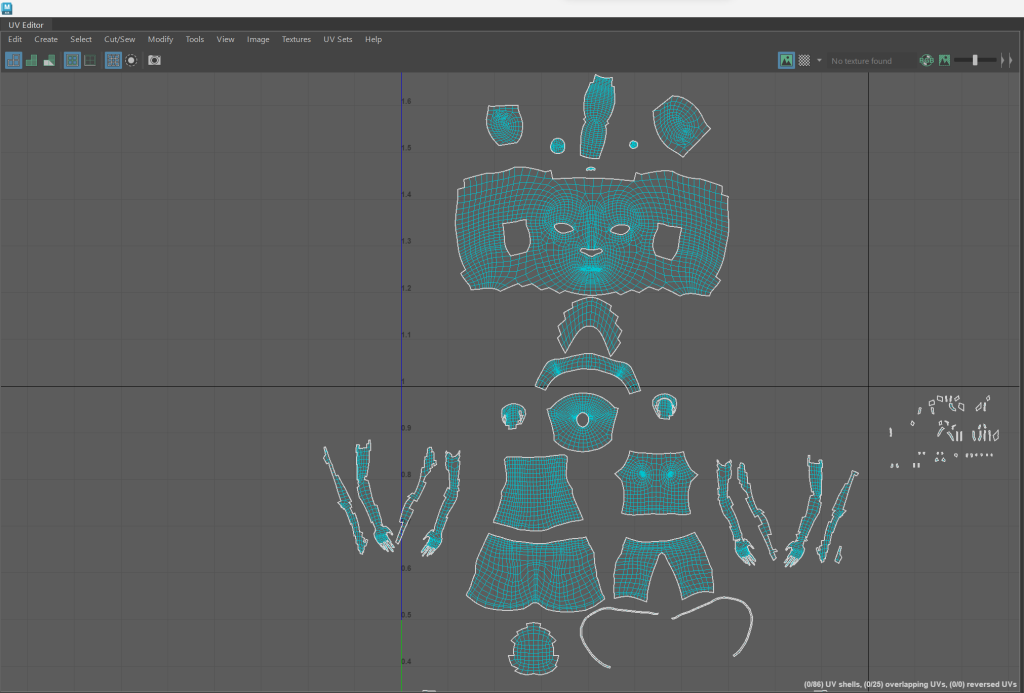
By splitting it into equal parts it removes the awkward angles and cuts the automatic UV option has done and makes for some smoother geometry. I made use of the Unwrap and Optimise tools in the UV editor so that the mesh pieces are unfolded correctly and have minimal stretching.
When using the unwrap and optimise features in the UV editor the plane would sometimes increase in size due to the amount of connected squares that make up the mesh, as can be seen with the face and body panels.

References:
FlippedNormals (2018) Retopology for Beginners in Maya [Video] Available Online: hw_dungeongold1i_h_en_100 (youtube.com) [Accessed 01/01/2024]
Pinterest (n.d) Modeling a realistic human body complete – leg topology [Image] Available Online: Pinterest [Accessed 02/01/2024]
Pellegrini, E. – Artstation (2020) Retopology Approach – Leg Focus [Image] Available Online: ArtStation – Retopology Approach – Leg Focus- [Accessed 06/01/2024]
Imgur – Pinterest (n.d) Body retopology [Image] Available Online: Pinterest [Accessed 06/01/2024]
Packt (n.d) Female Head topology reference image [Image] Available Online Squeaky Clean Topology in Blender (packtpub.com) [Accessed 07/01/2024]
Burton, A. Brunet, M. (2018) Free hand topology model image [Image] Available Online: Free Hand Topology Model (80.lv) [Accessed 07/01/2024]
FlippedNormals (2018) UV Tools You Didn’t Know in Maya 2018 [Video] Available Online: UV Tools You Didn’t Know in Maya 2018 (youtube.com) [Accessed 07/01/2024]
CG School (2018) [Maya] Character Modeling and Texturing : Part A- Modeling – # 023 (Hair, Eyebrow) [Video] Available Online: [Maya] Character Modeling and Texturing : Part A- Modeling – # 023 (Hair, Eyebrow) – YouTube [Accessed 08/01/2024]