Here is where I will outline the process of creating my emerging technologies project.
For my project I will be using Adobe Aero to create an augmented reality ‘treasure hunt’. The idea is the users will have to travel through an area to find clues that are viewable through a phone camera that displays them in the real world. These clues will eventually lead to a AR prize. The whole experience is designed to take up a relatively small scale area like part of a university campus.
Project Plan:
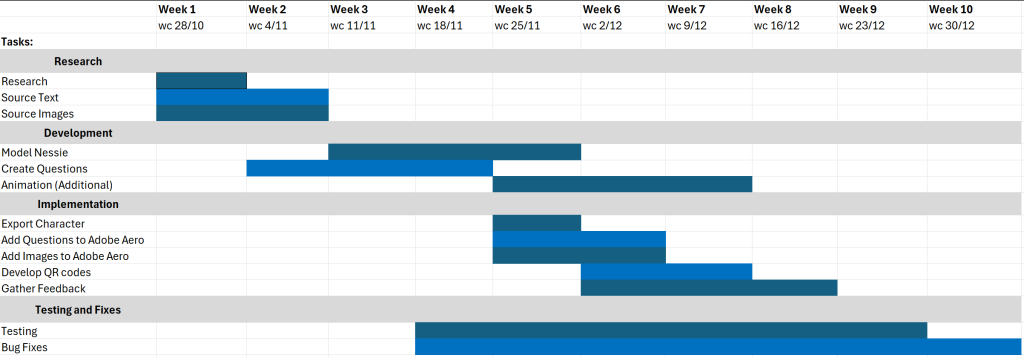
I’m going to use the production plan I created in my proposal as a guideline for what I want to accomplish within the timeframe I have. As part of this I have restructured how I want the player to navigate and find the various Nessie’s around the Campus.
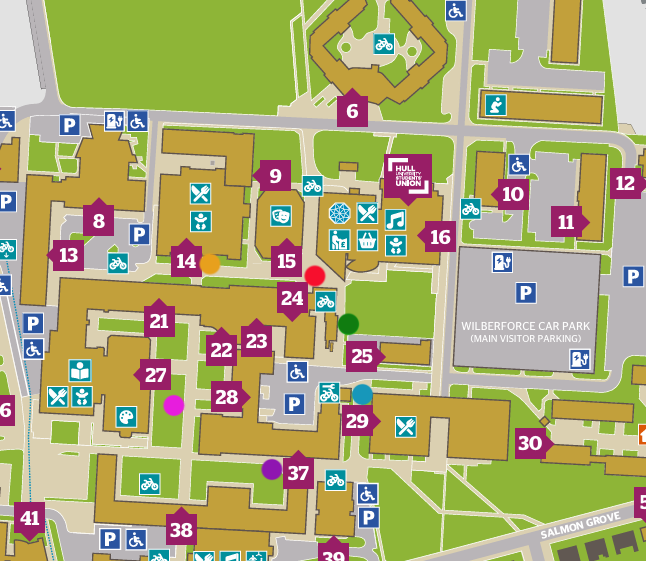
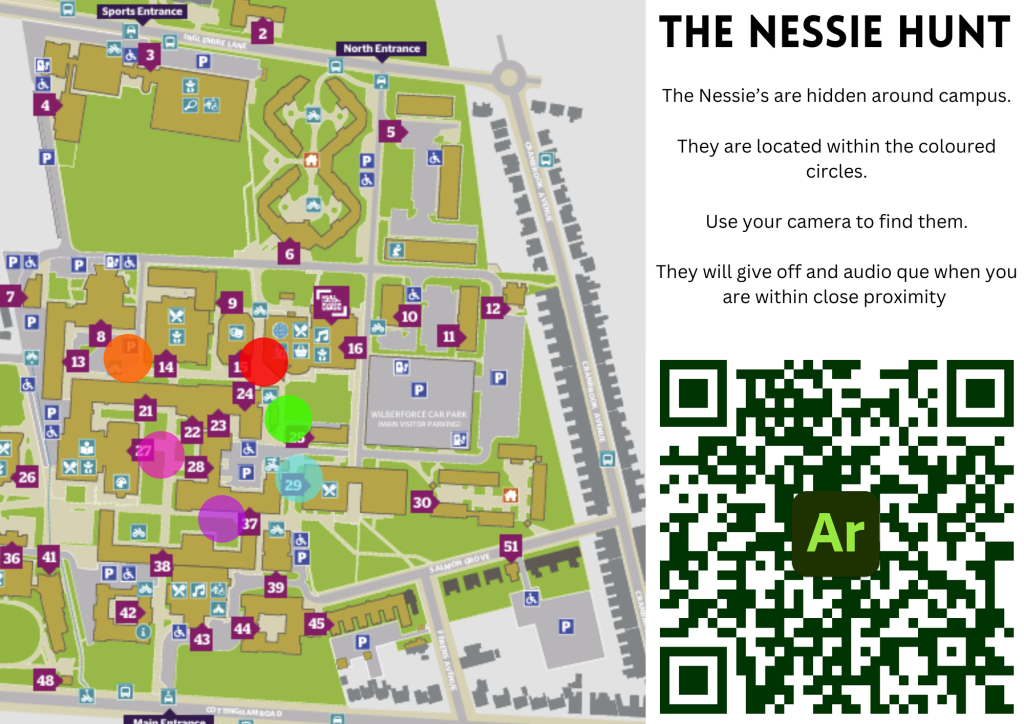
I can use the campus maps and the numbers given to different buildings as the guidance for the player. Then each Nessie will have a math problem or something that references these buildings numbers to lead the player to the next one.
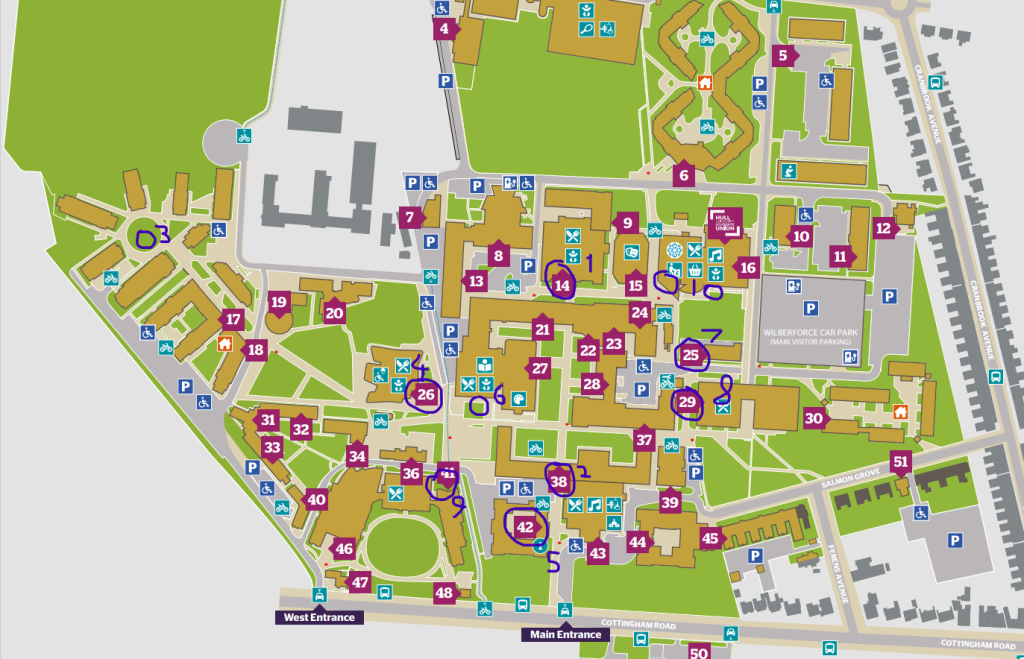
On the Map above I have circled some possible areas where I can place the Nessie’s. Whilst there are a few that are quite close together they are numbers far apart in the sequence to make sure that there is down time for the user as they move from each area across campus. I chose to focus on these buildings as they are main areas that students will possibly visit whilst on campus.
This down time is something I researched in my proposal. It makes sure that the user has the time to check their surroundings and make sure they are safe at all times. This physical safety also expands to where I place the Nessie models, As they will need to be placed in safe areas and will need to not be obstructing the view of any hazards.
I will also need to take into account the size of the models as well any text I implement. this is something I can test and iterate on when I start working in Adobe Aero
Creating Models:
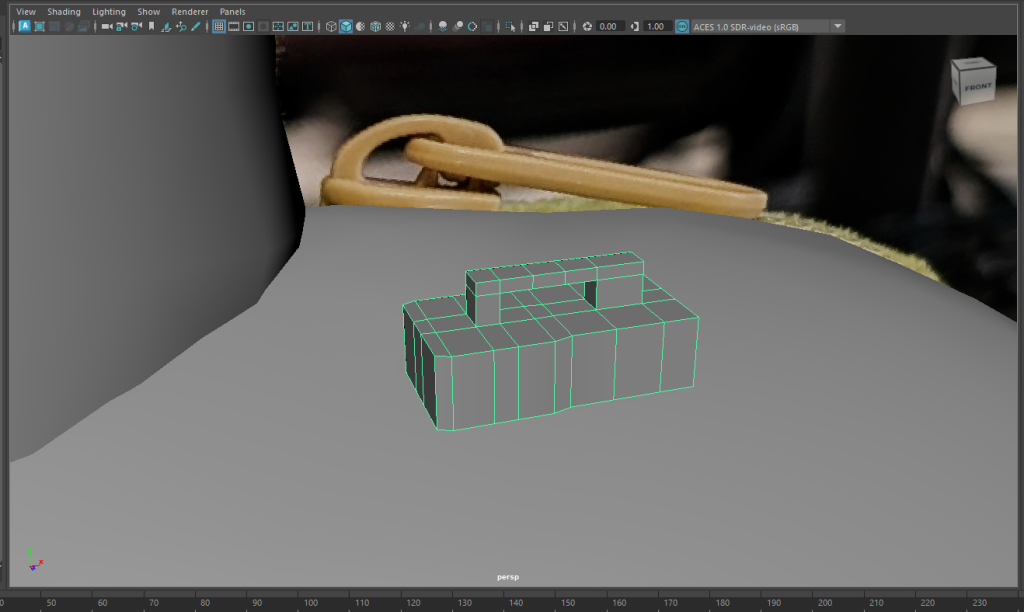
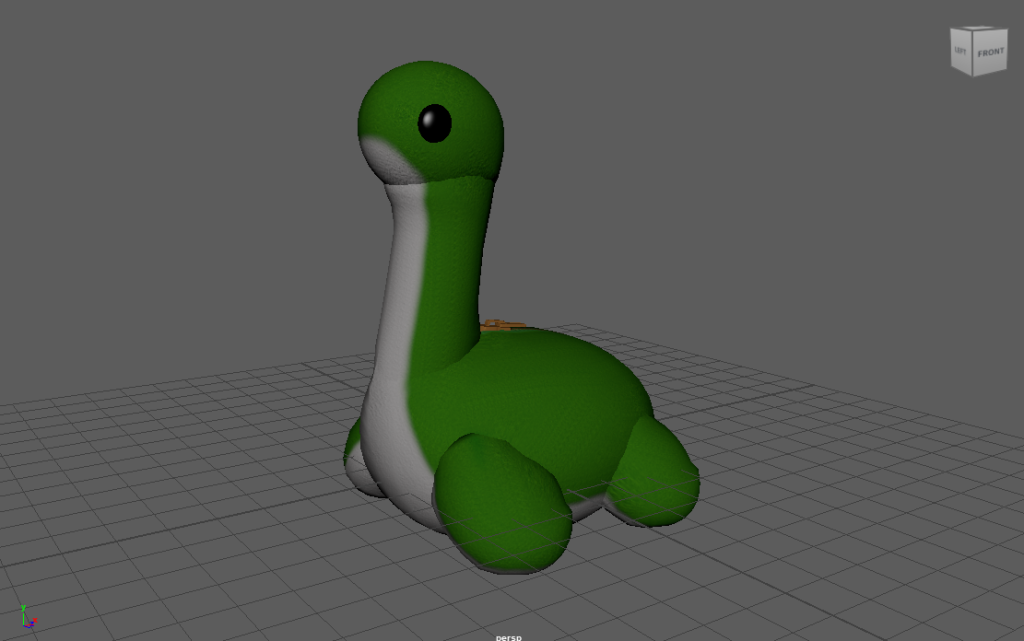
The main part of production is building, implementing and texturing the Nessie models. I took a quick side on photo and began by using some circle and cylinder shapes to create a quick block out of the base.
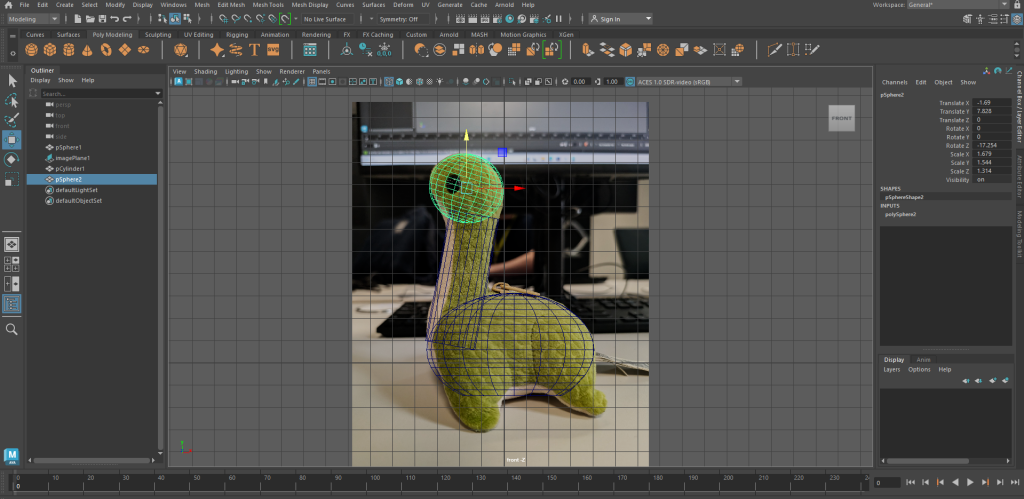
From There I used the Vertices of the shapes and manipulated them ,with symmetry turned on, to get more of a rotund shape that was the same all the way around. I extruded the cylinder to form the neck and manipulated the vertices to blend the it into the head and body. I didn’t want the model to be to complex as that could affect how many I could put into Adobe Aero due to the file size limit.
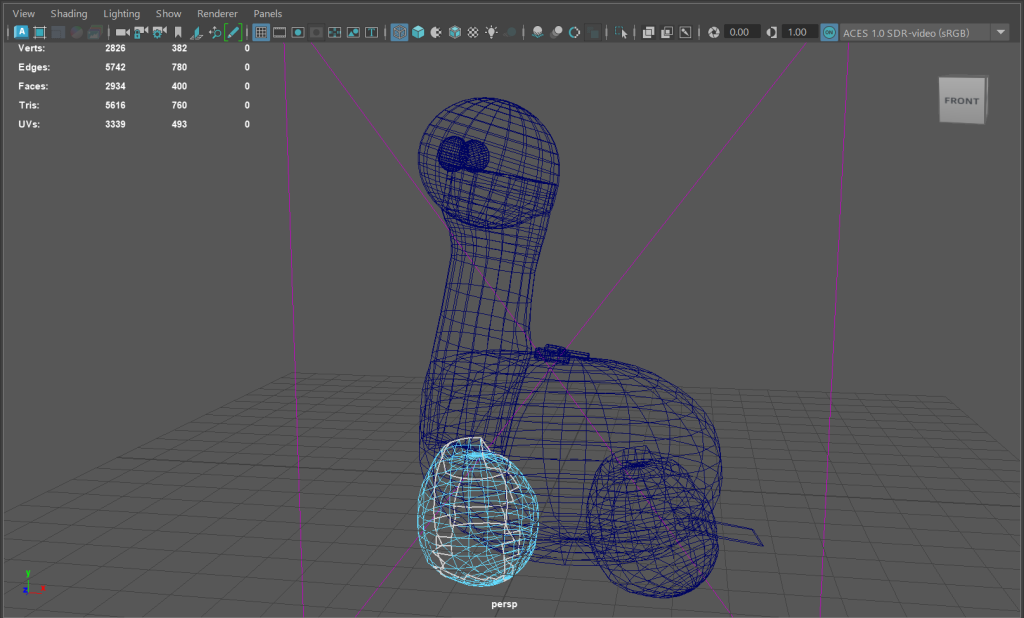
I then used the same techniques to build the legs. Which I then mirrored. I did undo the mirror later as it meshed with the UV’s when I started to set up the model for texturing.
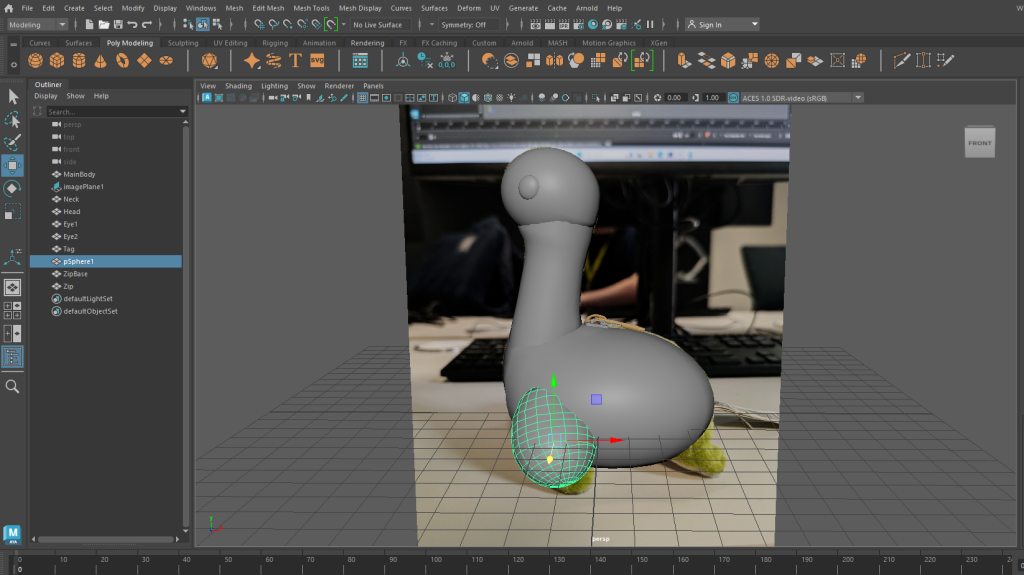
The last parts I added was a simple box that I extruded to create a tag at the back of the model and the Zip. I used to box shapes before using the multi-cut tool to add in some edge loops. With these edge loops in I could extrude and manipulate different faces of the model to create the shape I wanted.
Texturing Setup:
As I mentioned before , when I came to setting up the UV’s for substance painter I found an Issue where because I had messed with the edges and vertices of the base shapes, and then mirrored them. they overlapped and weren’t suitable for texturing.
To resolve this I backtracked and used the create ‘automatic’ UV tool in the UV editor to create what is below.

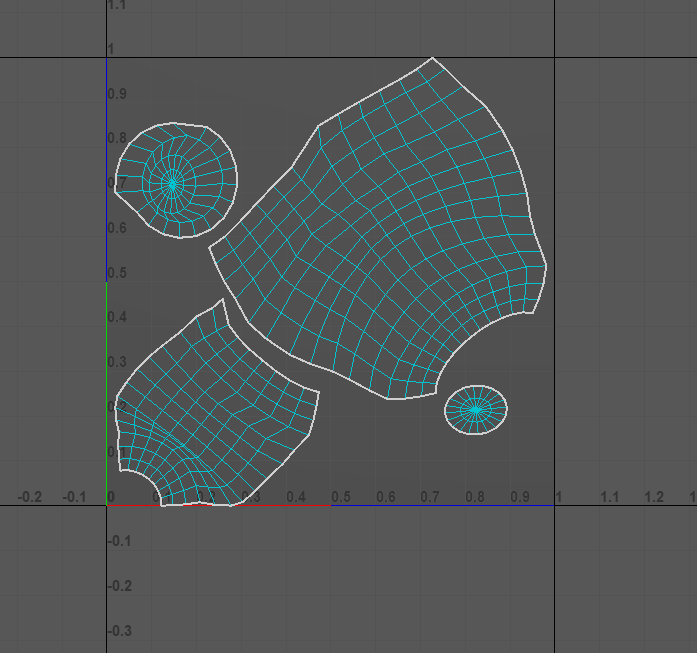
From there I then went and used the cut and sew tools to make them simple UV shapes with straight edges that should make it easier to texture. I also used the align and straiten tools to create clear edges and make sure the UVs used all the available space on the plane they are on.
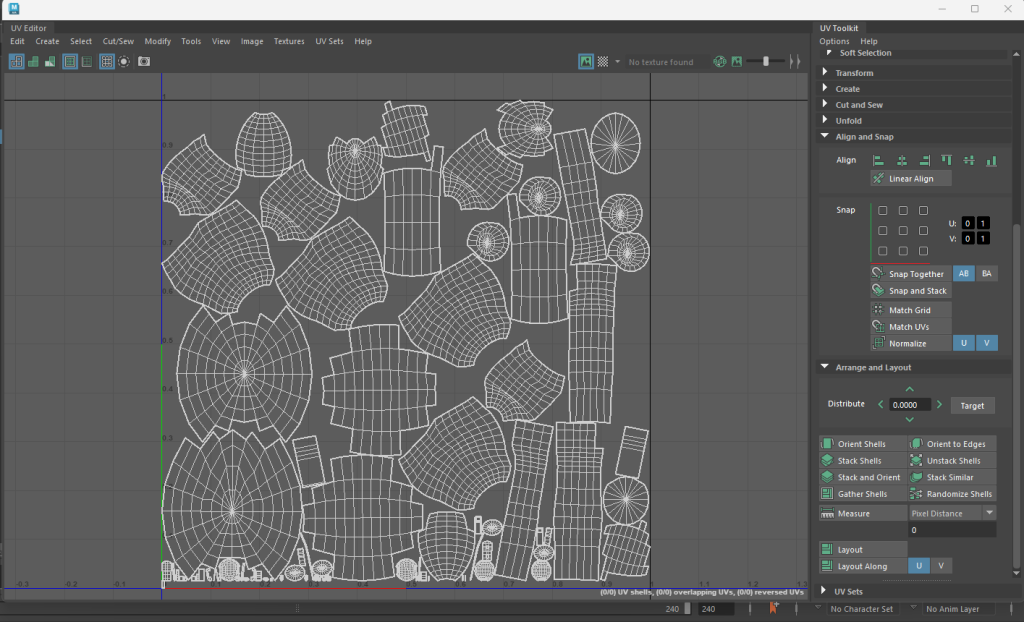
I went over the whole model after this tidying the UV shapes and using the automatic UV tool. Then when I mirrored the legs and grouped the model I used the align and straighten to use the whole UV plane and simplify the texturing process.
Substance Painter:
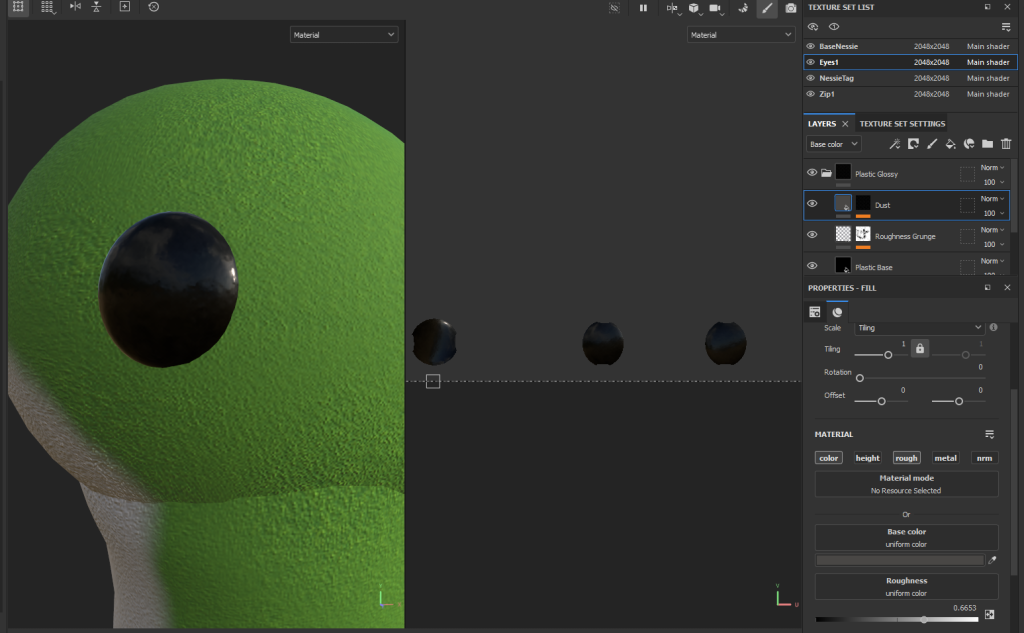
With the UV’s fixed I could move onto texturing. I setup some basic materials on different areas of the model in MAYA to separate areas of the model in the texture set list.
This meant that when I was painting I wouldn’t affect areas that wouldn’t have that colour and it meant the model would maintain a professional standard. I Started with the zip and eyes, I made use of the smart materials on offer in substance painter to keep it simple.
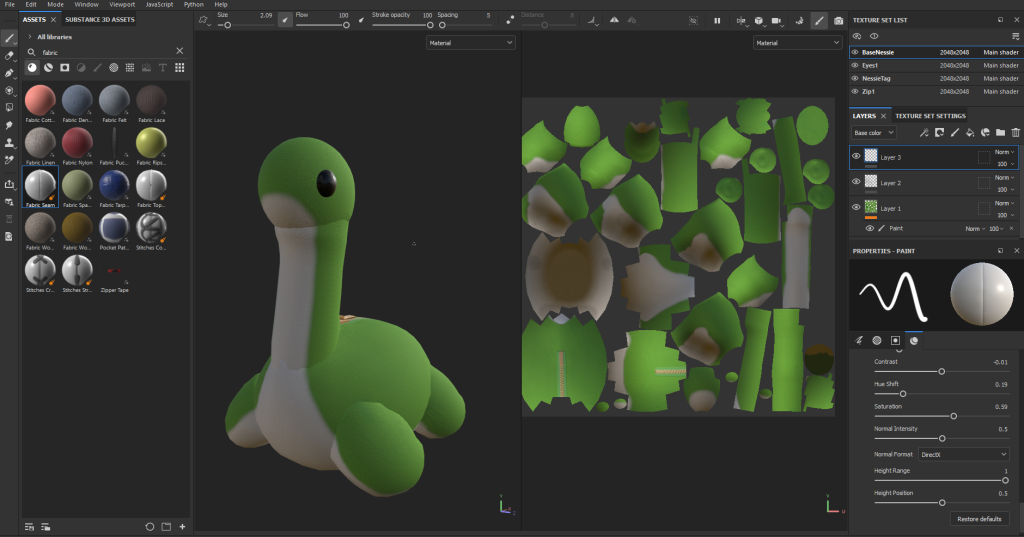
I then moved onto the base texture, I used one of the felt brush templates to make it feel like a soft toy. I used the same brush for both the white and green parts to keep some consistency but varied the brush strokes to give the illusion it has been sewn together.
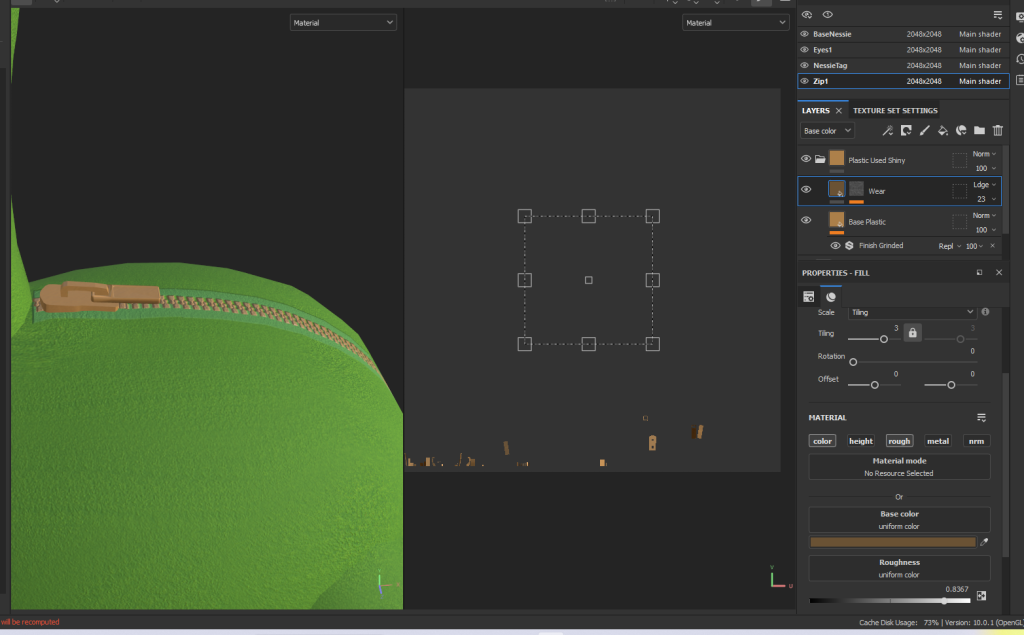
I then added in a paint layer to created the zip on the back. This uses a slightly darker version of the base colour I used for the felt texture as the base for the zipper fabric. It also uses the same colour for the zip as the zipper teeth. This keeps it as close as possible to the soft toy I have and the in game model I have taken inspiration from
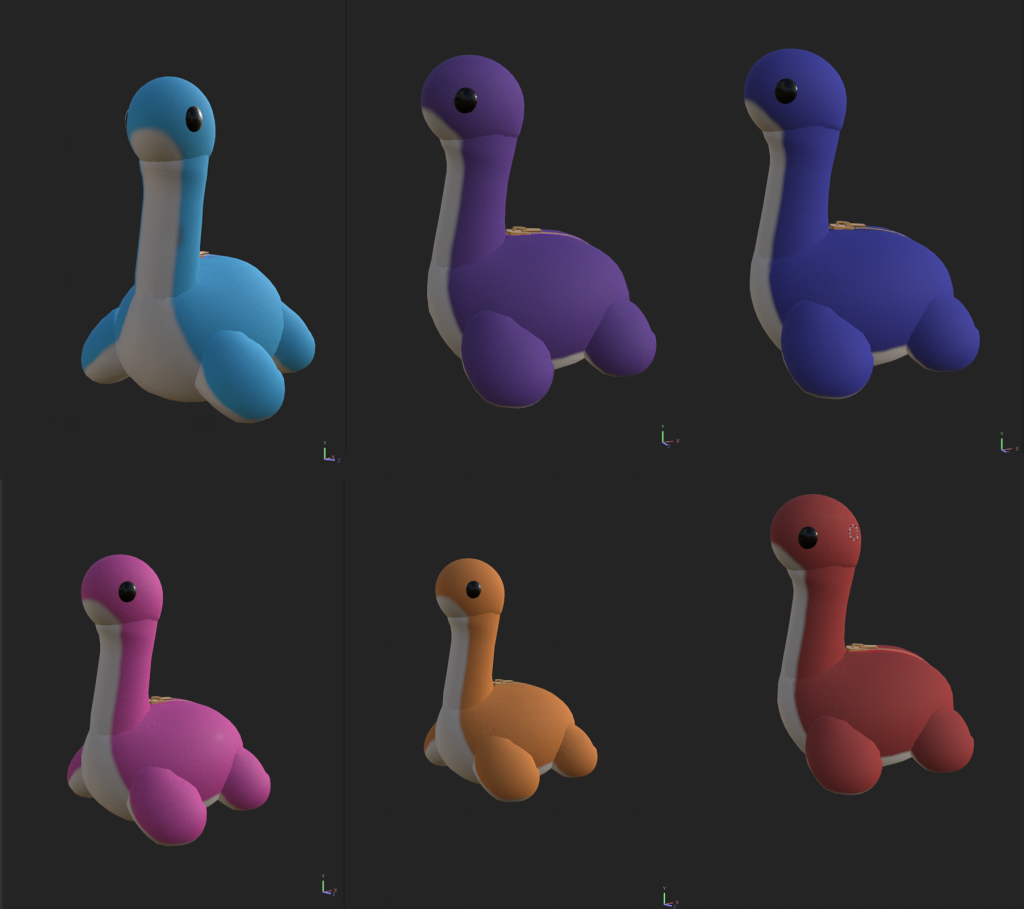
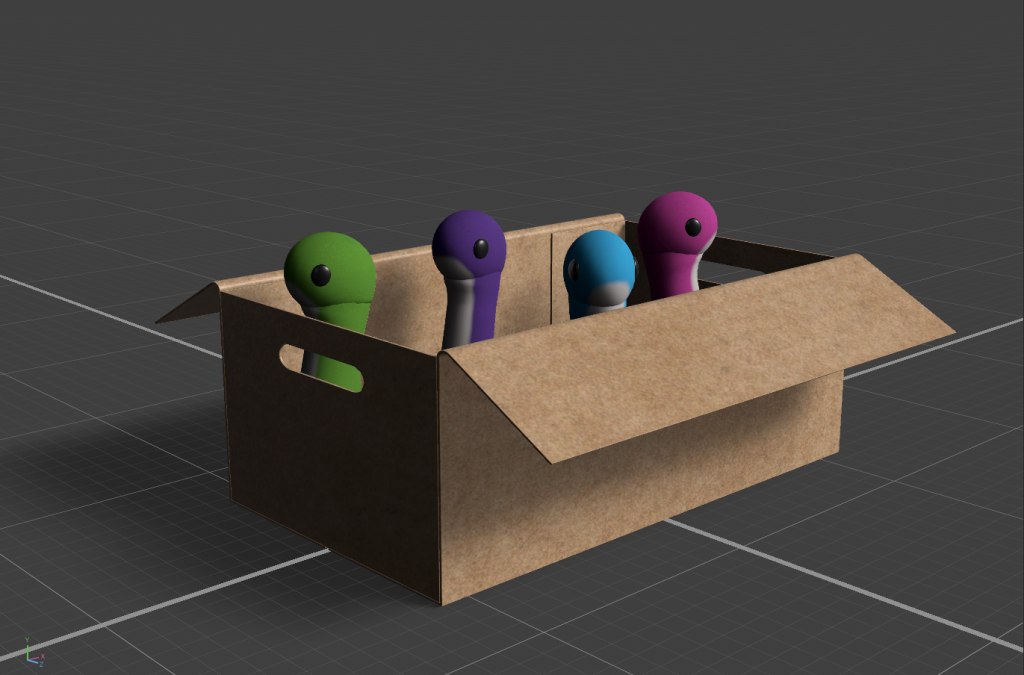
From this base colour I then worked on adding in some different colour variants. This is something that was suggested to me by some other students as a way of adding variation to the treasure hunt and making it more enjoyable to a potential user.
These Variants all use the same base model and base texture map with just a change of colour.
Design Considerations:
Whilst in Adobe Aero I will need to take into account some AR design considerations to make sure my project adheres to any applicable standards.
- UI and UX – If I continue to go with having questions that lead the player to the next location I will need to take into account the layout and position of text in an AR experience. It is recommended that text and is positioned in the middle third of the users screen. It should also be at least 20 pixels big and between 1.3 and 3 meters away from the user to help with user visibility. This also applies to any images I might include If I were to have a button that the user can press to make the Nessie model and question appear.
- Physical Safety – The player will be navigating the experience in the real world. Therefore I will need to look at how I place the models I include. I will need to make sure they aren’t obstructing the view of any hazards or be in placed in a hard to reach or dangerous area. As part of my experimentation Adobe Aero has a disclaimer when anyone opens a project that asks the user to make sure they are in a safe area and aware of their surroundings. I will also need to create down periods by spacing the clues and models out so the player has time to look away from their phone screen and make sure they are safe.
- Technical considerations – With Using Adobe Aero I will need to take into account that the software is still in development and in beta. Therefore I will need to make sure that anything I build works within the technical considerations of the platform. This means that when other devices use the QR code the models might appear at a slightly different hight or location to as originally intended.
Adobe Aero:
With the textures added I can work on implementing the model into Adobe Aero and working out a plan for how I want users to navigate the treasure hunt.
I have moved to using building numbers and I can have users make use of the campus maps (or a printout) to navigate.
I began by exporting the untextured model to a test file I used when exploring the software. This allowed me to get a sense of positioning and scale for the model and how I can go about creating the experience. The model itself is about the size my foot and could be scaled up slightly so that it is very visible. This will allow me to place the model in more compact and busy areas and still be seen.
From here I increased the number of Nessie’s to 3 to see how the software reacted to multiple of the same model. However, when I went to test this, none of the Nessie models appeared at the set locations I had them in. This is possibly due to the models being .fbx files and possibly exceeding the file size limit. Still this was an initial test and I got some valuable information on positioning, scale and how the software works.
With some research I found that I can export the models I have as .glb files. These have better compression and are smaller files, I can do this though Substance Stager.
From there I imported them into Adobe Aero and ran a few tests to get started. I started by importing and positioning all 6 of the Nessie models into the same project and running it. This worked well and was much smaller in size compared to my first test.
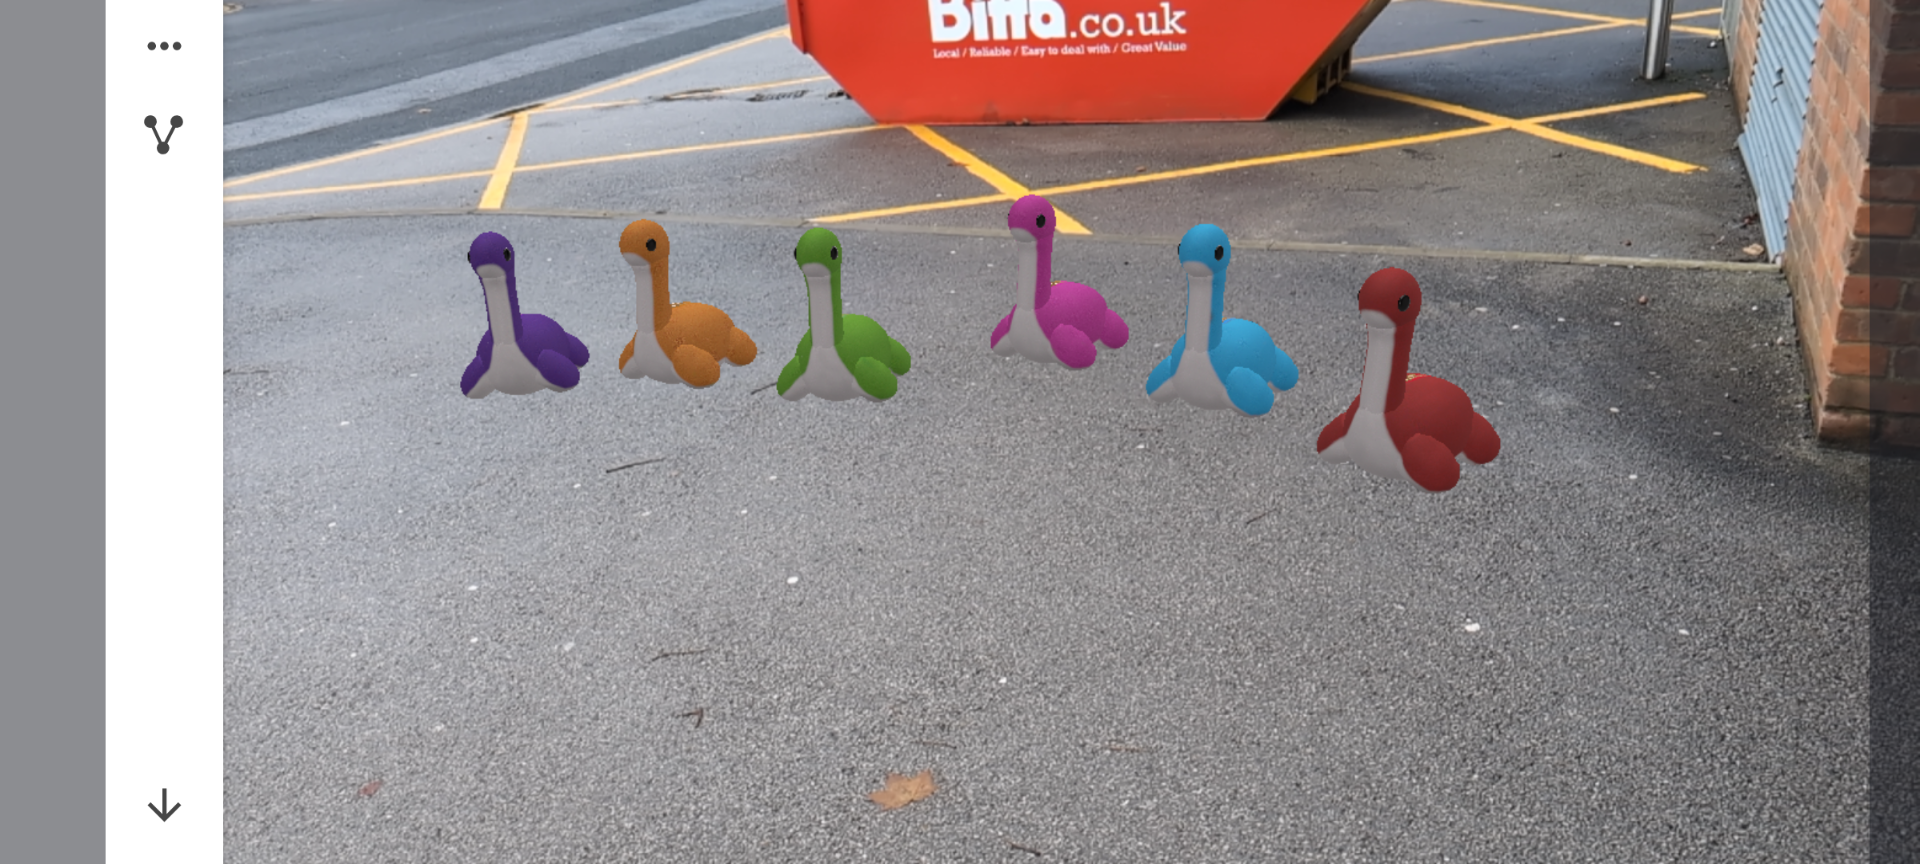
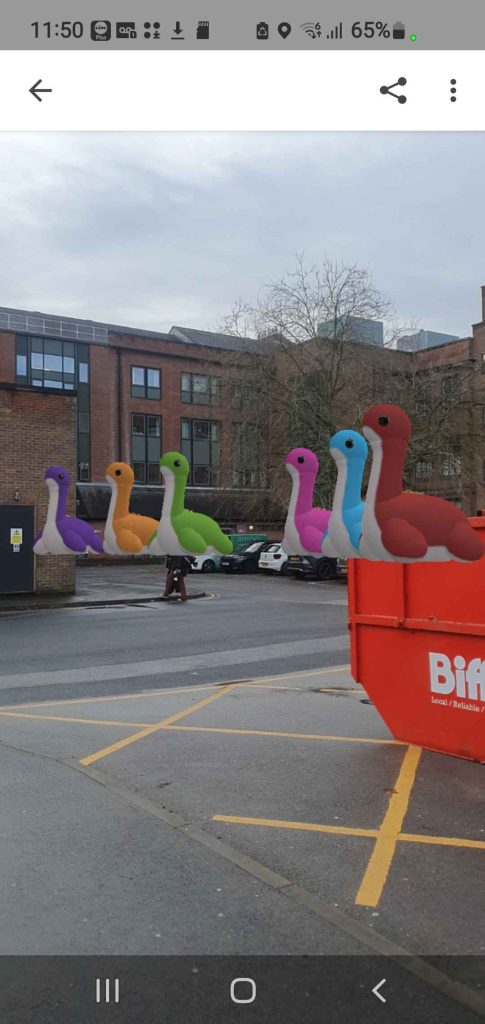
With this test I found that the position of the user and the device can sometimes give different results in how the models appear in the real world. I can gather more when I do a wider group test with more people to see the result but at the moment this isn’t a huge issue.
Next I moved each model into their respective positions. I scaled the models up to make them more visible within the placed areas. With Adobe Aero being work in progress technology the whole university campus isn’t fully captured. With that in mind I am still able to position 6 objects within the area I have comfortably.
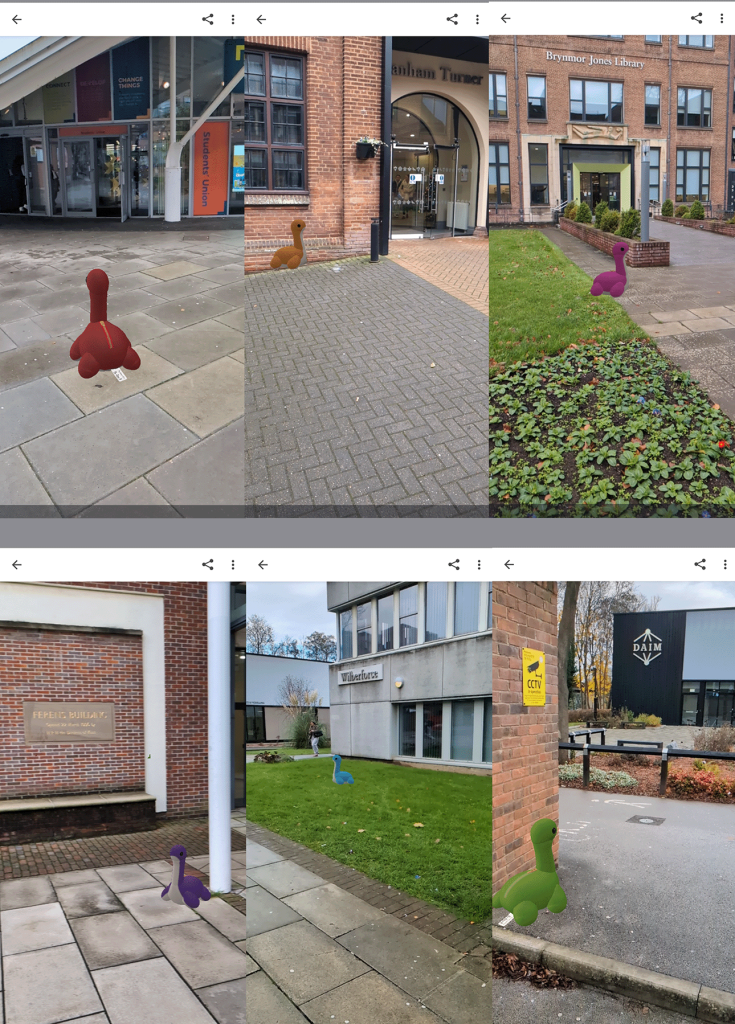
With the available area being smaller than the whole campus map I have worked towards 6 locations.
- Location 1 – Green Nessie outside the DAIM building (25)
- Location 2 – Blue Nessie at the front entrance to Wilberforce (29)
- Location 3 – Purple Nessie outside the Ferens Building (37)
- Location 4 – Pink Nessie outside the Brynmor Jones Library (27)
- Location 5 – Orange Nessie at the front of Canham Turner (14)
- Location 6 – Red Nessie near the entrance to the Students Union (16)
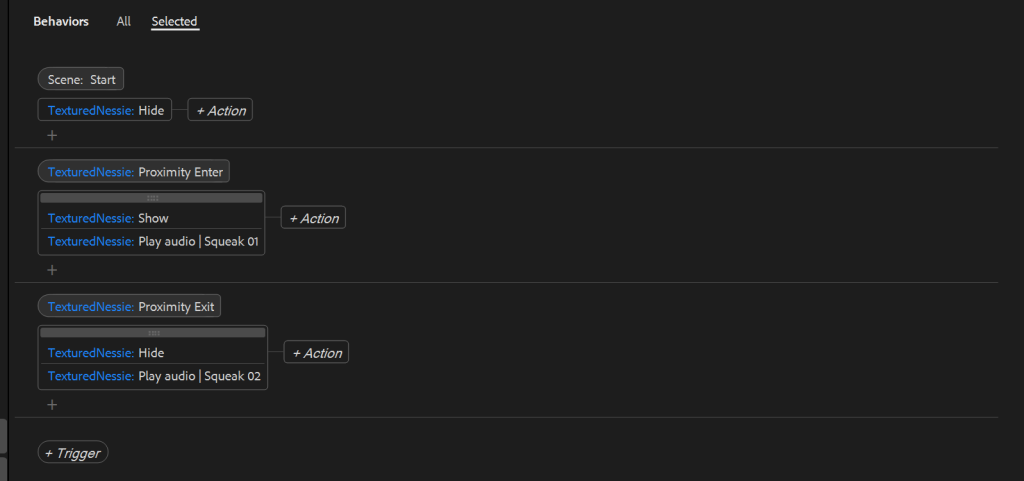
I decided to use the behaviour modifiers in Adobe Aero to have the Nessie hidden until the player is within a certain radius. I can also make use of the audio trigger to have an ‘squeak’ play as they close in on the Nessie’s position. This should improve the user experience as it should make the experience more interactive.
With this in mind I can give the player a map with the building number and a rough starting point of where the Nessie is located. It is then up to the user to move around and locate and find them. Similar to how Pokémon Go works with players locating Pokémon.
I had a few tests using the behaviour triggers. To start I was unable to get the proximity triggers to work fully. This was due to the activation distance being to short for the GPS technology to really pinpoint where the user and object is. To solve this I increased the trigger distance to between 250 and 300 (depending on the position and area of the Nessie). Which seams to have resolved the issue. 300cm is the largest trigger area, this is something I had to trail with the placement at the Student Union, Canham Turner and the Wilberforce building. This was due to it being to difficult for users to find the model not being found at the exact same location and the audio not triggering as they user wasn’t within the correct bounds.
I then attached a play audio action to the proximity triggers, this should make it easier for the user to locate the Nessie’s overall position as the audio que will let them know they are in the correct area.
For the final map I did end up slightly repositioning the red and orange Nessie to make sure they are in a wider area and more accessible for the user to find, this was also done with the increase to 300cm for the trigger distance to improve the users experience. This would be printed out and handed to users so they have the rough position of the Nessie’s and access to the QR code should an error occur.
Possible Improvements:
Here I will outline some areas I could improve if I were to take the project even further;
The main outline for my project was to create an interactive treasure hunt for new students to use as the placement of the Nessie’s would lead them across campus and to some of the most used buildings. This should in theory make it easier for new students to navigate campus. However Adobe Aero is still in beta and the tracking and positioning of objects in the real world isn’t one to one every time or consistent across every device.
It would be nice to have a way to see this data, for example if I could have Adobe Aero open up a URL link to see how students are interacting with it and if it useful for the intended purpose. It would also be possible to swap out the Nessie models for something more suitable for the university such as the SU’s mascot (Percy the Penguin) and have it be more tailored to the Universities purpose.
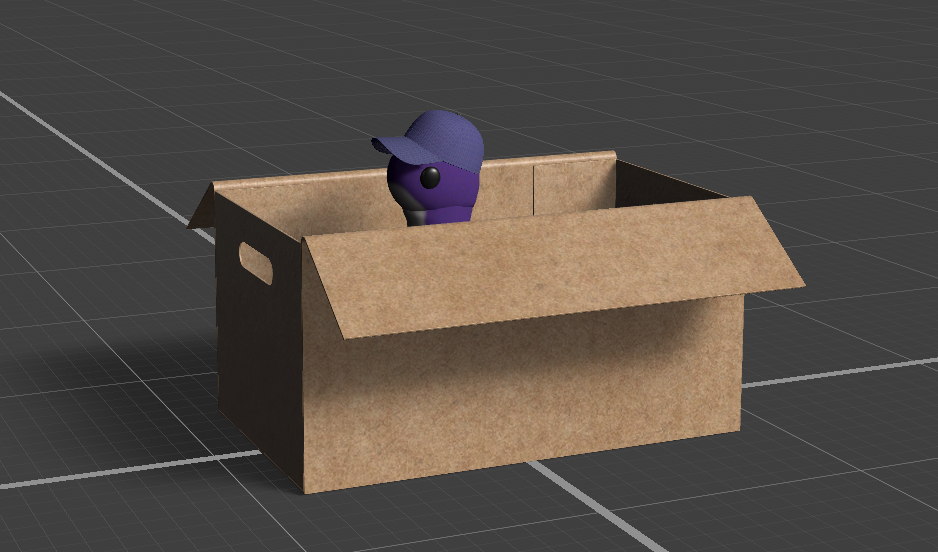
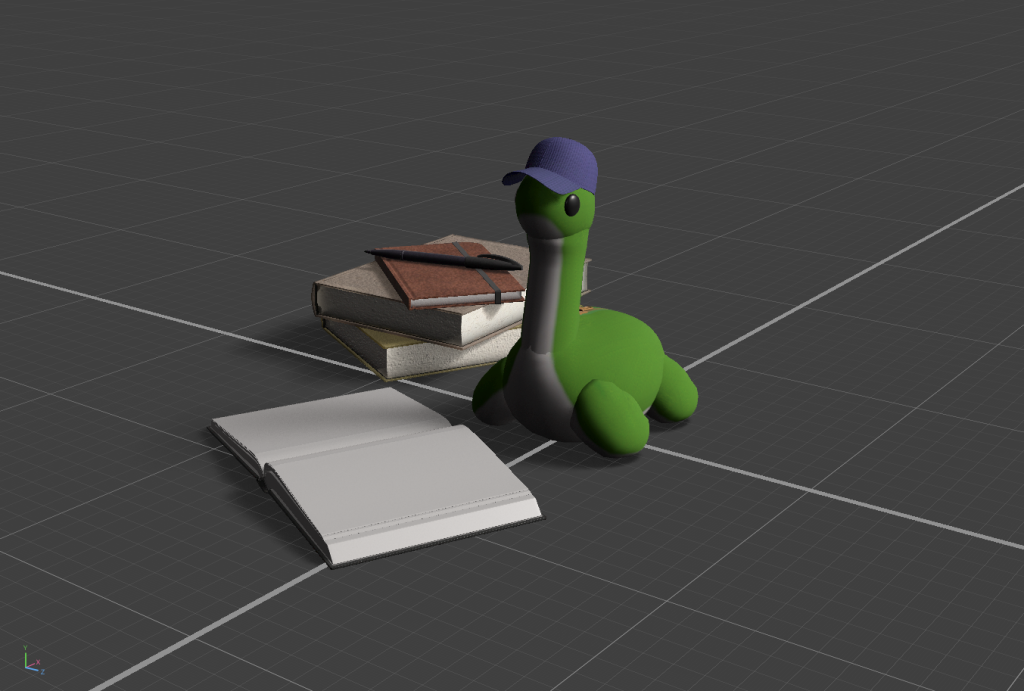
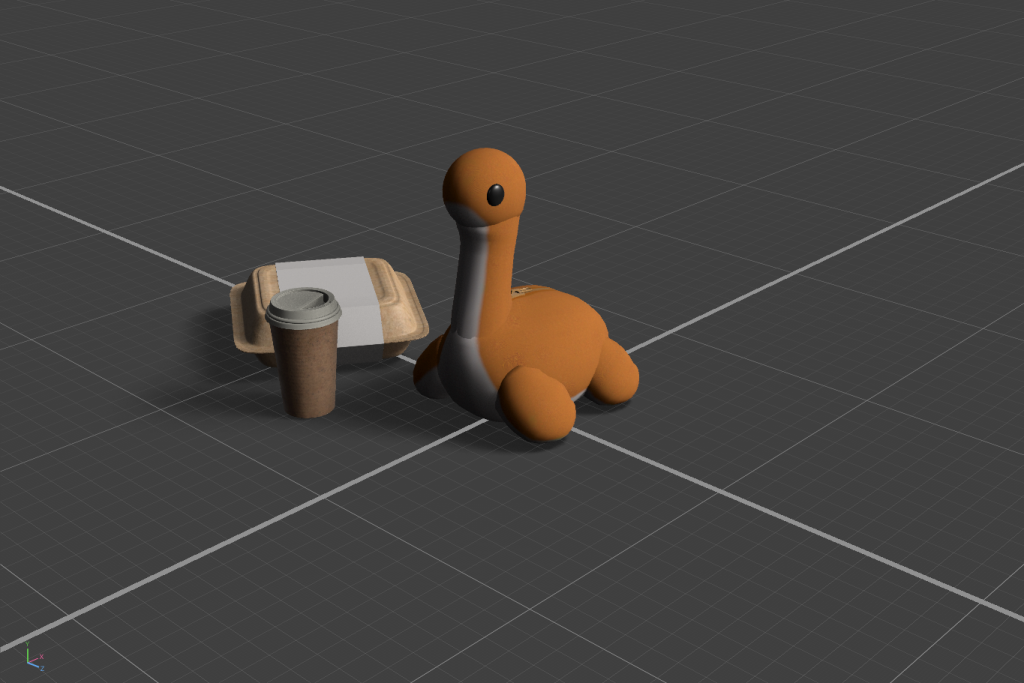
Whilst in Substance Stager I experimented with the base assets and materials within the software This was to get an idea as to how I could also leave some clues to where the Nessie’s are located. I could possibly experiment with having them represent the subjects in each area.
For example I could have one with a beaker and lab coat outside of the Chemistry building, some books outside the library or inside a box near the accommodation blocks.
Within my plan I also mentioned animating the Nessie. Within Adobe Aero there are behaviour triggers that can be used to start an animation. If I created some base animations similar to the dancing Nessie gif I found, and have them trigger when the user walks into a close proximity to the models position.
I Could also vary these animations and have them play when the user taps the model on their device by using the on tap trigger in Adobe Aero. This adds another set of functions that would possibly test the file limit, but would add some more interactivity to the overall experience.
Production Piece:
Un-Narrated Video: (Sped up)
Narrated Video:
References:
Kirthyvasan, K. (2023) A beginners guide on designing augmented reality experiences Available Online: Designing for Augmented Reality : A Beginner’s Guide [Accessed 29/10/2024]
Kaostheone (n.d) Nessie dancing GIF (Good Morning GIF) [Video] Available Online: Good Morning GIF – Good Morning – discover and share GIFs [Accessed 31/10/2024]
Zachary, J. Adobe (2022) How to import GLBs, PNG, and animated PNG sequences into an Adobe Aero scene. Available Online: Import image and 3d files into Aero [Accessed 28/11/2024]
Adobe (2024) The different types of Anchors in Adobe Aero. Available Online: Anchor types [Accessed 28/11/2024]
Zachary, J. Adobe (2022) Adding Triggers in Adobe Aero. Available Online: Adding Interactivity with Triggers [Accessed 05/12/2024]
Adobe Creative Cloud (2022) Adding Interactivity with AR triggers in Adobe Aero. [Video] Available Online: Adding Interactivity With Triggers | Getting to Know Ar in Adobe Aero | Adobe Creative Cloud [Accessed 05/12/2024]
Adobe Creative Cloud (2022) Adding actions to objects in Adobe Aero. [Video] Available Online: Adding Actions: Adding Motion to Objects | Getting to Know Ar in Adobe Aero | Adobe Creative Cloud [Accessed 05/12/2024]
Karl Kapp (2024) Getting setup with using Adobe Aero. [Video] Available Online: Getting Started with Adobe Aero [Accessed 05/12/2024]
Adobe Community, Kinney, J. (2024) Issue with proximity triggers: community post. Available Online: Proximity trigger not working – Adobe Community – 14410350 [Accessed 06/12/2024]
Dunaway Smith, H. (2023) Using 3D animation in AR with Adobe Aero tutorial [Video] Available Online: Using 3D Animations in AR with Adobe Aero [Accessed 08/12/2024]