Here I will outline my main research ideas and how I will expand on them into a final production piece. I have 2 main ideas that I would like to explore before deciding on which one I will take forward.
Plan 1 Overview:
For my first idea, I want to further develop my 360 video of the photography studio. I would like to spend more time on the models and environment as well as add in MASH to have the backdrop area change to different themes.
I would like to use the MASH toolkit to have parts of the backing fade away and transform into different landscape environments that will act as backdrops to the camera.
Considerations and Expectations:
When developing this project there are a few considerations and expectations I have to be aware of for a 360 virtual reality experience.
- POV and directing the user – The player will be the main focus of the experience. They are there to act as a model of sorts within the experience, as the ‘camera’ is in front of them. To help set this narrative the player will enter the experience facing the camera, with the backdrop behind them. I can add in a voice over to tell then player what to expect. I can also have the studio start in a ‘neutral’ position (overhead lights on to light the whole area) so they player isn’t overwhelmed as they enter.
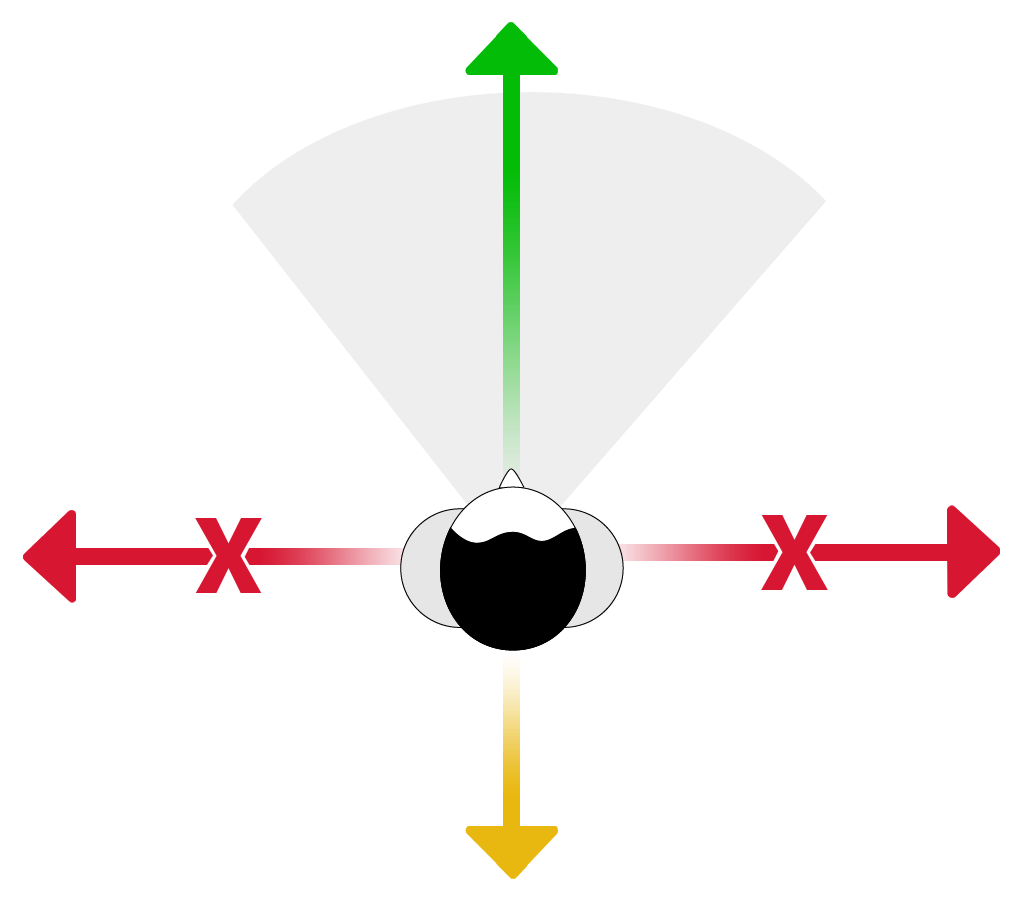
- Motion and Movement – The player will be locked into one position during the whole experience. They will be able to spin around and look at different parts of the scene. I will need to make sure that any movement within the scene (MASH) is in front or behind the player. This should help players who have motion sickness as any movement wont happen in the player peripheral vision.
- Light and Sounds – I intend to have lots of lights within my sequence with the setting being a Photography studio. However to make this experience enjoyable for the user I will fade in the lights I want to use for setting and make sure they don’t point directly at the user. I will also, make sure the area is as well lit as possible to avoid any discomfort. For sound, I will make sure any sounds used to help with the backdrop setting are at acceptable levels for the user to avoid any discomfort.
- Duration of experience and periods of use – The sequence is designed to between 1 to 3 minutes, this might increase as I test and iterate the project. It might also increase if I have time to include more backdrop scenes then I originally intend. By keeping the sequence to a shorter time frame I can make sure that the users aren’t using a VR headset for long durations of time that can lead to cyber sickness.
- The environment of the player (physical safety)– I have to take into account the users physical safety and how they might move within their own space. For this I will add in a disclaimer that asks the user to remain seated in a safe place before starting the video.
Concepting:
As I have stated before this is a continuation of my 360 test video. However I want to see what lights, colours and backdrop settings I can possibly create to have the most impact.
I initially used groups of 2 colours that are complimentary of each other. (Blue and Yellow and then Red and Purple) I can experiment with having these colours match the environments I chose as well as having the lighting setup of the studio change.

The main idea was to create flat light on the back drop with the user being the subject of the shoot in front of the camera. By having the lights position change as well as the colours I can set the scene of the user being in a photoshoot themselves.
Environments – Backdrop:
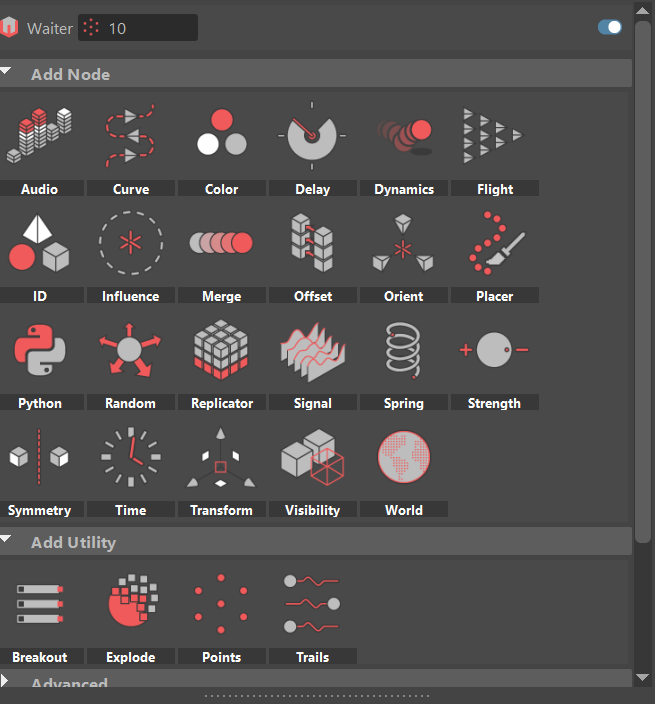
I intend to use MASH to have the backdrop and part of the studio fade away to reveal different scenes. Here I can use the Visibility, Delay and Placer nodes to set up the scene I have in mind and use the transform and signal nodes to add in animations and place them accordingly.
For my backdrops I am going to draw inspiration from some of my old photography work, Most of my work was around landscapes and I have 4 in mind that I would like to create as part of my sequence;
- Beach
- Forrest
- Lakeside
- Apartment /street
All of the backdrop settings I create will avoid any large changes in height and depth in the foreground to ease the player into the experience as well as use sound cues and lighting to make them appear realistic for the duration they appear. I can also have and audio cue to alert the user to the changing scene so they are able to turn around and see the environment change. This will help with motion sickness as they are able to experience the moving assets in front of them.
Storyboards:
I mocked up some quick storyboards to show how I would layout the scene and the main focal points that the user will be looking at each time frame. The Idea is to have the user turn around and experience the change in scenery, before facing the camera again.
Part 1 is setting the scene. Here I will introduce the player to what they are going to experience and how the scene will playout. It will mainly follow the same idea as the 360 camera test video I did with changing lights that reflect onto the backdrop.
Part 2 is where the player will first experience the change in backdrop. I want the new area to be contained in the backdrop area with some of the sand and water spilling over into the studio setting.
Part 3 is a continuation of the changing backdrop. More of the backdrop will filter into the main photography studio with foliage taking over the back cameras and walls.
Part 4 is where around half of the photography studio will have become an apartment after shifting from the forest setting. After this the studio will revert back to normal within the remaining 20 seconds.
Project Plan:
Here I will outline each part I will need to build or source to create my project and set out a rough development plan.
Model content:
With the scene being built in Maya I can use the existing camera test that already has a base that I can work from. Mainly I will need to work on the lights and camera set up to make sure they are somewhat realistic within the timeframe I have. I can also look into modelling some lighting tools and props that can help fill the space to give something for the player to look at as when they face the camera.
I can look into sourcing assets and using images to build up the main bulk of the background scenes. From there I can add in foliage and other details I would like to include to add depth to the scenes.
Sound:
Sound is what I want to cue the user into the changing environment as well as for setting the photography studio scene.
For the studio area I will need camera clicks, light switches which is something I can source these sounds and use FMOD to edit them. I will also need to source audio that is relevant to each of the backdrop scenes to make them as realistic as possible for the user to be fully immersed in the experience.
I will also record some voice overs to give the player some direction. For example, for the first part I can include some audio to have the player look at the camera and gently take them around the room.
Planned Asset Lists:
Photography Studio Assets:
| Asset | Creator | Integration |
| Camera Model | Original Asset | Camera is pointed at the player as they enter the scene. It is an integral part of the studio setup. |
| Lighting Structure | Original Asset | I can use the existing blocks in my sequence and develop them. They will be used through all scenes. |
| Studio Equipment | Original Assets and Sourced | Studio lighting props that will populate the camera side of the scene. Set up like a usable studio. |
| Computer | Original Asset | Background asset, Aim to add detail to existing block in 360 test video. |
| Background Assets | Original Assets and Sourced | Additional Assets that aren’t integral to storytelling but will help populate the environment. |
| Sound | Sourced | Edited in FMOD to be integrated in the form of audio cues in Maya or Adobe After Effect |
Beach Backdrop Assets:
| Asset | Creator | Integration |
| Rocks / Cliff Formation | Sourced | One of the walls of the backdrop will form a cliffside. Creates leading lines to the beach and sea. |
| Water Texture | Sourced | Used for sea. Can use existing texture map within Maya. |
| Beach Ball and other beach items | Original Asset | Add to set dressing to help set the scene. |
| Sand Texture | Sourced or Original Asset | Will be applied to ground to create beach. Might be able to create within Photoshop. |
| Sky Texture | Sourced | High quality texture that will be applied to the skybox that is outside the studio. |
| Sound | Sourced | Edited in FMOD to be integrated in the form of audio cues in Maya or Adobe After Effect |
Lakeside / Forrest Backdrop Assets:
| Asset | Creator | Integration |
| Water Texture | Sourced | Same as above |
| Sky Texture | Sourced | Same as above |
| Trees | Sourced | Will line the edges and populate the environment |
| Bench | Original Asset | Main focal asset within the scene. |
| Background Assets | Original Assets and Sourced | Adds detail to the scene |
| Sound | Sourced | Edited in FMOD to be integrated in the form of audio cues in Maya or Adobe After Effect |
Apartment Backdrop Assets:
| Asset | Creator | Integration |
| Sofa | Sourced | Focal point within the scene |
| Bookcase | Original Asset and Sourced | Will line the back wall. Will source or quickly make some books (Can use asset from VFX) |
| Wall Textures | Sourced | Sourced, Aim is to style the sequence as a studio apartment |
| Background Assets | Original Assets and Sourced | Makes the apartment feel lived in, additional furniture |
| Sound | Sourced | Edited in FMOD to be integrated in the form of audio cues in Maya or Adobe After Effect |
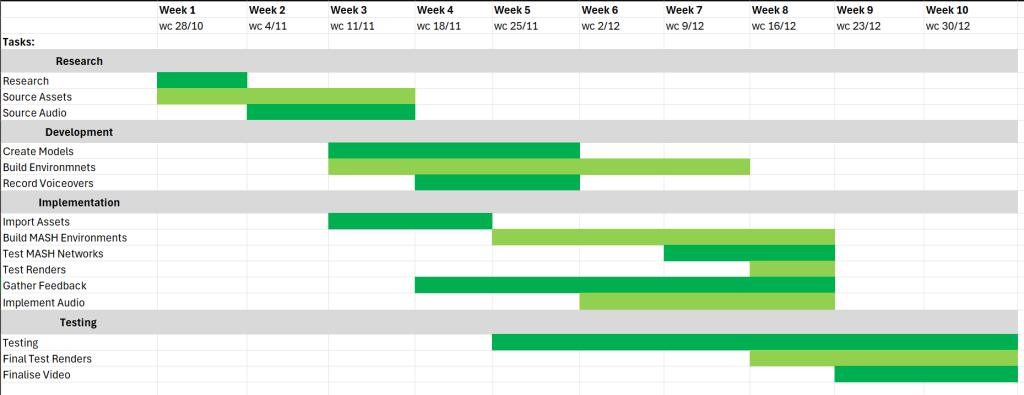
Development Plan:
Most of my time will be spent on build models and the environments I want in my scene and getting them to work with the MASH nodes. Whilst doing this I can test render parts of my sequence to see how they look at different points of development from the 360 camera.
The development of the project as a whole relies on myself completing each parts of the project before moving onto the next in a waterfall. There are some areas of development that I can complete in tandem like importing assets and building the environment. But that still requires me to sourced all of the assets and have completed my research.
Plan 2 Overview:
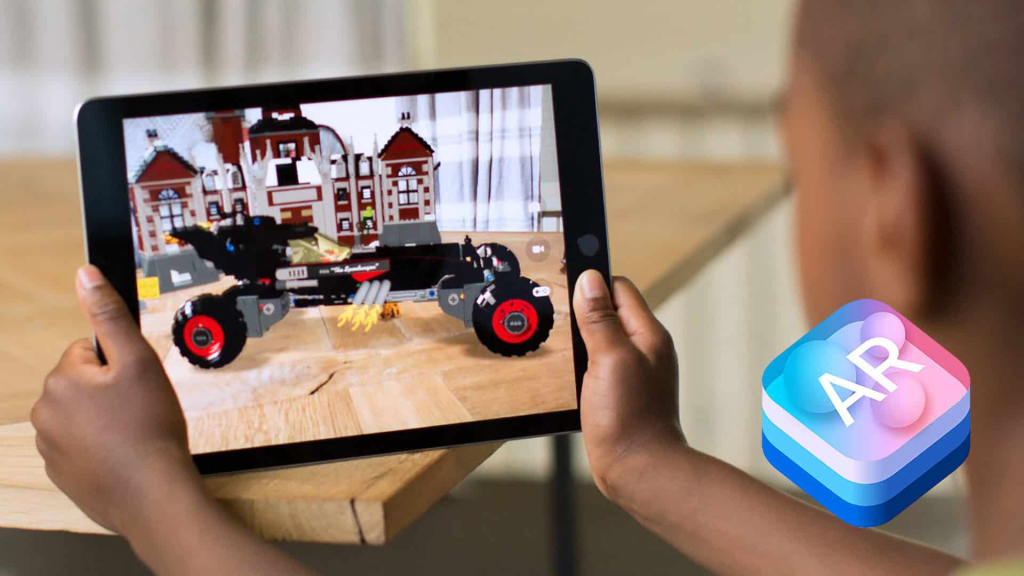
For my second plan I would like to use either Adobe Aero or Zapworks to create an interactive ‘treasure hunt’ using augmented reality.
I idea is the users will have to travel through an area to find clues that are viewable through a phone camera that displays them in the real world. These clues will eventually lead to a AR prize. The whole experience is designed to take up a relatively small scale area like part of a university campus.
Considerations and Expectations:
When developing this project there are a few considerations and expectations I have to be aware of for a Augmented Reality experience like this.
- Physical Safety – The player will be navigating the real world, so any objects I create and implement will need to not be obstructing the view of any hazards. I will also need to create down periods by spacing the clues out so the player has time to look away from their phone screen and make sure they are safe.
- UI and UX – The interface the players see will not necessarily be interacting with them. They will still need to be able to see and read any of the clues I have set up and eventually be able to see the end prize as well. I intend to test and iterate on the clues I want to build to make sure they are easy for the user to interact with.
- Text and Images – Similar to UI and UX. Any text or images I use for my clues have to be clearly visible to the player. It is widely used that text and images are viewable in the middle third of the users screen. It should also be at least 20 pixels big and between 1.3 and 3 meters away from the user. This should allow help with user visibility and help with consistency.
- Device compatibility and Technical considerations – With Using Adobe Aero and Zapworks I am able to use their software which is already compatible with a wide variety of devices. I still want to test on a range of devices to make sure that everything I include is viewable at a good scale.
Concepting:
The idea came from a soft toy that I have that I drew as part of my experimentation with VR software.
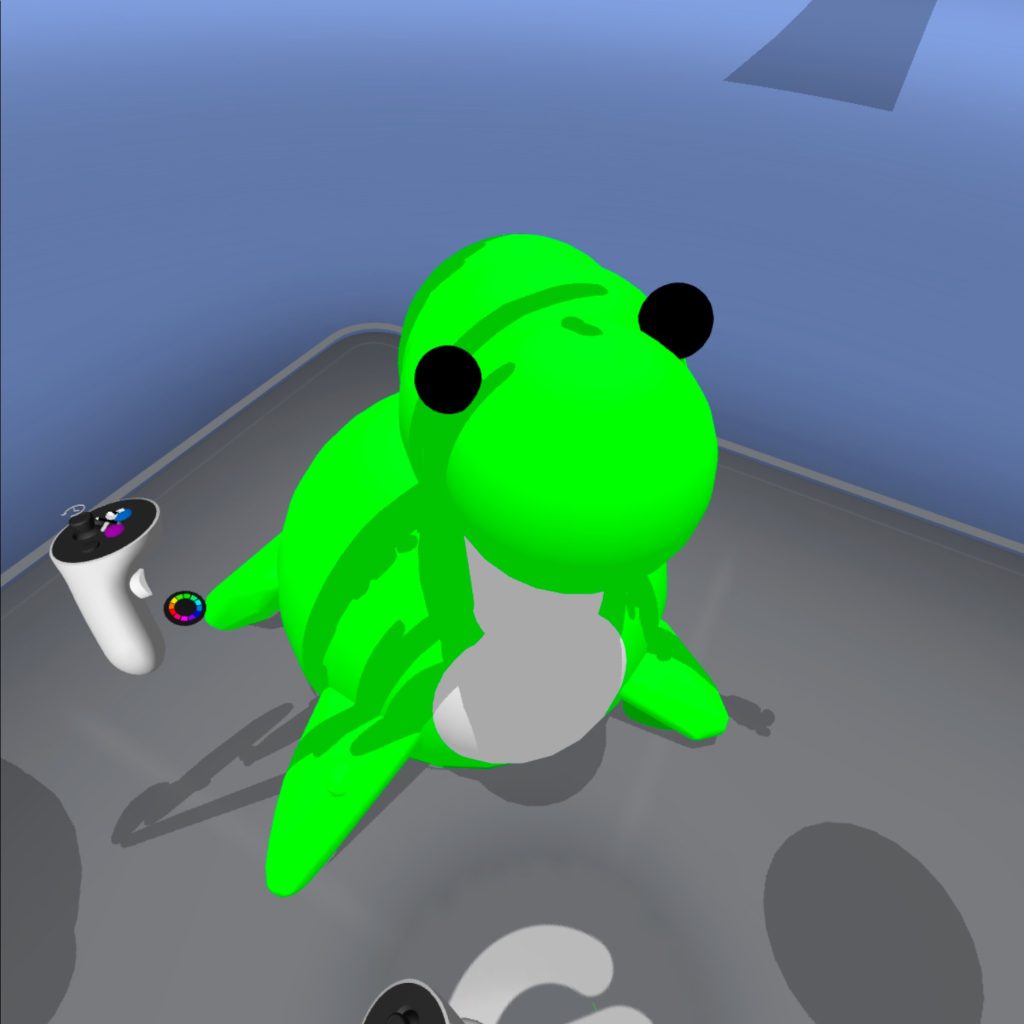
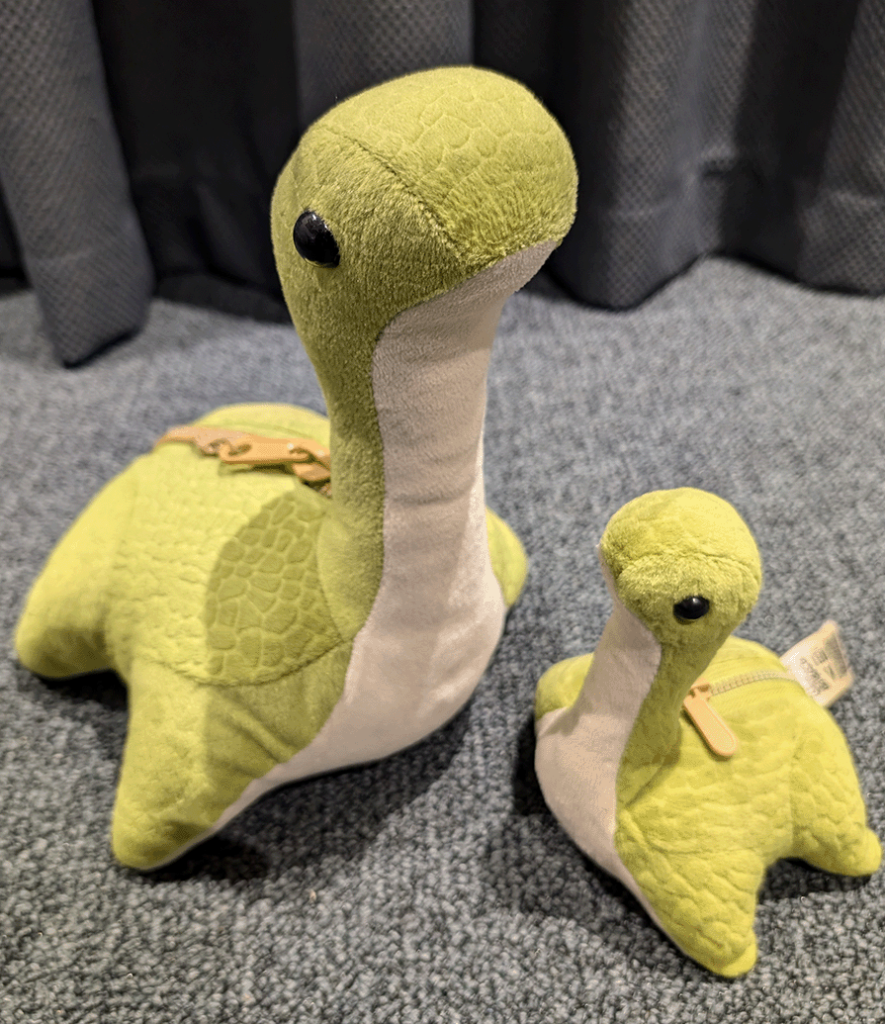
This is a ‘Nessie’ from the Apex Legends and Titanfall universe and series of games. Within Apex Legends these plush toys are hidden across the map in various locations. On the Kings Canyon map, finding all of these Nessie’s and shooting them in a certain order, allows the player to find an video game easter egg.
This formed the basis of my idea. I can have players walk around a small area hunting for different clues before eventually finding the final ‘easter egg’.
Project Plan:
Here I will outline each part I will need to build or source to create my AR experience as well as, set out a rough development plan.
Visual Design and User Experience:
For the design of the clues, I looked at some other successful apps and software to gather inspiration for the user experience. I have 2 main choices that I can use to integrate the questions into the AR experience.
Fixed to screen and marker based AR:
One option is to have all of the elements locked to the screen space or locked onto a marker that I can place in the real world (marked based AR -Zapworks). This would rely heavily on the users camera positioning as the experience would be locked to specific anchor or to the screen like a responsive website.
This could become a drawback of the whole experience as the user would have to angle their device in a specific way to get the full intended experience.
Object related (Adobe Aero):
The alternative is to have the text and UI attached to a particle object in the real world. This object / area can then act as a trigger or anchor for what I want to display.

This is what I want to do with the final object (Nessie model), as I can add in animations to the model and have it play out in the real world. If I went down this road I could have the clues attached to the builds I want the user to go to. This could eventually lead to a different QR code that has the final object attached so the players don’t find it too early.
Models and Text:
Text is something I want to source to make it fit the overall style of the experience I want to create. as for the model of the Nessie character I have a few options to create it;
1. Use model in gravity sketch and export to Zbrush to add detail.
2. Scan in real world soft toy and use that within the experience.
3. Build asset within Maya and export to Adobe Aero.
I would also like to look into adding a small dancing animation to the Nessie to make it more interactive more of a reward for the player.
This animation should make the overall experience more interactive for the user and hopefully make the player feel rewarded for finding it.
Planned Asset Lists:
| Asset | Creator | Integration |
| Nessie Models | Original Asset | to be made and exported into Adobe Aero. |
| Text | Sourced | Source text to use for clues. Will need to test visibility when viewed in AR |
| Images | Sourced | Same as above |
| QR Codes | Generated by Software | QR codes will be generated by the software I use, Form there I can print them out to place in the real world |
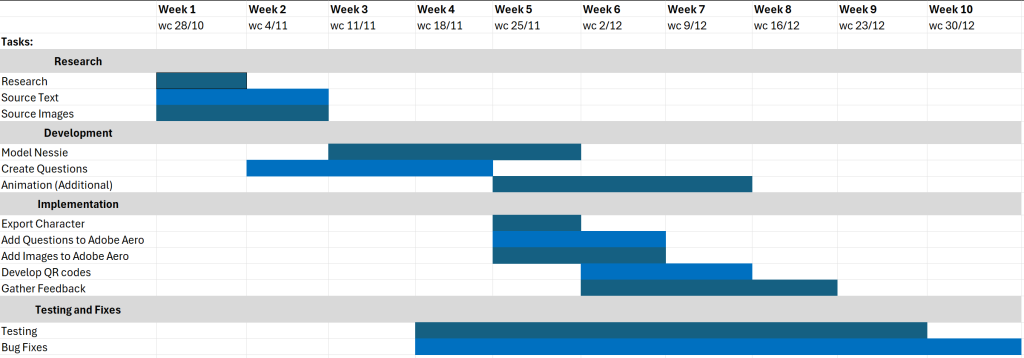
Production Plan:
I have set up my plan to be flexible so I can spend a lot of time on creating and implementing my models and questions. Once they are in Adobe Aero I can take the opportunity to test and see how each part looks in the real world.
Conclusion:
In conclusion I feel that my second idea is something I can complete to a higher standard within the small timeframe. The project itself allows me to be flexible with what I can add and the overall scope. Whereas my first idea relies heavily on finding the correct models and building all of the ones I cannot source quickly and to a high standard to make sure the setting is immresive.
I will also be able to test the project regularly, as I am able to use the University Campus as a testing ground for the project. This will allow me to see what it looks like in a real world setting to iterate on my design, to make sure that the user has a fun and engaging AR experience.
References:
Digital Camera World (2019) Studio Lighting Guide. Available Online: Photography Cheat Sheet: 24 Essential Pro Lighting Setups (thephoblographer.com) [Accessed 02/05/2023]
Reimagine FX (2023) Tutorial on the MASH nodes in MAYA [Video Series] Available Online: MASH | Maya | Arnold – YouTube [Accessed 27/10/2024]
Meta (2022) Planning and Shooting guidelines for creating a 360 video for virtual reality Available Online: Planning and shooting guidelines | Getting Started | Meta Quest for Creators [Accessed 28/10/2024]
Light Sail VR, Meta (2022) Diagram of movement practises for creating a VR experience [Image] Available Online: Planning and shooting guidelines | Getting Started | Meta Quest for Creators [Accessed 28/10/2024]
Interaction Design Foundation (n.d) What is Augmented reality? Available Online: What is Augmented Reality (AR)? — updated 2024 | IxDF [Accessed 29/10/2024]
Kirthyvasan, K. (2023) A beginners guide on designing augmented reality experiences Available Online: Designing for Augmented Reality : A Beginner’s Guide [Accessed 29/10/2024]
Derakhshani, D. (2021) Bringing Audio into Maya [Video] Available Online: FY24Q4 CC Individual AX uk en PRO Yendy Consideration PROS 15sInstreamSkip YouTube VID 16×9 NA NA [Accessed 31/10/2024]
Engine Creative (2024) AR user interface: Best practises Available Online: AR User Interface: Best Practices | News | Engine Creative [Accessed 31/10/2024]
Apple, Engine Creative (2024) ARKt, AR creative software [Image] Available Online: AR User Interface: Best Practices | News | Engine Creative [Accessed 31/10/2024]
Kaostheone (n.d) Nessie dancing GIF (Good Morning GIF) [Video] Available Online: Good Morning GIF – Good Morning – discover and share GIFs [Accessed 31/10/2024]