After looking into keyframes and finalising my animation ideas, the next step was to look into creating a working rig that could be used to animate a character.
Rigging Test:
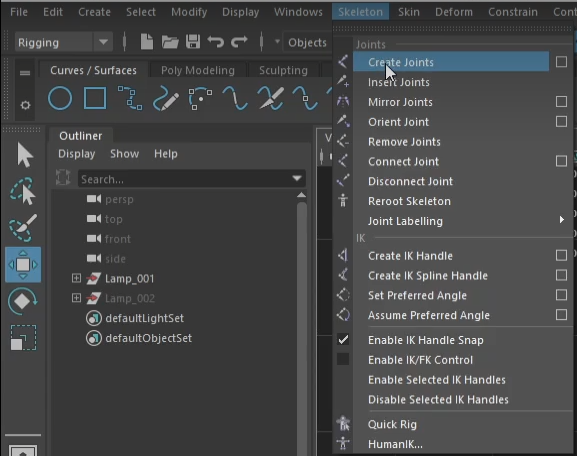
To start we looked at creating 2 different rigs that can be used on my character. These were built using some lamps and mainly were constructed by adding joints to the mesh by using the rigging tab in Maya.
With the joints in place I could move onto connecting them to the mesh and adding in some curves as controllers to control the movement of the lamp mesh.
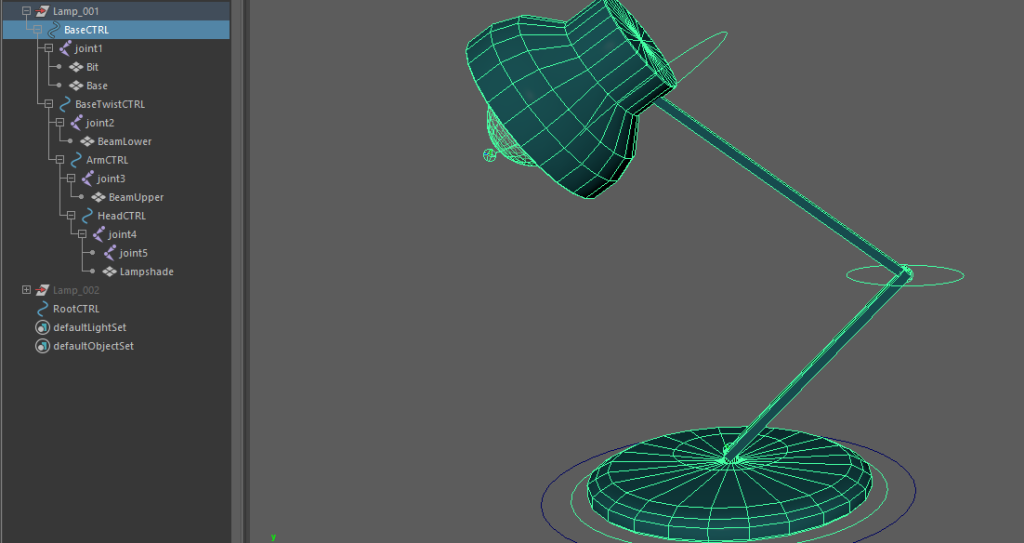
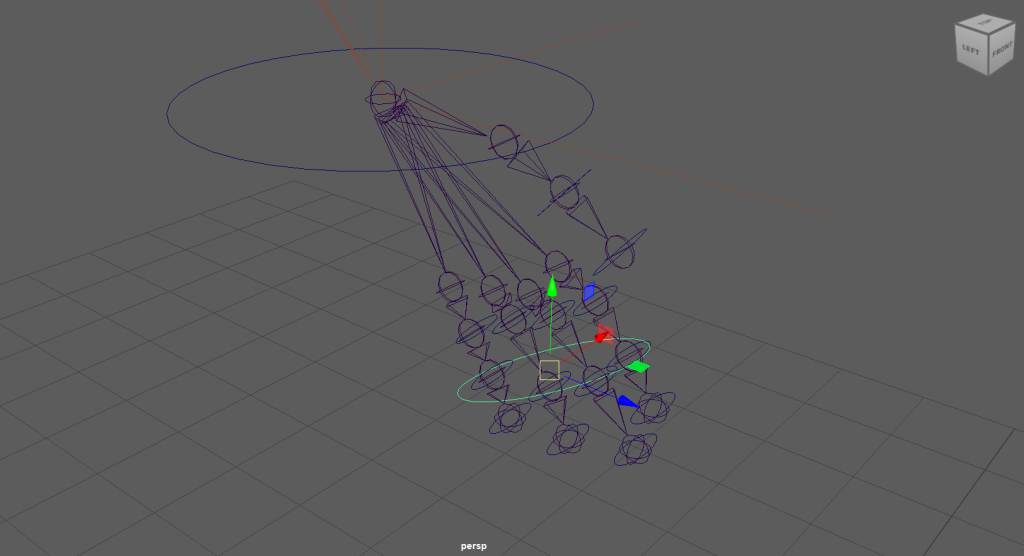
FK Rig –
FK or forward kinematics is one of the main forms of rigs that is used to move characters. It means that if you move one bone in a FK rig all of the connected bones move with it from that point.
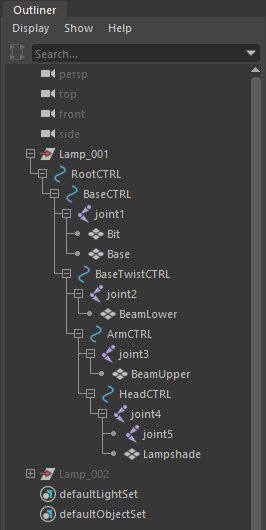
The bones are created using the rigging submenu, from there I can begin to add bones in the main areas of movement. These bones will control the translation of the mesh when animating. I can later add some curves to create some controllers that will be used to move each of the bones and for key framing.
With the bones attached I can lock some of the transformation scales so that each part of the mesh only moves in a realistic way. for example, the head of the lamp only needs to rotate up and down and side to side. any other movement would be covered by the rest of the lamp.
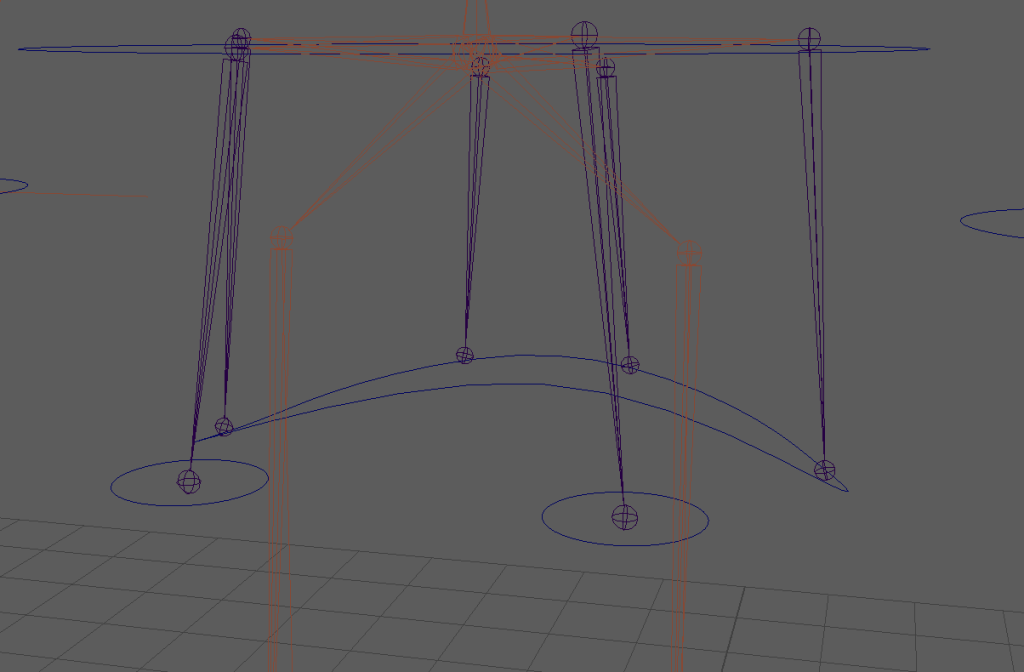
IK Rig –
IK or inverse kinematics, is the other type of rig that can be used to animate, This uses mathematics to work backwards. Usually the end points are what is moved as this moves all of the bones before it to create smooth arcs.
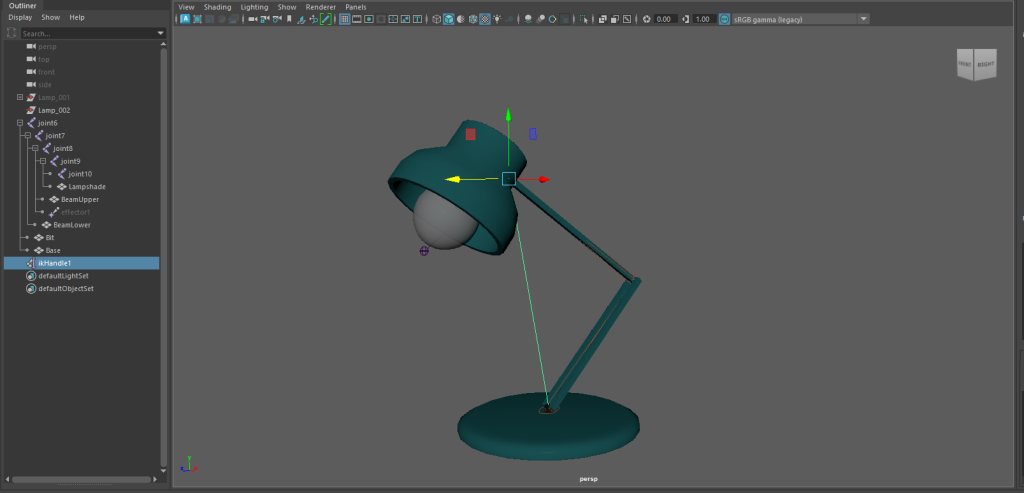
The overall rig structure is different as an IK rig works differently and affects the joints differently.
Using the same process to add in joints and the controllers, it uses the addition of an IK handle, this is the main difference between IK and FK and helps the the joints move together to create those arcs of movement.
Rigging the Character:
To start I had a look around on Pinterest and Artstation to find some character rigs that were similar to my character.
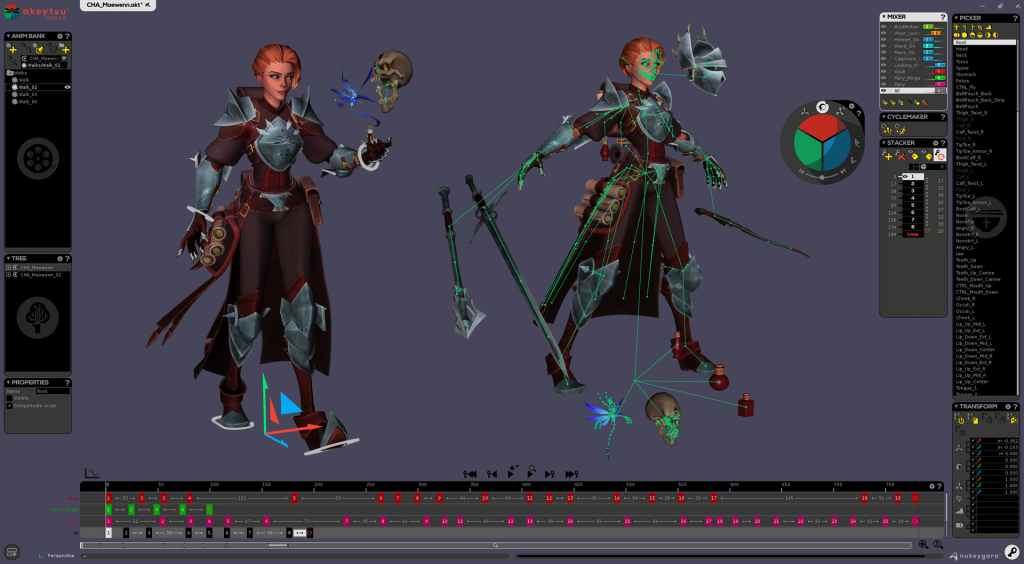
This was one rig that was similar in design to my character and something I can use as a loose guide when working on adding bones and controls.

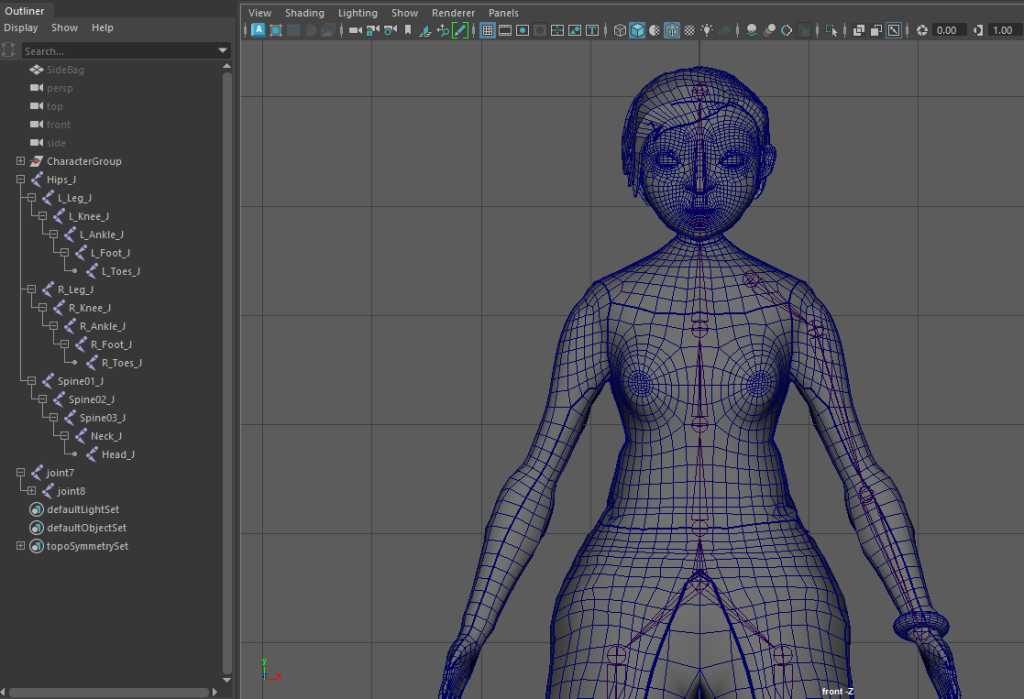
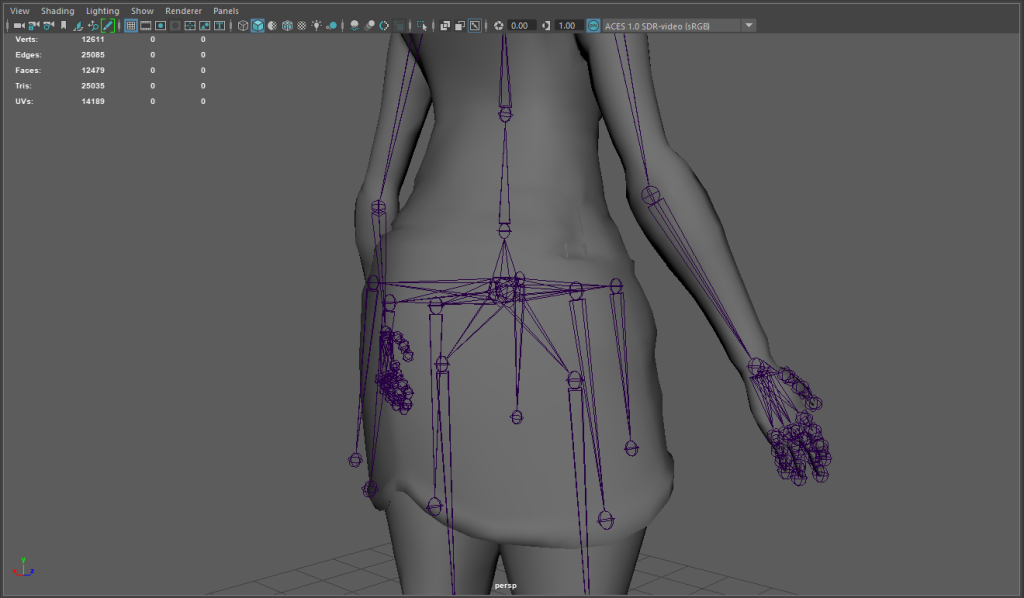
Using the Rigging I started to add some bones to my character, Starting with the legs. The process is the same to how I added bones to the lamps to create a basic rig. With this rig I will later be able use weight painting to define which areas of my character mesh are affected by each separate bone.
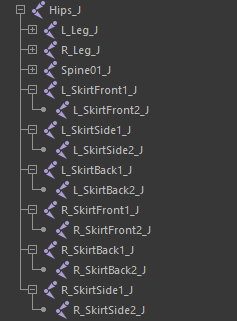
Each bone has L_ followed by a name for the area it affects and _J for joint. This helps define the area it affects as there are a lot more bones within this character mesh compared to the lamp but also when mirroring areas.
As demonstrated in the video below I can copy across areas I have already added bones too. From here I can swap out the L_ (for left) for R_ (right).
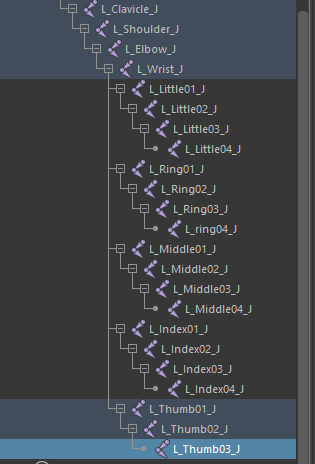
After tidying up the legs I moved onto the main body and started the process for the arms and hands. I can use the same mirror process I used for the legs here to copy them over to the right hand side.
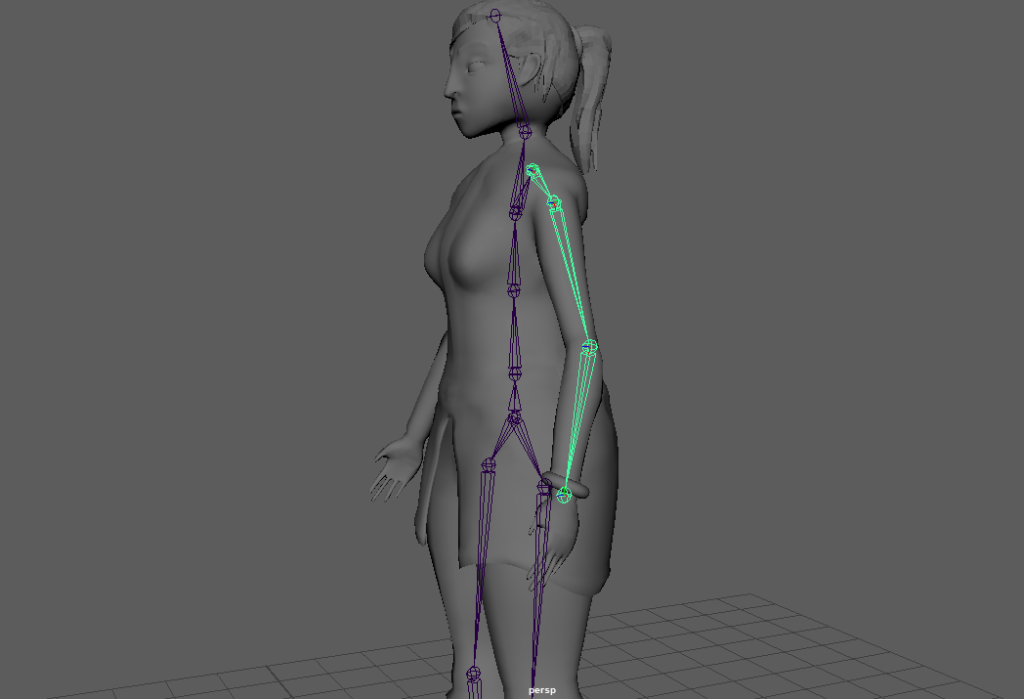
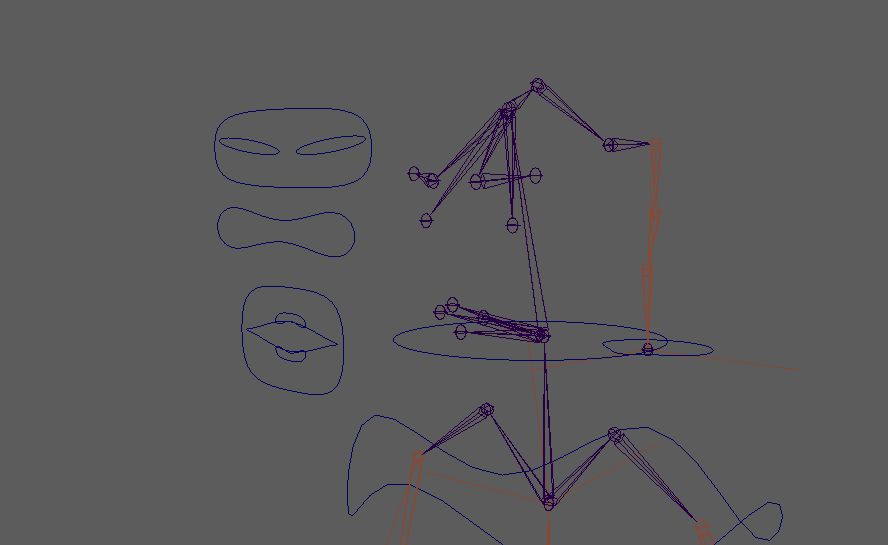
After the hands where added I worked on areas of the Mesh that would also have some movement within my animation concepts. These areas aren’t as important as the main mesh but are affected by the movement of the character so will have bones added to create some realistic movement within animation.
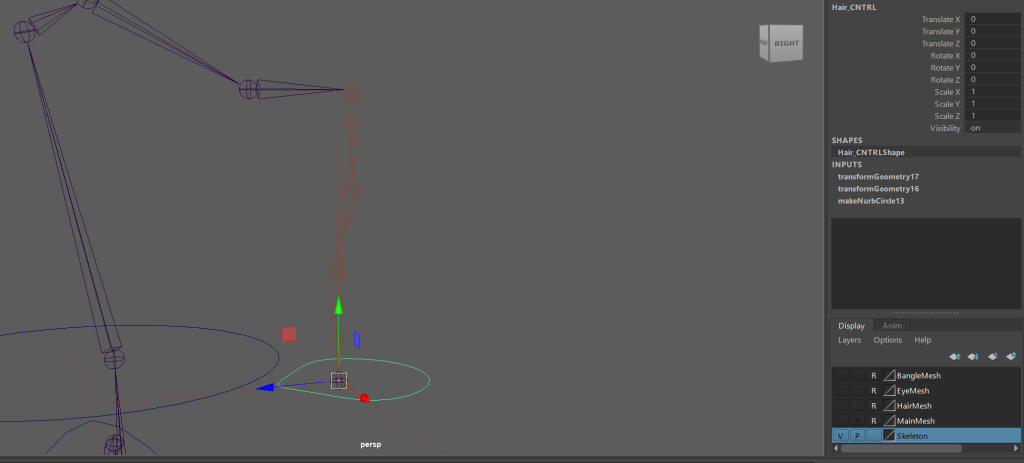
I then worked on adding in some bones to the ponytail. I can tie this to the hair mesh to get some nice swing in the walk and attack animations.
Finally I added some bones to the cloak, The areas that overhang the legs needed some extra bones adding to make sure they deform and react realistically to leg movement.

Rig Handles Setup:
Now with a finished basic rig I can begin to add in some handles and controls, as well as begin weight painting to get the character to move.

I started with some IK handles for the legs and arms of my character. These handles will help with the movement and positioning of the whole leg and arms. The handles are created in a similar process to the normal joints (through skeleton, IK Handle). I was then able to select the bones where I needed it.
For the Legs they run from the hips to the ankle and for the arms, they go from the shoulder to the wrist.
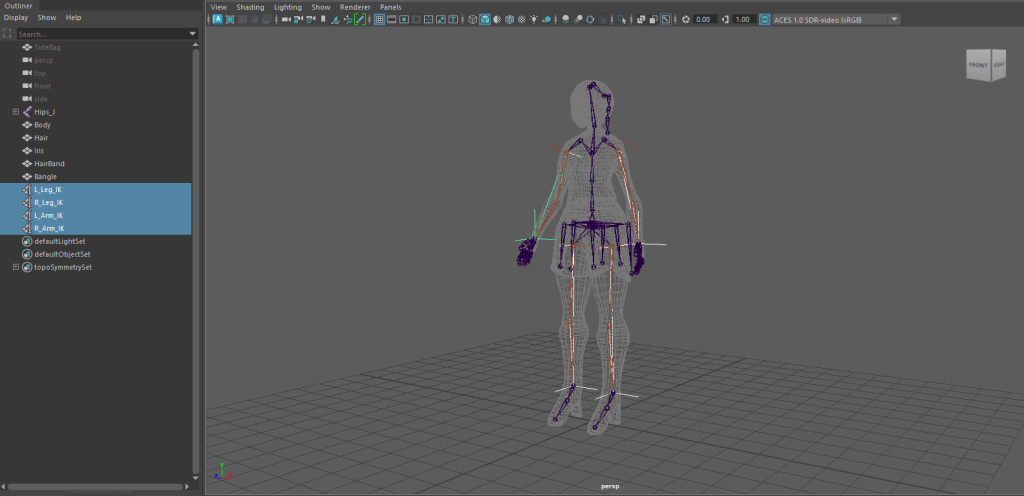
From here I added in some NURB curves to act as controls that I can move with my mouse to control these handles and joints ready to animate.
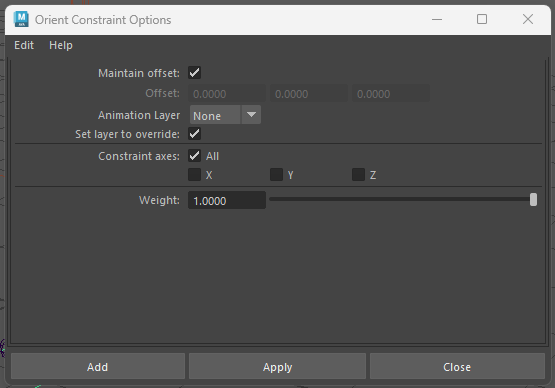
These controls have some constraints attached. (Constrain tab in Rigging Menu) These constraints attach the rig to these controls and will help influence the bones and IK for movement, as demonstrated below.
Mainly I used orient and point, these mainly connect the bones translate and rotation values to the control.
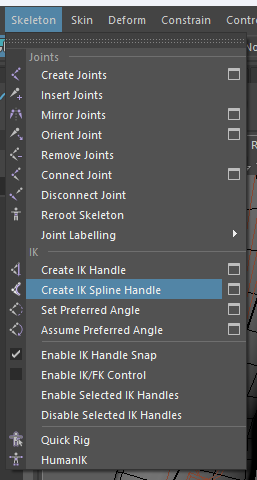
Next I worked on the chest and main body of controls. This started with adding a IK spline handle that will act as the main spine and connect the main controls.
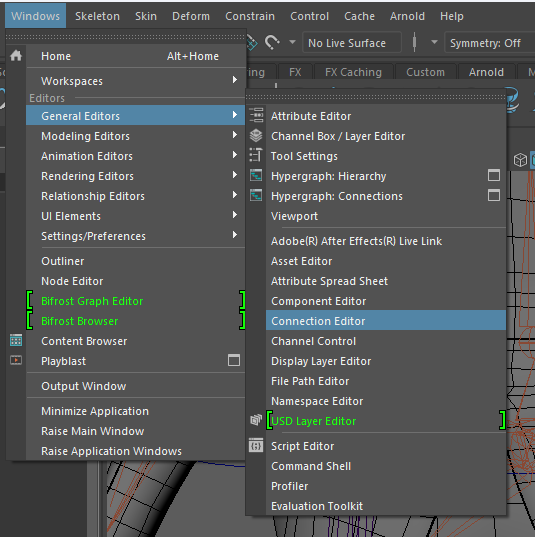
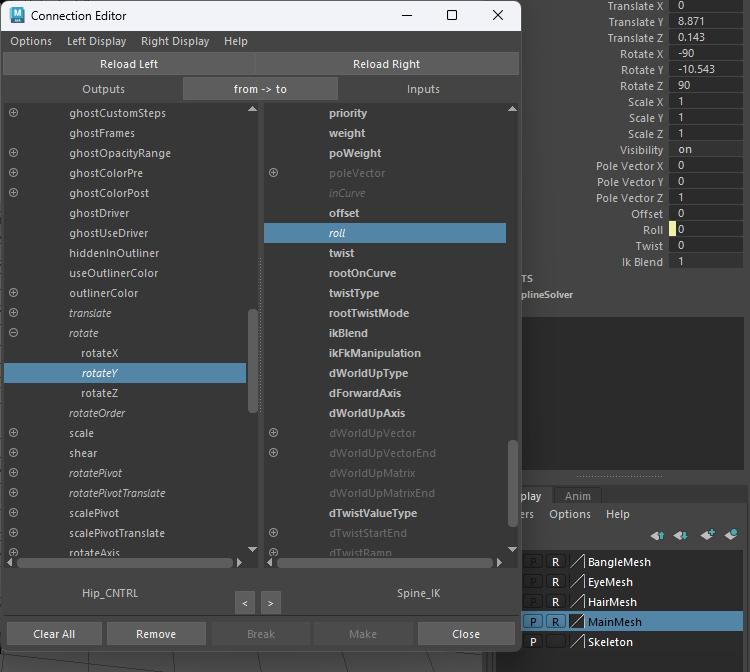
The spline IK has some extra things we can manipulate with the connection editor, by adding roll to the Y rotate of the hip control and twist to the Y rotate of the shoulder control it creates adds more movement options and control when animating.
Finally I added the neck control and parented the neck and shoulders to the hips that when when the hips move all of the controls and joints move with it so it will make it easier to control.
All of the controls I add can be parented to the master control that will move the mesh as a whole.
With the main controls in, I worked on adding some other joint controls that will give me control over less important areas to add some detail and character to my animations.
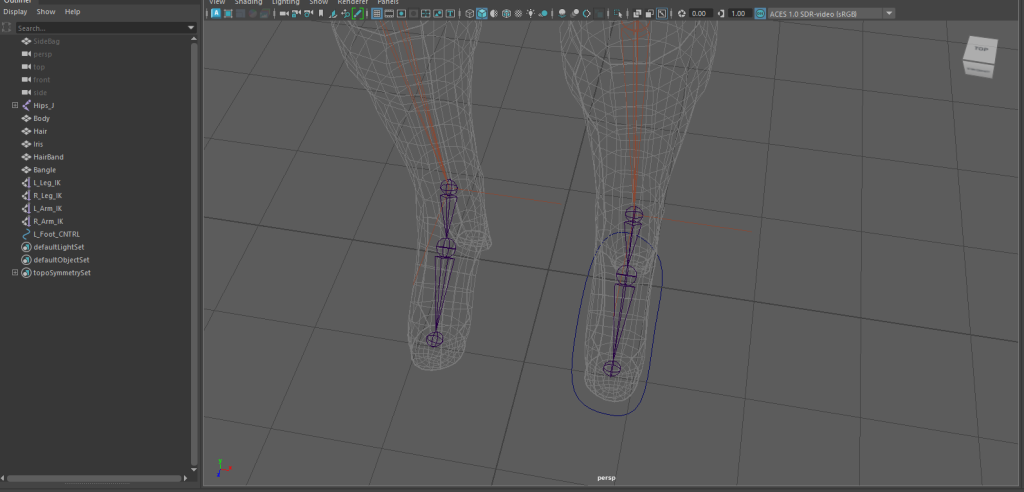
I started around the legs adding some controls for rotation of the toes and ankle before adding a control for the skirt.
Next I worked on the hands. I needed the hands to be able move independently of each other to have some dynamic movement for the book animation. But, also rotate at the same interval so they can grip the staff.
I did originally test an idea where I would have a control for all of the joints (image below). I did realise that this wouldn’t work as I wouldn’t get the individual joint movement I wanted. From here I looked into adding driven keys.
Driven keys can be added to key some variables to certain positions, simply by changing a value. I set up a driven key for each individual finger setting the bounds between 1 and 0.
From here I can specify what controls the key will effect and set the starting position for each of the keys.
I can then rotate the controls and key it again at a value of 1 for each finger to finish the set up of the keys, before moving onto the other hand.
Next I added an IK handle for the hair so it has so that I can add some secondary movement within the attack and walk cycles. I also added some joints and controls for the face that will be seen later when I add weight paints to the face.
Finally I parented all of the controls to a Master control. So now when I move that master control the whole rig and its controls move with it.
Weight Painting:
Adding Weight Paints to my character will basically tell Maya what bones and joints interact and move each part of the characters body, As well as, how those parts are influenced by other bones and their connections.
I started with a test on the skirt, looking at the influence it had on the mesh and getting used to the tools. I mainly used paint, add, smooth for painting on and removing areas of influence for each of the bones and the select and paint select tools to highlight different areas.
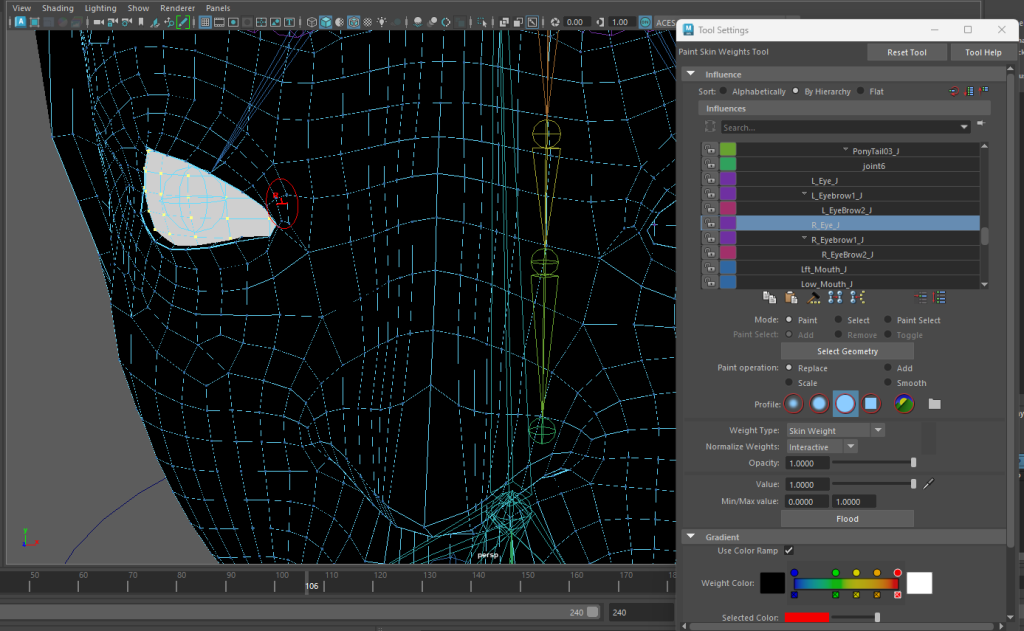
I then started properly, with the head sorting the influence of the ponytail joints before moving onto the main head and face. The main issues where around the neck and chin areas, where parts of the body or hair had influence that stretched the mesh when moving the controls.
I then looked at the eyes using the vertex select tool to highlight the whole eye and flood it with a influence of 1 for each eye joint. This means that only those joints will have influence over the whole eye shape.
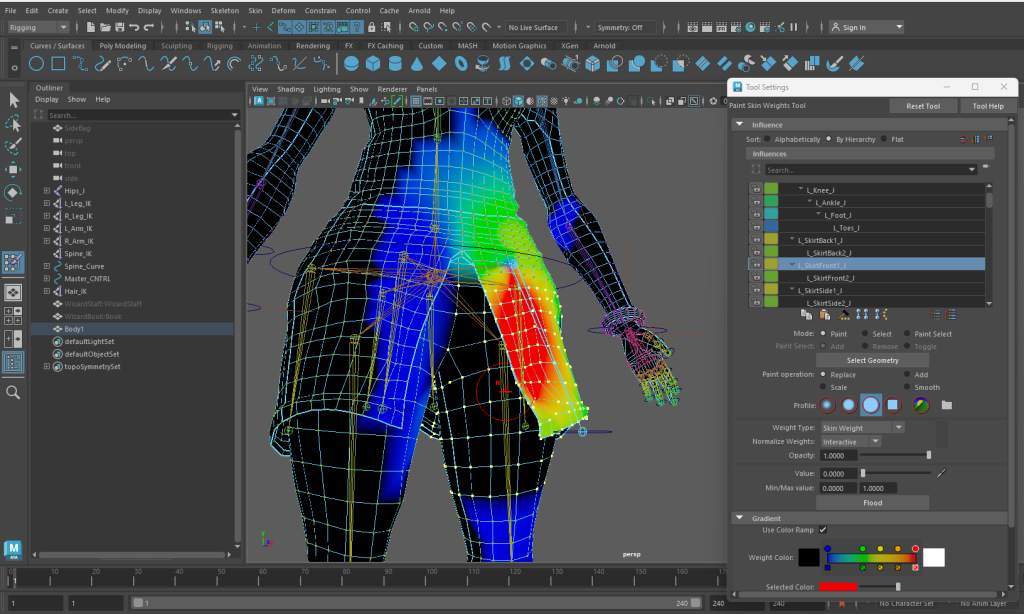
I then worked on the legs and skirt. I started by moving the controls to an extreme movement point by moving the joint controls. For the skirt this tended to be up and away from the body and, for the legs I had the character almost crouching. This allowed me to get a good idea as to where the mesh was deforming and what parts need more or less influence being added or removed.
I then mirrored the influence over and used the smooth point operator to smooth any edges or discrepancies each joint had after being mirrored to the other side of the mesh.
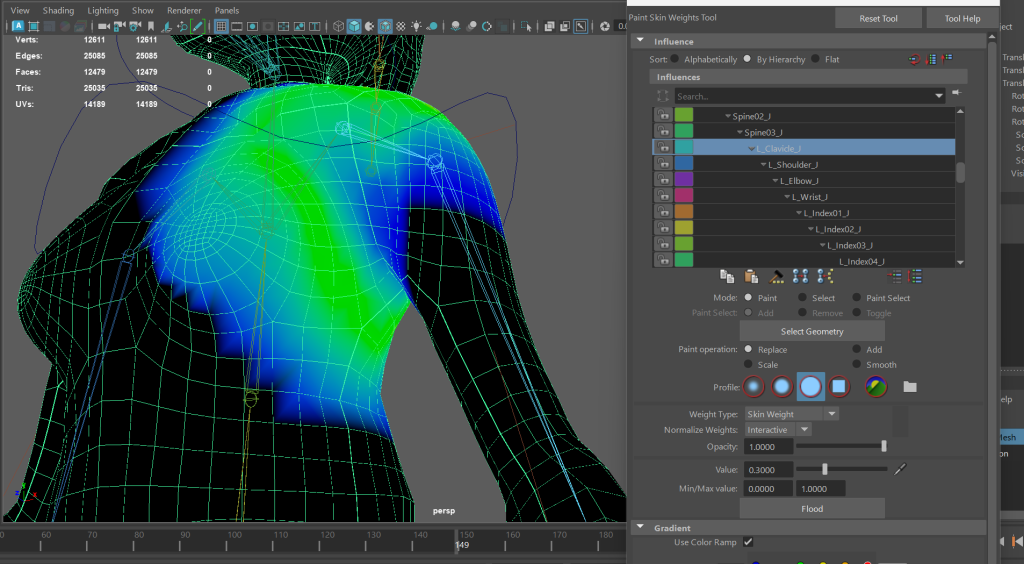
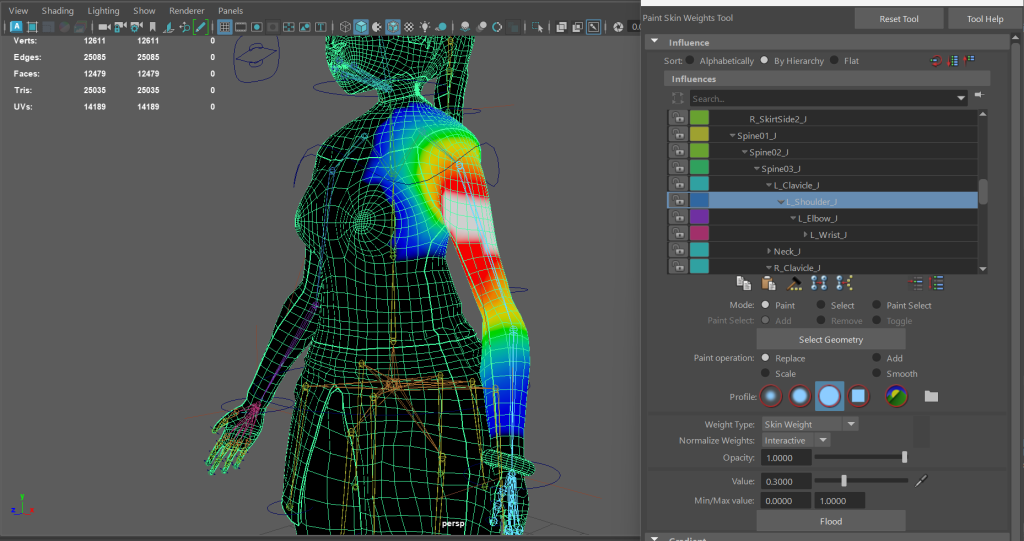
I then began work on the chest and arms. The chest area was relatively okay, I just had to tidy up some of the joints influence and remove the connections the arms had to awkward parts of the body that meant parts of the chest mesh stretched when I moved the arms.
The arms where an area I spent a lot of time on, I wanted to make sure that each part looks as realistic as I can get it. I had to remove some areas where the auto weight paint that Maya did attached parts of the arms and fingers to parts of the body. This stretched some parts of the body whenever I moved the arms.
However once that was sorted it was a case of painting and testing to see what area looked like when it moved and contracted
Once I was happy with the arms and fingers. I used the mirror skin weights to mirror what I had done to the right side. It is here where I had an issue. For some reason Maya deleted all previous weight paint from the elbow down on the right side when I used the mirror function.
I solved this by and some basic weight painting the affected areas so that each part had influence over the model again, I then re used the mirror function and that seamed to solve it. From there I just checked nothing was out of place and smoothed out some areas of the mesh
References:
Beschet, E. (2020) Battle Mage Character Model Art. (Artstation) [Image] Available Online: ArtStation – Maewenn, Etienne Beschet [aka Vexod14] Accessed [28/03/2024]
Academic Phoenix Plus (2019) Creating a 3D character rig for beginners [Video] Available Online: Rigging for Beginners: Painting Weights in Maya (youtube.com) Accessed [30/03/2024]
Academic Phoenix Plus (2019) Creating a 3D character Rig for beginners – Rigging the hands in Maya [Video] Available Online: Rigging for Beginners: Rig Hands in Maya (youtube.com) Accessed [17/04/2024]
Autodesk, Maya (2024) Weight painting GIF [Image] Available Online: Maya Help | Paint skin weights | Autodesk Accessed [15/04/2024]