Using some of my top down concepts as a basis to help me layout my world, I started to model and build up the environment and collect the assets I would need to populate and add depth and to the environment.
Landscaping:
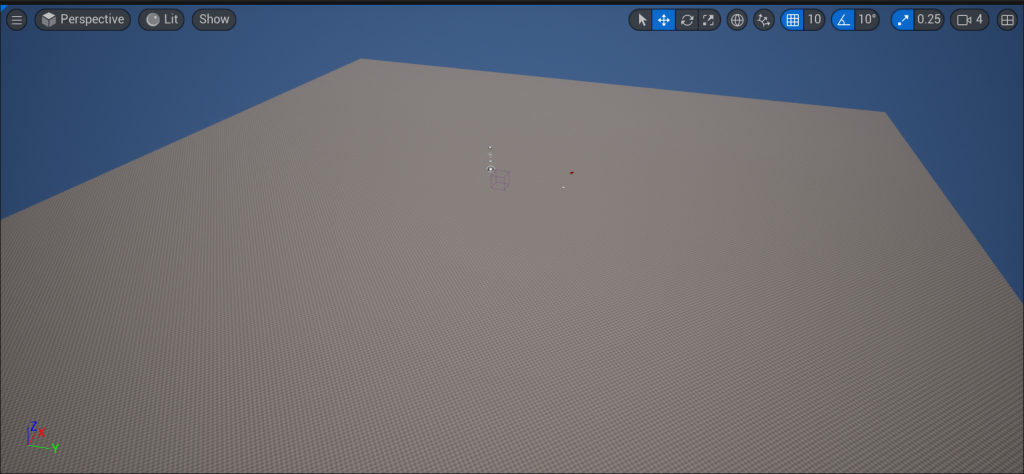
To Start I created a first person environment and removed all of the basic starter scene content. The I selected the landscape tool and created a 25 by 25 by 100 landscape that I could then sculpt and mould using the present tools available in the Unreal Engine.
To get a basic layout of the mountains and higher areas I used the sculpt tool which gradually raises an area of landscape to a desired hight when it is selected. Erosion has the opposite affect and lowers the landscape which made it useful to create my lake for the environment
Textures and Materials:
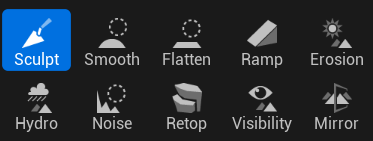
With the basic landscape set out, I started to create a material that I could use to paint the landscape. This material would be plugged into the landscape painter and provide Unreal with all of the Textures I need for my environment from grass, rocks, pebbles and leaves.
The Materials where all sourced from Quixelbridge, A tool built into Unreal that provides downloadable assets, materials and textures for designers to use.
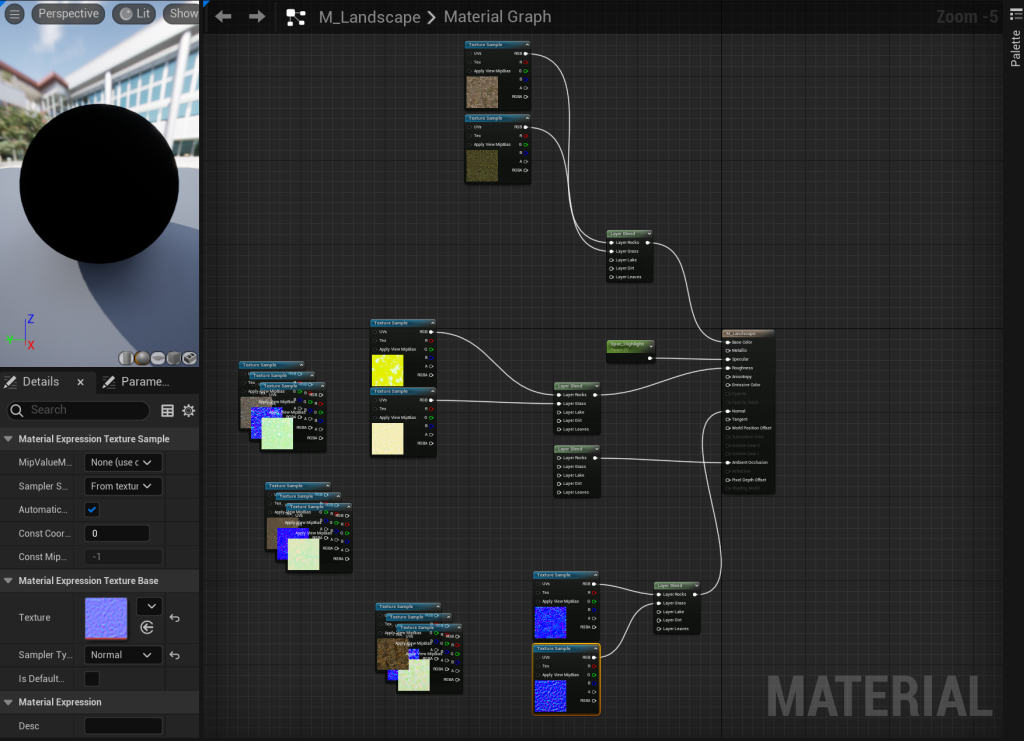
With the Material set up and added to my landscape, the base material showed up on the ground, however it was tiled and can clearly be seen as such which isn’t a good look for my environment.
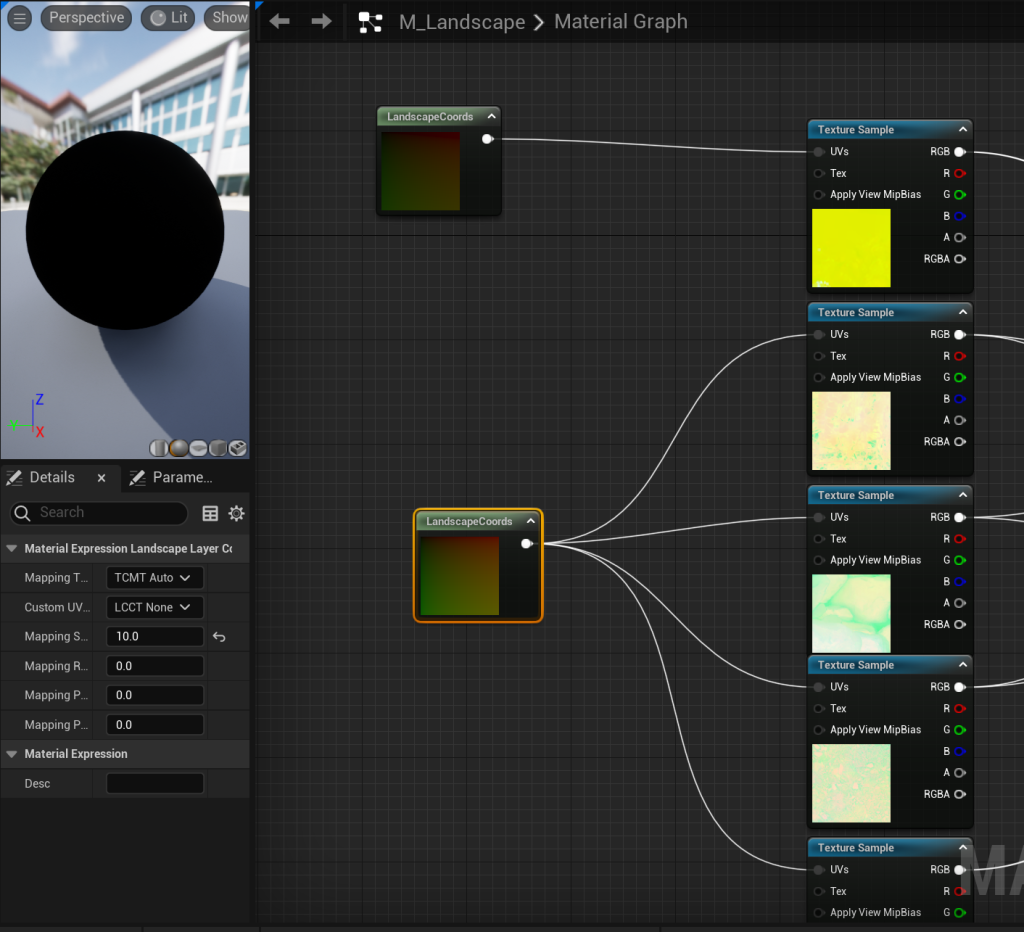
So by plugging in a landscape co-ordinate into my texture samples for base colour, normal, ambient occlusion and roughness. It allowed me to scale all of the textures I used by as certain amount so they appear less tiled, this was a trial and error process as some of the textures needed to be scaled by a higher amount than others so I used multiple of these landscape co-ords to make sure that each material looks professional. they will be further broken up when I add in rocks and foliage to my environment, so some tiling isn’t a problem at this stage.
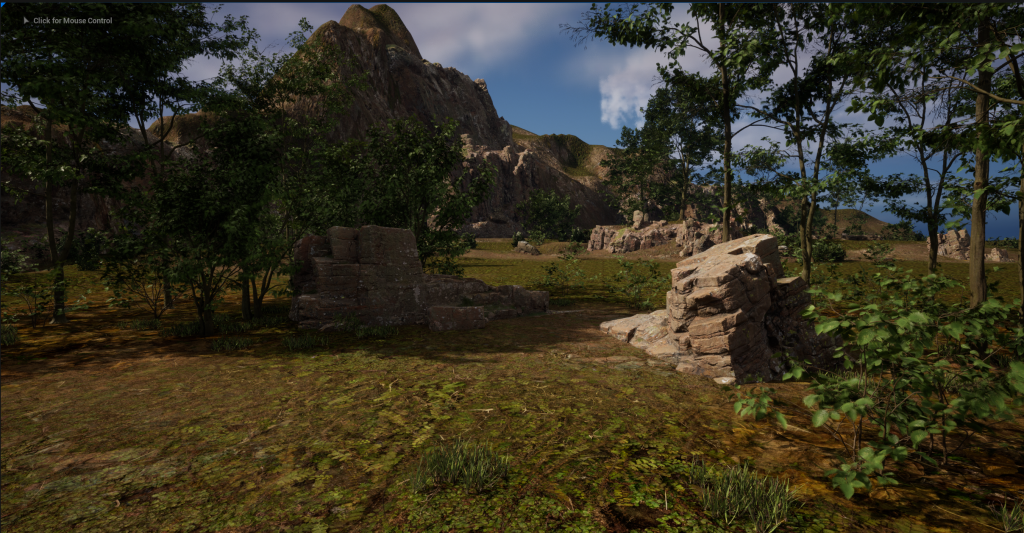
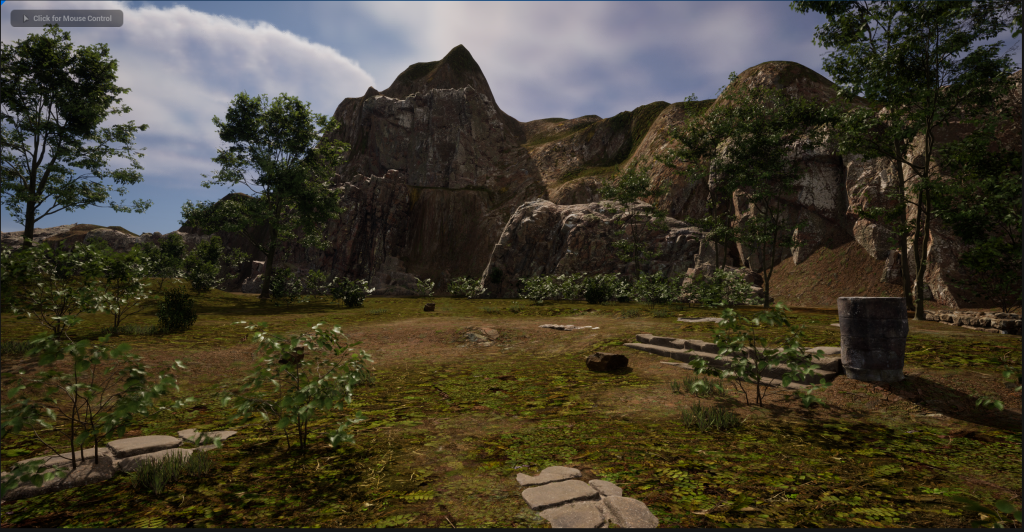
Once I had some correct Landscape scalers set I could move onto add the materials to the environment. I used the same base material for my sculpted hills and mountains as is seen on the imported landscape rocks in the scene. I then built up using peddles for the shore around my lake and large patches of dirt and grass where the landscape is more flat. I also plugged in a fallen leaves material that I will add to the landscape when I have placed my foliage.
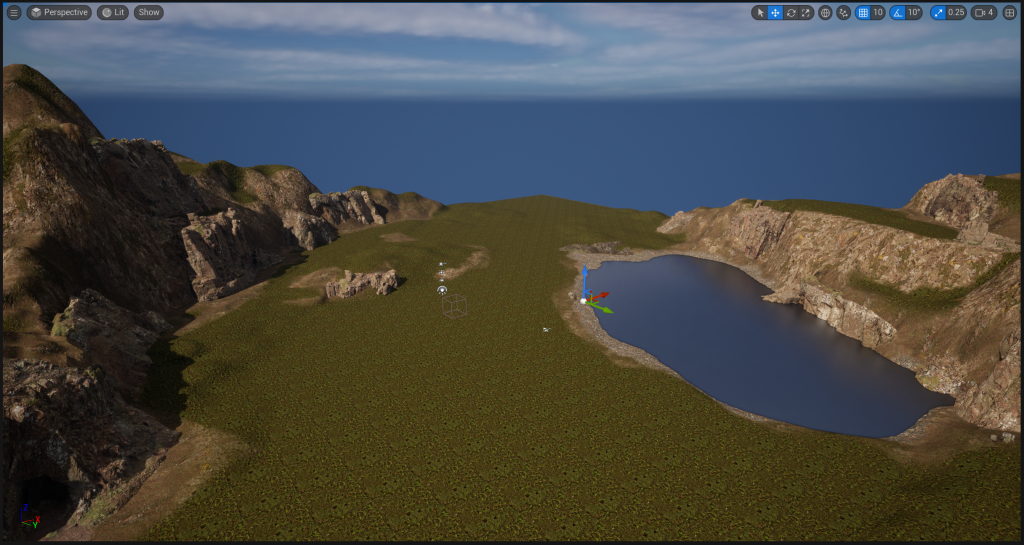
With my landscape now looking more realistic I could move onto adding foliage.
Adding Foliage:
For my environment and asset I went with Fantasy and Decay / Corruption. I wanted to highlight how this environment has decayed over time and succumbed to nature through my use of foliage and derelict buildings.
Using assets from both Quixel Bridge and the Unreal asset store I was able to download some high quality trees and foliage to populate my environment with. Using the foliage mode I could drag and drop which assets I wanted to use from the content browser into the foliage window. From there I was able to edit the spawn rate of each individual piece of foliage and the spacing of them to create the desired affect I wanted.
I was able to add in rocks, trees, grass and bushes into the environment quickly and edit them to make sure the environment I was creating was what I wanted.
However I did find that because I had some very highly detailed trees in my environment. too many of them in one place would make the camera lag slightly, so for now I am having to be sporadic with my placement until I can find a resolution.
The Issue was linked to the processing power of the Computer I was using in the labs. When moving to a more powerful computer I was able to add more trees and add more foliage to the environment without any lag
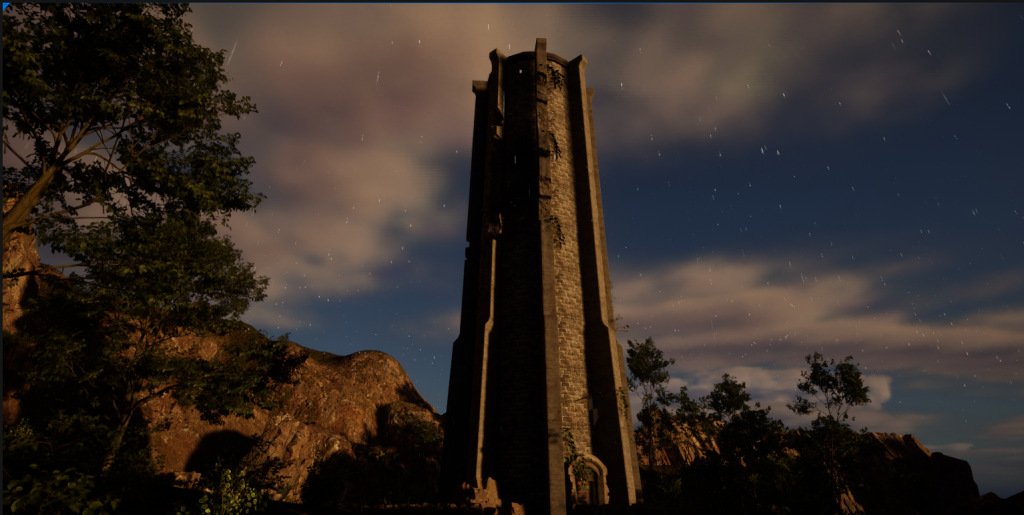
Buildings and Other Additions :
The brief states that the environment we create must contain a building and its surrounding environment. This is something I struggled with as I couldn’t decide as to what type of structure I wanted to place within my environment.
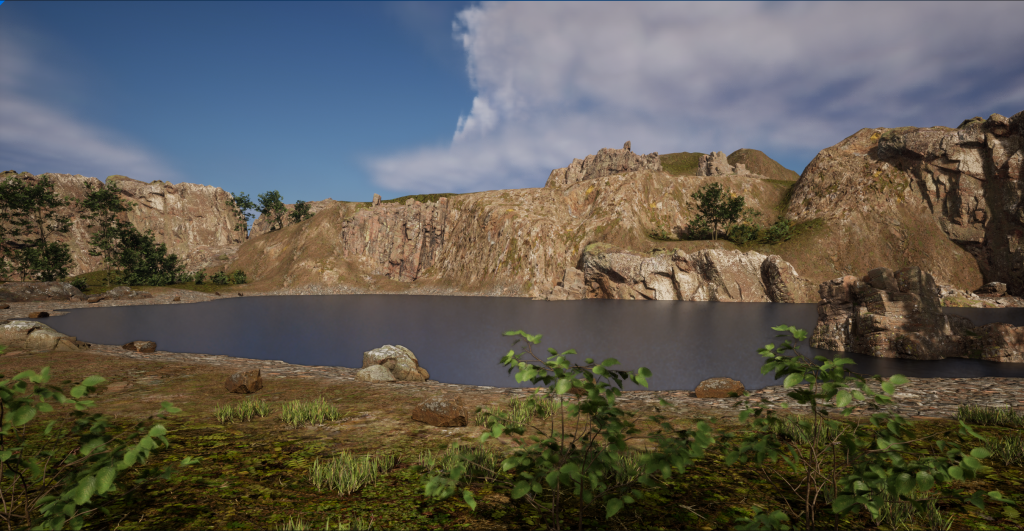
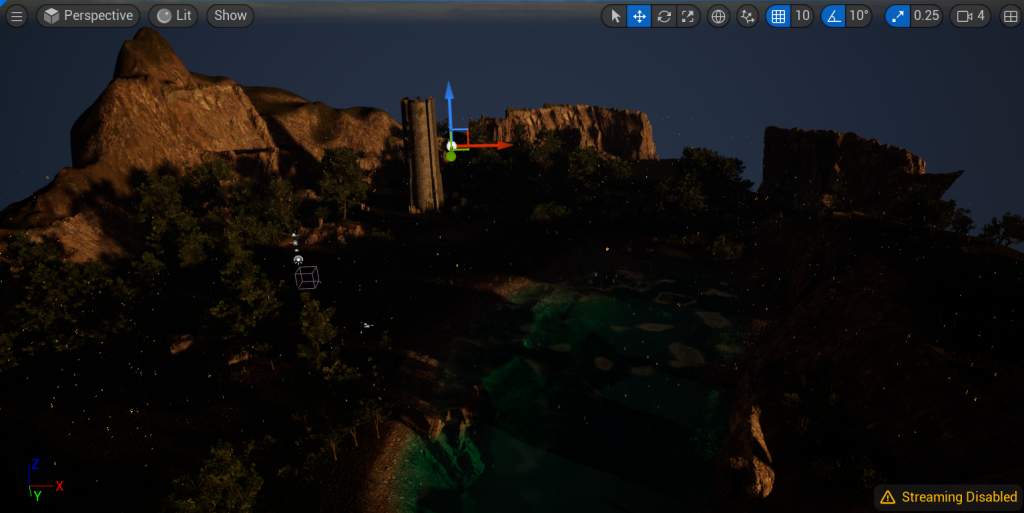
Eventually I settled on creating a lonely tower, and adding some vines and foliage around it to make it look abandoned and decaying. With my sword being my interpretation of the ‘Sword in the Stone’ and my environment referencing other myths and legends from the same stories, I thought the tower could have been Merlin’s tower and my environmental story telling will need to reflect that.
From there I went to editing some parts of the environment, I angled the point light to change the time of day to early morning to add a orange hue to the lighting and create some darker shadows in clusters of trees.
I also edited the water material I applied to my lake from the basic unreal lake to one I created.
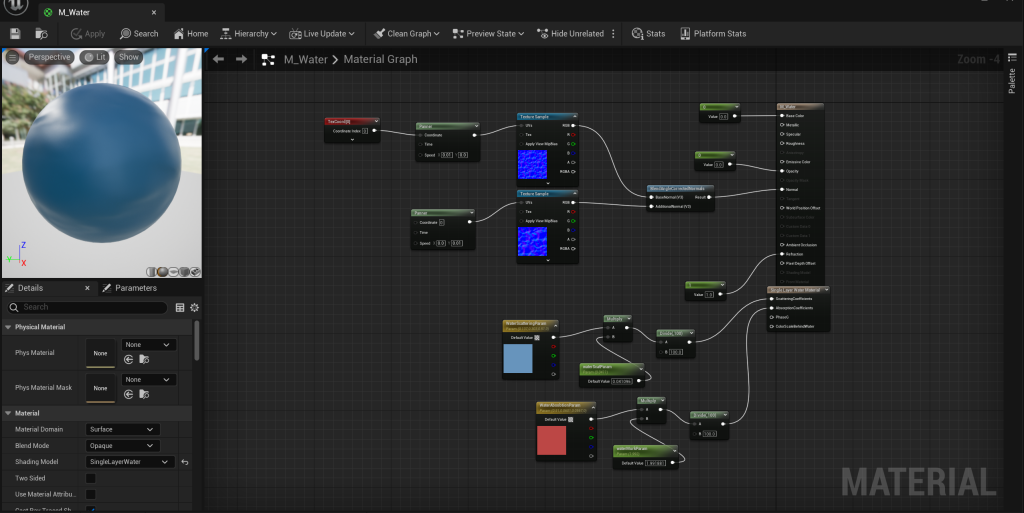
Using the Single Layer Water shader in the material details. Underneath the material output I created a single Layer water material output where I was able to plug in some parameters with a multiply and a divide value into the absorption and scaling coefficient. The red colour means that any red light in the scene will be absorbed by the material making lower a depth under the plane will appear darker as the more red light will be absorbed. the other controls the base colour of the water to give it a hint of blue as it scatters the light beneath the material.
Finally using some of the base water normal maps that are part of the starter content, I was able to use those to make the water appear as if it has some movement to it rather than it looking like a flat plane.
Particle Affect:
I also created a particle affect to create some light rain. I used the Niagara system in unreal and manipulated the fountain pre set to create a rain affect that collides with the ground and other objects within the scene.
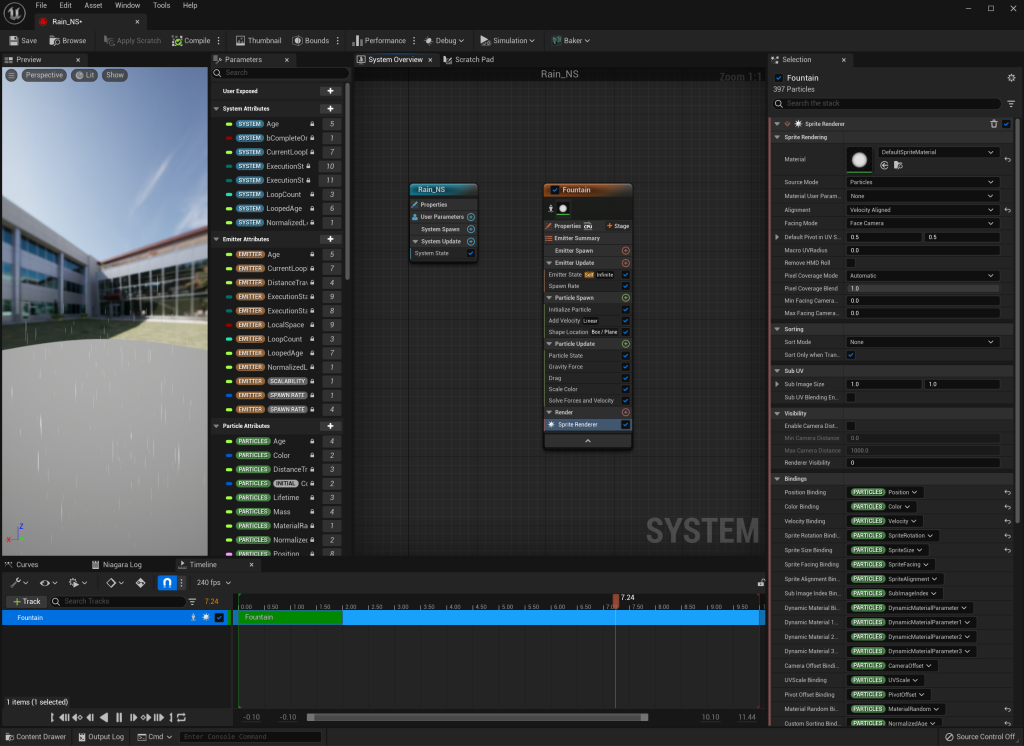
by changing the spawn rate and emitter type to a low spawn speed but a high frequency of objects spawned within a box area rather than the standard cone. It created a almost perfect rain that I can place Over my environment. I added a velocity to the particle system to make the rain fall to the ground and added collision parameter that destroys the rain when they touch the ground so they don’t just pass straight through any object within my environment.
References:
Galuzin, A. (2016) Preproduction Blueprint; How to plan game environments and level design. N/A: World Of Level Design LLC.
Aspland, M. (2022) How To Make Rain Unreal Engine Tutorial [Video] Available Online: How To Make Rain | Niagara Rain Particle System – Unreal Engine Tutorial – YouTube [Accessed 05/05/2023]
Prismatic Dev. (2022) Single Layer Water Material [Video] Available Online: Single Layer Water | 5-Minute Materials [UE4/UE5] – YouTube [Accessed 05/05/2023]
Quixel Megascans (n.d) Megascans Castle Ruins for Unreal. Available Online: Megascans – Castle Ruins in Megascans – UE Marketplace (unrealengine.com) [Accessed 18/04/2023]
Quixel Megascans (n.d) Megascans Trees European Hornbeam for Unreal. Available Online: Megascans Trees: European Hornbeam (Early Access) in Megascans – UE Marketplace (unrealengine.com) [Accessed 16/04/2023]
Infinite Blade (n.d) Castle Environment asset pack Available Online: Infinity Blade: Castle in Environments – UE Marketplace (unrealengine.com) [Accessed 27/04/2023]
Quixel Megascans (n.d) Megascans forest path assets for Unreal. Available Online: Megascans – Forest Path in Materials – UE Marketplace (unrealengine.com) [Accessed 18/04/2023]